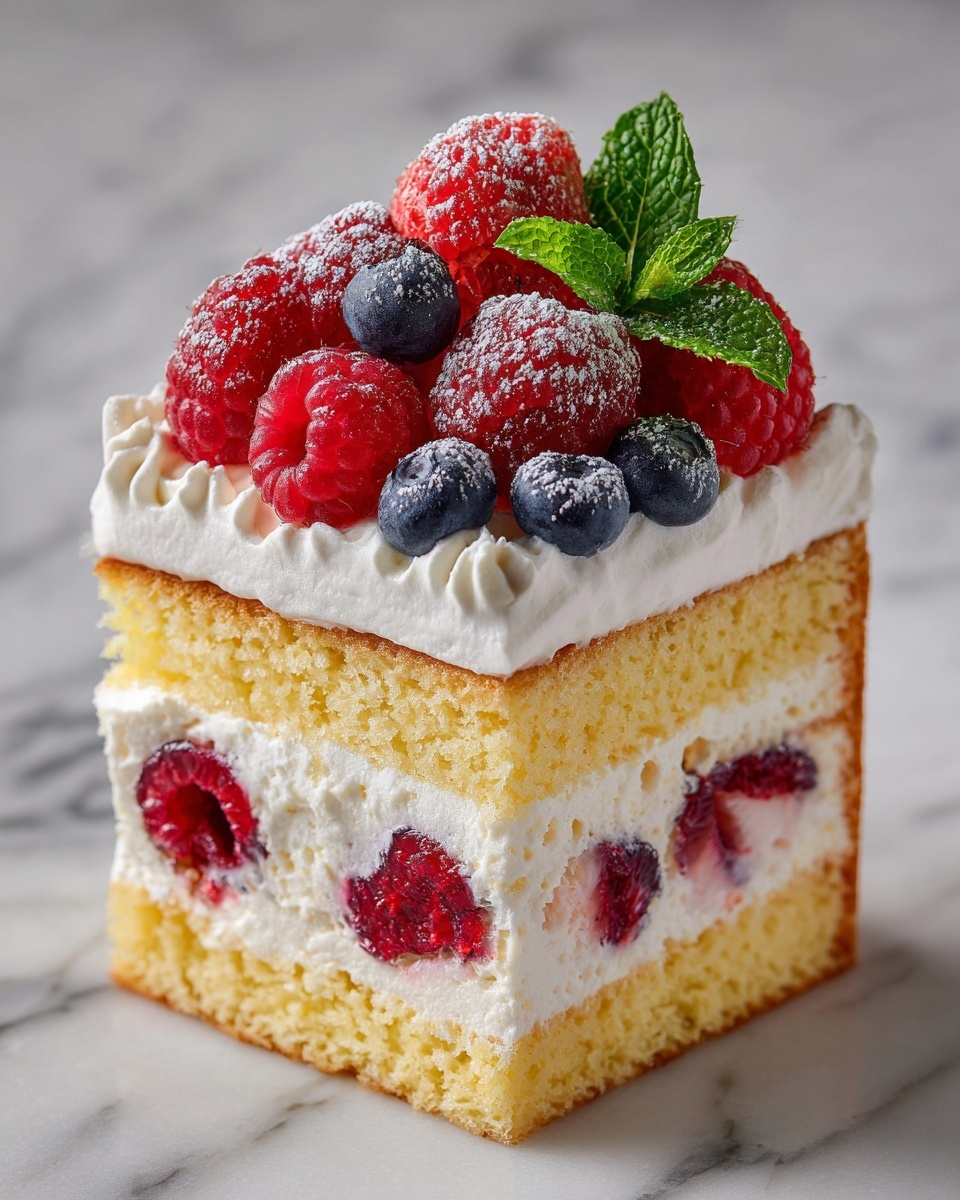
If you adore the classic taste of a Victoria sponge but want a fun, fuss-free twist, this No-Bake Victoria Sponge Mousse Slice Recipe is going to become your new favorite indulgence. It beautifully captures the light, airy texture of mousse layered over a crumbly biscuit base, swirled with luscious berry jam and finished with a creamy vanilla kick. Without ever turning on the oven, you can create a stunning, crowd-pleasing dessert that’s perfect for a sunny afternoon tea or a casual get-together. Trust me, once you try it, you’ll keep this recipe close for those moments when you want something elegant, effortless, and utterly delicious.
Ingredients You’ll Need
This recipe calls for simple ingredients that come together to create layers of taste and texture, making each bite a delightful balance of creamy, crunchy, and fruity. Every item plays a special role, from the crunchy biscuit base to the fluffy mousse and the vibrant jam swirls that bring it all to life.
- Digestive biscuits (1 1/2 cups): These create the buttery, crunchy base—feel free to substitute with plain biscuits if you prefer.
- Unsalted butter (1/4 cup, melted): Helps bind the biscuit base together with a rich flavor and smooth texture.
- Sugar (2 tbsp, optional): Adds just a touch of sweetness to the base, balancing flavors nicely without overpowering.
- Heavy cream (1 cup): Whipped to stiff peaks, it forms the light, airy mousse that makes the slice so luscious.
- Cream cheese (8 oz, softened): Gives body and creaminess to the mousse, adding a subtle tang that’s irresistible.
- Powdered sugar (1/4 cup): Sweetens the cream cheese smoothly without graininess.
- Vanilla extract (1 tsp): Infuses the mousse with classic warm notes, lifting the flavors perfectly.
- Strawberry or raspberry jam (1/2 cup): The star swirl that adds fruity brightness and gorgeous color contrast.
- Fresh strawberries or raspberries (optional for garnish): A final fresh pop of flavor and elegance for serving.
- Extra jam (optional for drizzling): For that extra touch of sweetness and presentation flair.
How to Make No-Bake Victoria Sponge Mousse Slice Recipe
Step 1: Prepare the Base
Start by crushing your digestive biscuits into fine crumbs. This crumbly texture is essential for a firm and buttery base. Mix the crumbs with the optional sugar if you want a little extra sweetness. Then, stir in the melted unsalted butter until every crumb is coated. This mixture will become your slice’s crunchy foundation, so ensure it feels evenly wet and holds together when pressed.
Step 2: Press the Base into the Pan
Line an 8×8 inch square or similarly sized rectangular pan with parchment paper—it makes for easy removal later. Firmly press the biscuit mixture into the pan’s base, creating an even, compact layer. Don’t be shy here; the more solid your base, the better your slices will hold. Pop the pan into the fridge to set while you prepare the mousse filling. Chilling at this stage helps everything come together seamlessly.
Step 3: Make the Mousse Filling
Whip the heavy cream until stiff peaks form—this light and airy texture is what elevates the mousse and gives the slice its signature fluffiness. Separately, beat together softened cream cheese, powdered sugar, and vanilla extract. This creamy, smooth mixture adds richness and depth, perfectly balancing the light whipped cream. The secret here is patience and gentle folding to preserve the airy mousse.
Step 4: Combine the Mousse Ingredients
Now, carefully fold the whipped cream into the cream cheese mixture using a spatula. The goal is to blend them evenly without deflating the whipped cream, which keeps the mousse light and velvety. Take your time with this step—the texture of your mousse depends on it!
Step 5: Assemble the Slice
Spoon the mousse mixture over your chilled biscuit base, smoothing the top with a spatula for a flawless finish. Next, drizzle your strawberry or raspberry jam over the mousse’s surface. Use a knife to carefully swirl the jam into the mousse, creating gorgeous, marbled ribbons of fruity goodness that make this slice as pretty as it is tasty.
Step 6: Chill
Refrigerate your creation for at least 4 hours. This chilling time lets the mousse set firmly so it will hold nice, clean slices when you cut into it. It’s key for achieving that perfect layered texture where the biscuit base and mousse melt in harmony with each bite.
Step 7: Serve
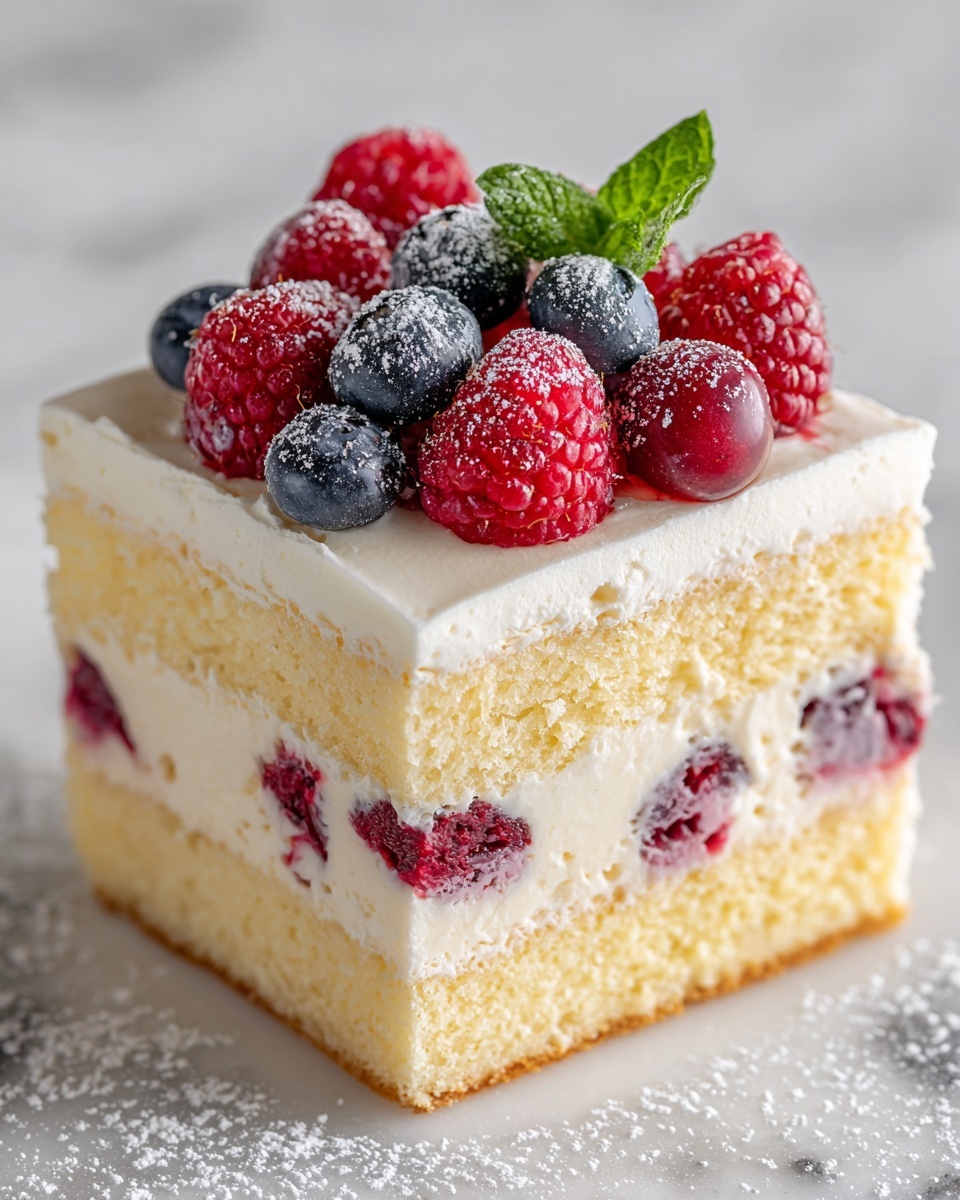
Once set, slice your No-Bake Victoria Sponge Mousse Slice into neat squares or bars. Garnish with fresh strawberries or raspberries for that extra splash of freshness and topped optionally with a little extra jam drizzle. It’s ready to impress guests or be enjoyed as a rewarding treat after a long day!
How to Serve No-Bake Victoria Sponge Mousse Slice Recipe
Garnishes
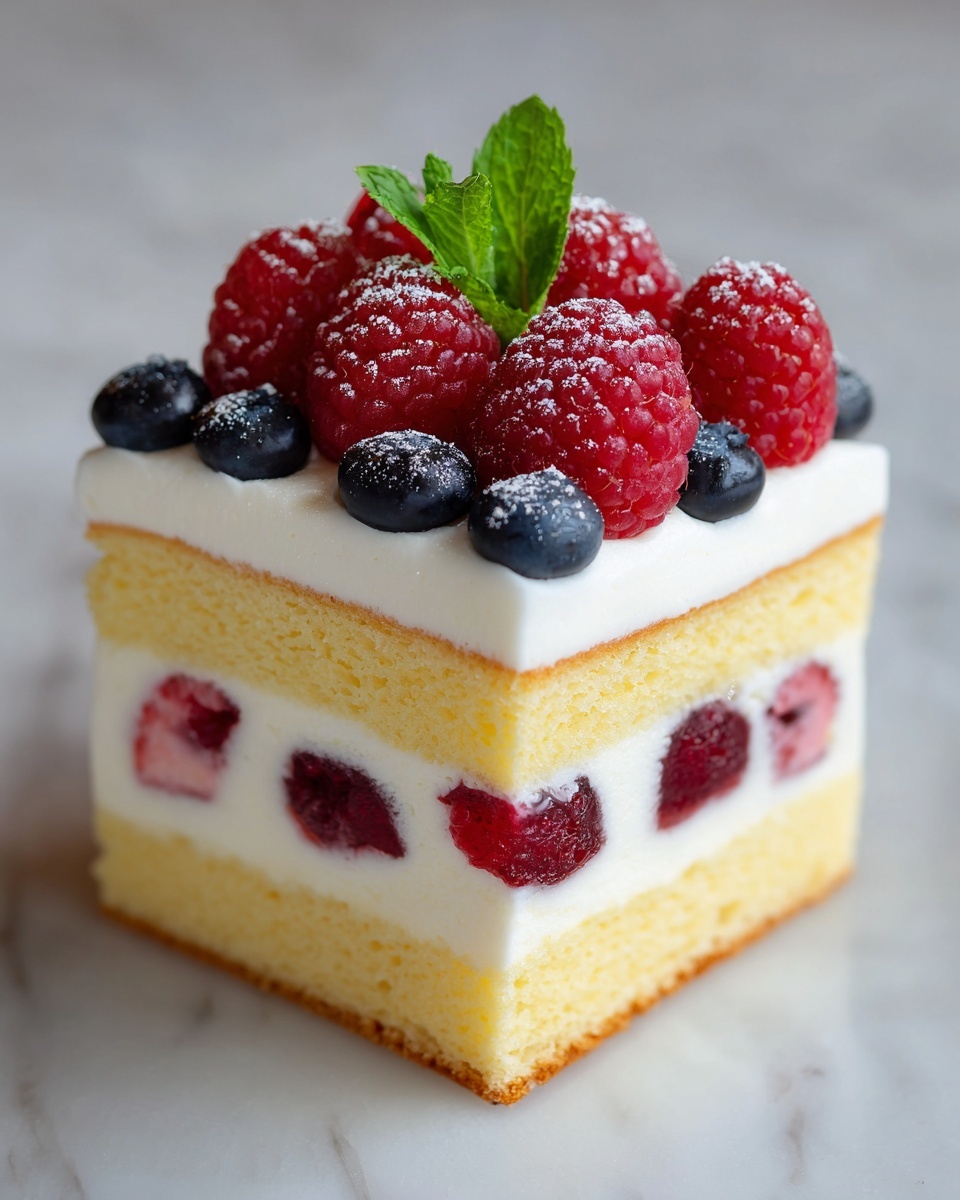
Fresh berries are your best friends here. Arrange sliced strawberries or whole raspberries on top to add vibrant color and a fresh burst of flavor that complements the creamy mousse beautifully. A light dusting of powdered sugar can also add a delicate, elegant touch.
Side Dishes
This mousse slice pairs wonderfully with a simple cup of tea or coffee, allowing the luscious dessert to shine. For a brunch or afternoon tea gathering, serve alongside light finger sandwiches or crisp fresh fruit for a balanced, delightful spread.
Creative Ways to Present
If you want to jazz things up further, try layering your mousse slice in individual clear glasses for a layered dessert parfait effect. Alternatively, create mini slices topped with edible flowers or mint leaves for charming, bite-sized treats perfect for parties or special occasions.
Make Ahead and Storage
Storing Leftovers
Once your No-Bake Victoria Sponge Mousse Slice is made, keep it covered in the fridge for up to 3 days. A tight lid or plastic wrap ensures the mousse stays fresh and moist while maintaining its delicate texture.
Freezing
You can freeze the mousse slice, but take care. Wrap individual portions tightly in plastic wrap and place in an airtight container to prevent freezer burn. Thaw overnight in the fridge before serving. Expect a very slight softening of texture, but the flavor will remain lovely.
Reheating
This dessert is best served chilled and does not require reheating. If you find it a little too cold when serving, simply let it sit at room temperature for 10-15 minutes to soften slightly and enhance its creamy texture.
FAQs
Can I use other types of biscuits for the base?
Absolutely! Plain biscuits like graham crackers or even shortbread work well as substitutes. Just choose a biscuit with a neutral flavor that won’t overpower the mousse.
Is it possible to make this recipe vegan?
Yes, you can swap dairy ingredients for plant-based alternatives such as coconut cream and vegan cream cheese. Just ensure the substitutes whip up well for that perfect mousse texture.
How long does this dessert take to set properly?
A minimum of 4 hours chilling time is recommended for the mousse to set firm and slice cleanly. Overnight chilling works even better for enhanced flavor and texture.
Can I use other fruit jams instead of strawberry or raspberry?
Definitely! Apricot, blueberry, or even blackcurrant jam will work wonderfully, just choose your favorite flavor to swirl into the mousse.
What’s the best way to get clean slices?
Use a sharp knife warmed under hot water and wiped dry before slicing. This helps cut smoothly through the set mousse and biscuit base without crumbling.
Final Thoughts
There is something truly magical about the No-Bake Victoria Sponge Mousse Slice Recipe—it takes the beloved taste of Victoria sponge and transforms it into a silky, no-oven-needed dessert that anyone can whip up with ease. Whether you’re serving it at a casual family get-together or a fancy tea party, its light texture and fruity brightness make it an absolute winner. I genuinely encourage you to try this recipe soon and experience just how wonderfully simple and delicious no-bake desserts can be!
Print
No-Bake Victoria Sponge Mousse Slice Recipe
- Prep Time: 20 minutes
- Cook Time: 0 minutes
- Total Time: 4 hours 20 minutes
- Yield: 12 servings 1x
- Category: Dessert
- Method: No-Cook
- Cuisine: British
- Diet: Vegetarian
Description
This No-Bake Victoria Sponge Mousse Slice is a delightful twist on the classic Victoria sponge cake, combining a crunchy biscuit base with a light, creamy mousse filling swirled with fruity jam. It requires no baking and is perfect for a refreshing, elegant dessert that sets in the fridge, making it ideal for warm weather and easy entertaining.
Ingredients
Base
- 1 1/2 cups digestive biscuits (or any plain biscuits), crushed
- 1/4 cup unsalted butter, melted
- 2 tbsp sugar (optional)
Mousse Filling
- 1 cup heavy cream
- 8 oz cream cheese, softened
- 1/4 cup powdered sugar
- 1 tsp vanilla extract
- 1/2 cup strawberry or raspberry jam (for the swirl)
Optional Garnishes
- Fresh strawberries or raspberries, sliced
- Extra jam for drizzling
Instructions
- Prepare the Base: In a bowl, combine the crushed digestive biscuits and sugar if using. Add the melted butter and mix until the crumbs are thoroughly coated and hold together when pressed.
- Press the Base into the Pan: Line an 8×8 inch square or rectangular pan with parchment paper. Firmly press the biscuit mixture evenly into the base of the pan to form a compact layer. Place the pan in the refrigerator to chill while you prepare the mousse.
- Make the Mousse Filling: In a large mixing bowl, beat the heavy cream until stiff peaks form, ensuring it is light and fluffy. In a separate bowl, beat the softened cream cheese with powdered sugar and vanilla extract until smooth and creamy.
- Combine the Mousse Ingredients: Gently fold the whipped cream into the cream cheese mixture, taking care not to deflate the cream. Mix until fully combined and light.
- Assemble the Slice: Spoon the mousse filling over the chilled biscuit base and smooth out the top with a spatula. Drizzle the strawberry or raspberry jam over the mousse, then use a knife to swirl the jam gently into the filling to create a beautiful marbled effect.
- Chill: Refrigerate the assembled slice for at least 4 hours, or until the mousse has set firmly and is ready to slice.
- Serve: Once set, cut into squares or bars. Garnish with fresh sliced strawberries or raspberries and drizzle with extra jam if desired for an elegant finish.
Notes
- You can substitute digestive biscuits with graham crackers or other plain biscuits of your choice.
- Adjust the sugar amount in the base depending on the sweetness of your biscuits and personal preference.
- Ensure the cream cheese is softened to room temperature for smooth blending.
- Be gentle when folding whipped cream to maintain the mousse’s airy texture.
- If jam is too thick, warm slightly to make swirling easier.
- Keep the mousse slice refrigerated until serving to maintain firmness.
- For a different flavor, try other fruit jams like apricot or blueberry.