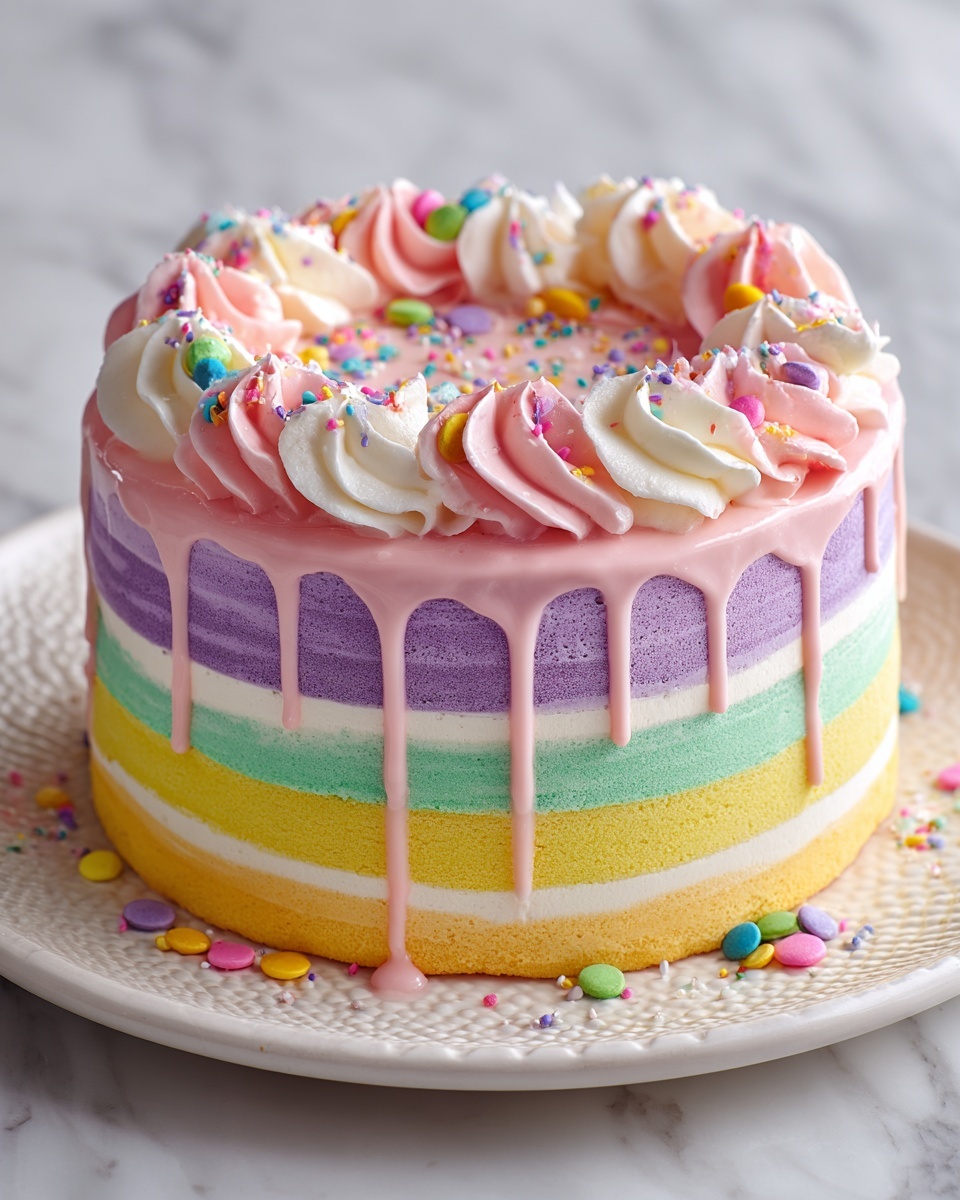
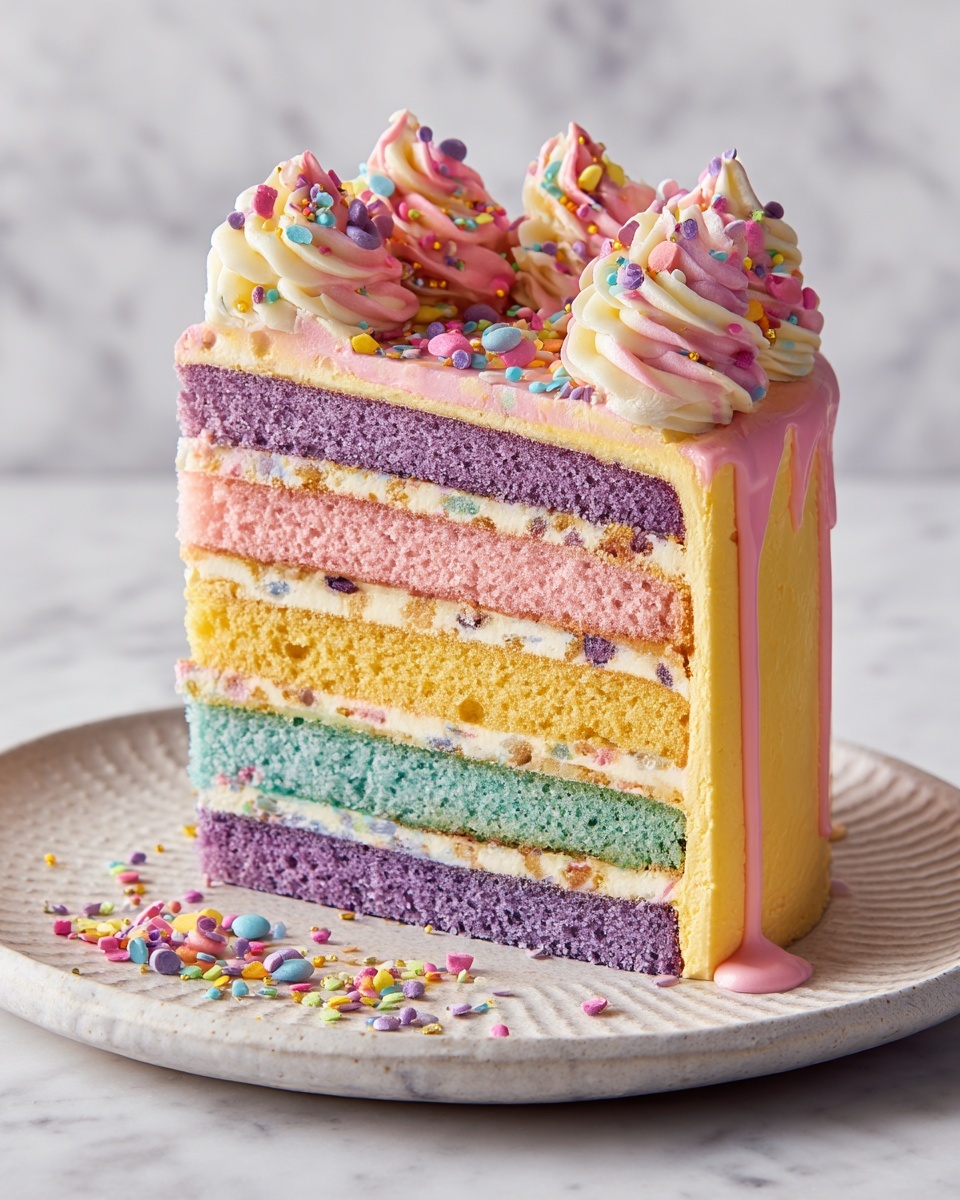
If you are looking for a show-stopping dessert that brings joyous color and delightful flavors to any celebration, the Rainbow Drip Cake Magic Recipe is exactly what you need. This cake isn’t just a treat for your taste buds but a feast for your eyes, combining moist layers of vibrant cake, silky buttercream, and a luscious tinted white chocolate drip that together create pure magic. Whether you’re a seasoned baker or just starting out, this recipe brings together simple ingredients and fun techniques to help you create a stunning centerpiece everyone will rave about.
Ingredients You’ll Need
Each ingredient in the Rainbow Drip Cake Magic Recipe plays a crucial role, offering a balance of texture, flavor, and visual appeal without any fuss. The list is straightforward but essential for achieving that perfect moist and fluffy cake with a colorful, creamy finish.
- 3 cups all-purpose flour: Provides the structure for tender, fluffy cake layers that hold their shape beautifully.
- 2 1/2 tsp baking powder: Gives the cake lift and lightness, creating an airy crumb.
- 1 cup unsalted butter, softened: Adds richness and moisture, making the cake irresistibly soft.
- 2 cups sugar: Sweetens the cake while helping with the texture and browning.
- 4 large eggs: Bind the ingredients together and contribute to the cake’s stability and fluffiness.
- 1 cup whole milk: Ensures the batter is smooth and keeps the crumb tender.
- 1 tsp vanilla extract: Brings depth of flavor and a sweet aromatic note.
- Gel food coloring (pink, blue, yellow): Creates the vibrant, stunning layers that make this cake truly magical.
- Buttercream frosting: The luscious, creamy layer that complements each cake tier perfectly.
- Sprinkles for decoration: Adds playful texture and an extra pop of color on top.
- White chocolate drip, tinted with gel food coloring: Creates that iconic, eye-catching drip effect that makes this cake a work of art.
How to Make Rainbow Drip Cake Magic Recipe
Step 1: Prepare Your Pans and Oven
Start by preheating your oven to 350°F (180°C). Grease and line three 8-inch round cake pans with parchment paper to ensure your cakes come out cleanly and evenly baked. This step sets the stage for perfectly shaped layers.
Step 2: Cream Butter and Sugar
In a large mixing bowl, beat the softened butter and sugar together until the mixture is light and fluffy. This process incorporates air into the batter, essential for that tender crumb. Then add eggs one at a time, beating well after each addition to create a smooth, velvety base.
Step 3: Combine Dry and Wet Ingredients
In a separate bowl, whisk together the flour and baking powder. Alternate adding the dry mixture and the milk to the creamed butter and sugar, beginning and ending with the dry ingredients. Stir in the vanilla extract last to infuse the batter with its fragrant flavor.
Step 4: Add Colorful Twists
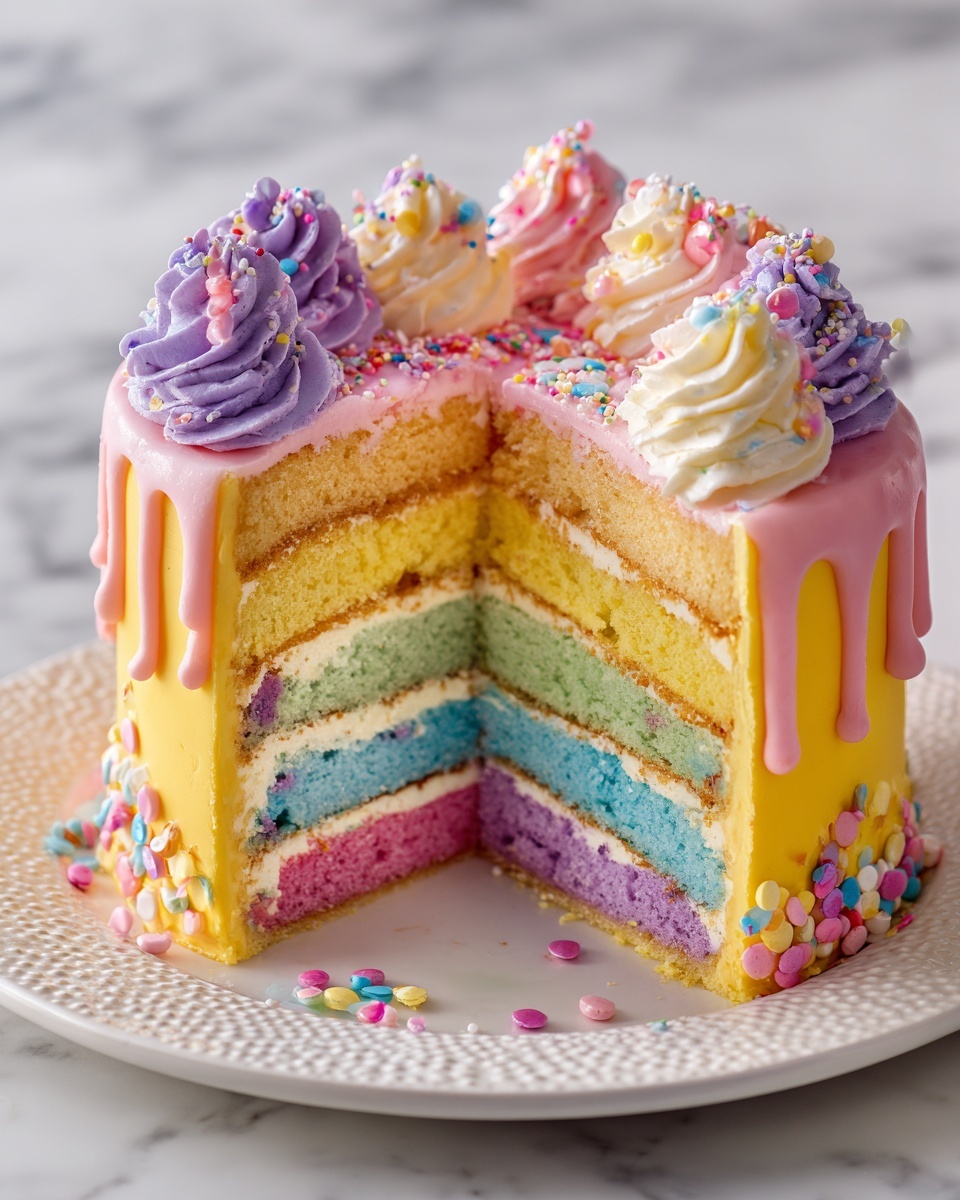
Divide the batter evenly into three separate bowls. Add your gel food coloring to each to create distinct pink, blue, and yellow batters. This is the exciting part where your cake starts turning into a rainbow dream!
Step 5: Bake and Cool
Pour each colored batter into its prepared cake pan and bake for 25 to 30 minutes, or until a toothpick inserted in the center comes out clean. Allow the cakes to cool completely in the pans before removing them to avoid breakage.
Step 6: Assemble and Crumb Coat
Stack the cooled cake layers with a generous layer of buttercream frosting between each. Apply a thin crumb coat around the whole cake to seal in crumbs, then chill in the refrigerator for 30 minutes to set this base layer. This makes your final frosting smooth and flawless.
Step 7: Frost, Drip, and Decorate
Spread another layer of buttercream all over the cake, smoothing it carefully. Prepare your white chocolate drip tinted with gel food coloring, and pour it slowly over the edges and top for that signature “magic” effect. Finish with swirls of buttercream and sprinkle colorful toppings to truly bring the Rainbow Drip Cake Magic Recipe alive.
How to Serve Rainbow Drip Cake Magic Recipe
Garnishes
For garnish, consider bright, playful sprinkles or edible glitter—these add sparkle and whimsy that perfectly match the cake’s vibrant spirit. Fresh edible flowers or even small fondant shapes can also add an elegant touch that impresses every eye and palate.
Side Dishes
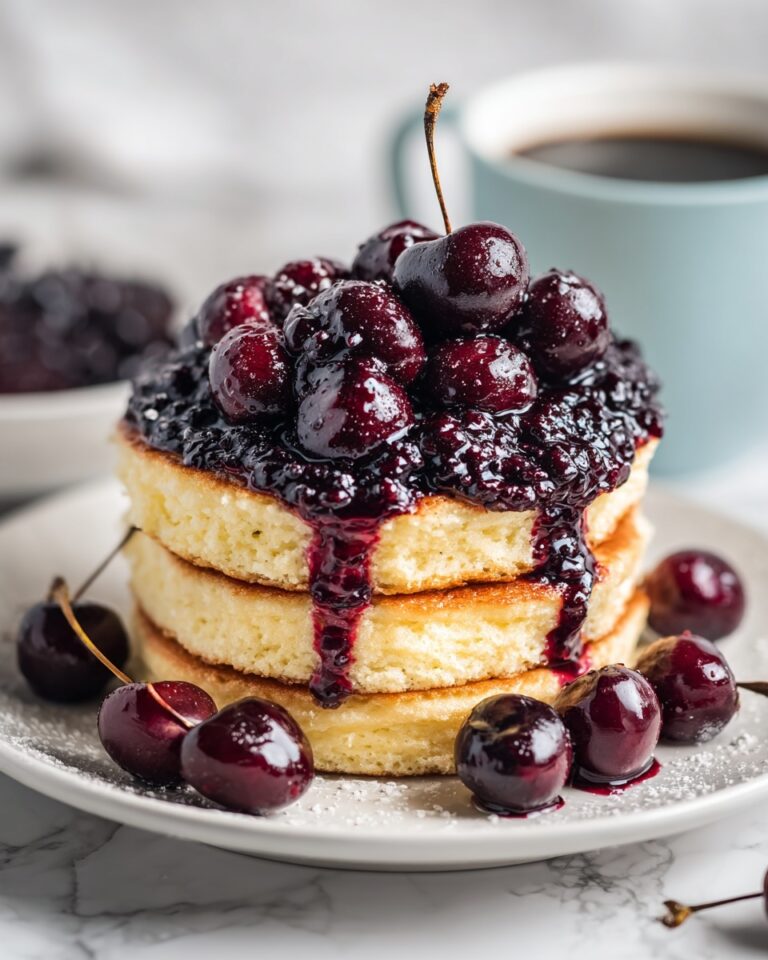
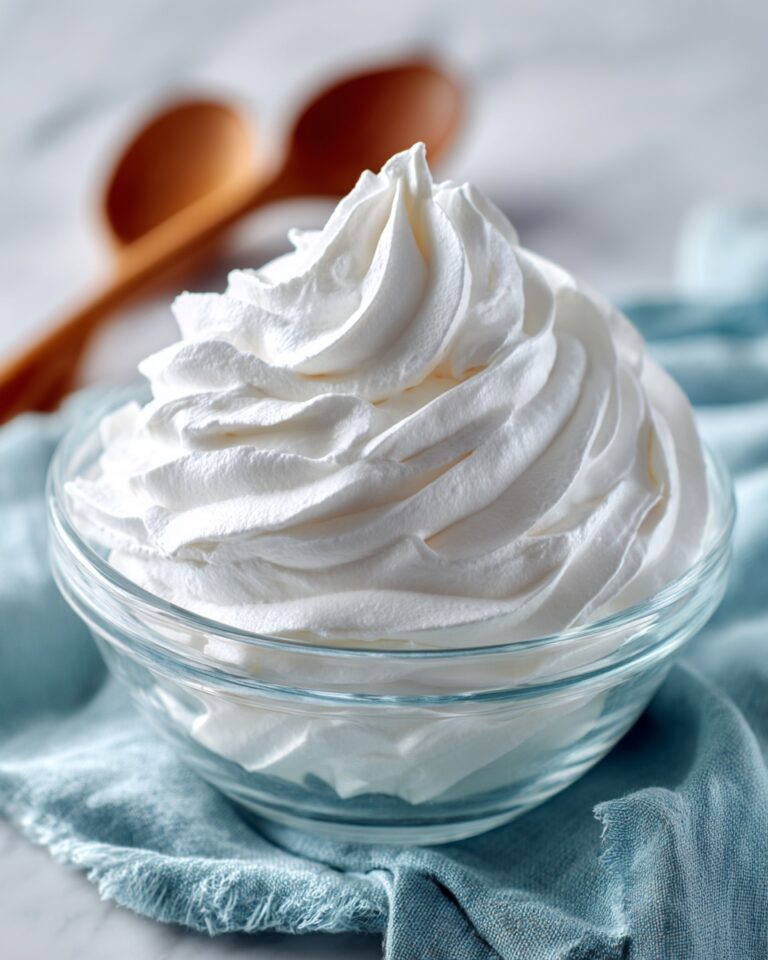
This cake is a star on its own but pairs wonderfully with a light accompaniment like fresh berries or a dollop of whipped cream to balance the sweetness. A simple glass of sparkling lemonade or a creamy hot cocoa also complements the festive vibes.
Creative Ways to Present
Think about serving the Rainbow Drip Cake Magic Recipe on a clear glass cake stand or a bright, colorful platter to highlight its layers. For parties, slice the cake and place pieces in individual clear boxes or cups, allowing guests to admire the rainbow before diving in.
Make Ahead and Storage
Storing Leftovers
Keep any leftover cake tightly covered in the refrigerator, preferably in an airtight container, to preserve its moisture and prevent it from absorbing other flavors. It will stay fresh for up to 3 days, allowing you to enjoy more slices without drying out.
Freezing
You can freeze the fully assembled Rainbow Drip Cake Magic Recipe or just the individual layers before frosting. Wrap cake layers tightly in plastic wrap and foil, then freeze for up to one month. Thaw in the fridge overnight before frosting or serving for best results.
Reheating
To gently refresh a slice, bring it to room temperature by leaving it out for about 30 minutes. Avoid microwaving whole slices, as this can alter the texture of the frosting and cake, but a quick 10-second zap for a single bite can warm up the flavors nicely.
FAQs
Can I use other colors for the Rainbow Drip Cake Magic Recipe?
Absolutely! Feel free to swap in your favorite gel food coloring shades to personalize the rainbow — whether you want pastels, neons, or even a full spectrum of colors, this recipe is flexible and fun to customize.
Is this cake suitable for beginners?
Yes, the Rainbow Drip Cake Magic Recipe is surprisingly approachable. The steps are straightforward, and the colorful layering adds a fun, creative element that beginners find rewarding without being intimidating.
Can I make the buttercream frosting from scratch?
Definitely! Homemade buttercream frosting can elevate your cake even more, giving you control over flavor and texture. Classic recipes with butter, powdered sugar, vanilla, and a touch of milk work beautifully.
What if I don’t have three cake pans?
You can bake the layers one at a time in the same pan, just be sure to cool the pan between bakes to maintain even heat and avoid overbaking. It takes a bit more time but still results in glorious layers.
How do I get a smooth drip on the cake?
Make sure your white chocolate drip is at the right temperature — warm but not hot — before pouring. Slowly pour over the edges and top using a spoon or piping bag for controlled coverage. Refrigerating the cake first helps the drip set quickly and neatly.
Final Thoughts
The Rainbow Drip Cake Magic Recipe is more than just a dessert; it’s a joyful project that brings excitement to your kitchen and smiles to your table. It’s perfect for birthdays, celebrations, or simply whenever you want to splash some rainbow happiness into your day. Trust me, once you try this recipe, it’ll become your go-to favorite for brightening any occasion.
Print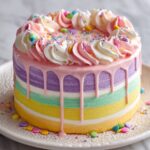
Rainbow Drip Cake Magic Recipe
- Prep Time: 20 minutes
- Cook Time: 30 minutes
- Total Time: 1 hour 20 minutes
- Yield: 12 servings 1x
- Category: Dessert
- Method: Baking
- Cuisine: American
Description
This vibrant Rainbow Drip Cake Magic recipe delivers a stunning multi-colored layer cake with smooth buttercream and a glossy, white chocolate drip. Perfect for celebrations, this cake combines classic vanilla flavors with playful visual appeal, featuring layers tinted in bright hues and finished with colorful sprinkles.
Ingredients
Cake Batter
- 3 cups all-purpose flour
- 2 1/2 tsp baking powder
- 1 cup unsalted butter, softened
- 2 cups sugar
- 4 large eggs
- 1 cup whole milk
- 1 tsp vanilla extract
- Gel food coloring (pink, blue, yellow)
Buttercream Frosting
- Buttercream frosting (quantity as needed for layering and decorating)
Decoration
- Sprinkles for decoration
- White chocolate drip, tinted with gel food coloring
Instructions
- Preheat and Prepare Pans: Preheat your oven to 350°F (180°C). Grease and line three 8-inch round cake pans with parchment paper to prevent sticking.
- Cream Butter and Sugar: In a large mixing bowl, cream the softened butter and sugar together until the mixture is light and fluffy, ensuring a smooth texture for the cake.
- Add Eggs: Beat in the eggs one at a time, mixing thoroughly after each addition to fully incorporate and create a stable batter.
- Mix Dry Ingredients and Combine: In a separate bowl, whisk together the all-purpose flour and baking powder. Alternately add this dry mixture and whole milk to the wet mixture, beginning and ending with the dry ingredients. Stir in the vanilla extract for flavor.
- Divide and Color Batter: Separate the batter evenly into three bowls. Add the gel food coloring to each portion—pink, blue, and yellow—and mix until the color is uniform.
- Bake the Layers: Pour each colored batter into the prepared cake pans and bake in the oven for 25-30 minutes, or until a toothpick inserted in the center comes out clean. Allow the cakes to cool completely.
- Assemble and Crumb Coat: Place one cake layer on your serving plate. Spread a layer of buttercream frosting on top, then add the next layer. Repeat for all layers. Apply a thin crumb coat over the assembled cake to seal in crumbs and chill it for 30 minutes to set.
- Final Frosting and Drip: Add a final smooth layer of buttercream frosting. Prepare the white chocolate drip by melting white chocolate and tinting it with gel food coloring. Carefully pour over the edges of the cake to create a drip effect.
- Decorate: Finish the cake by piping swirls of buttercream on top and generously sprinkling colorful sprinkles for a festive appearance.
Notes
- Ensure cakes are completely cooled before frosting to avoid melting the buttercream.
- Use gel food coloring for vibrant colors without altering batter consistency.
- The drip should be at a pourable but not too runny consistency to create perfect drips.
- Chill the crumb-coated cake for better layering and cleaner final frosting.
- This cake can be made a day in advance and stored in the refrigerator.