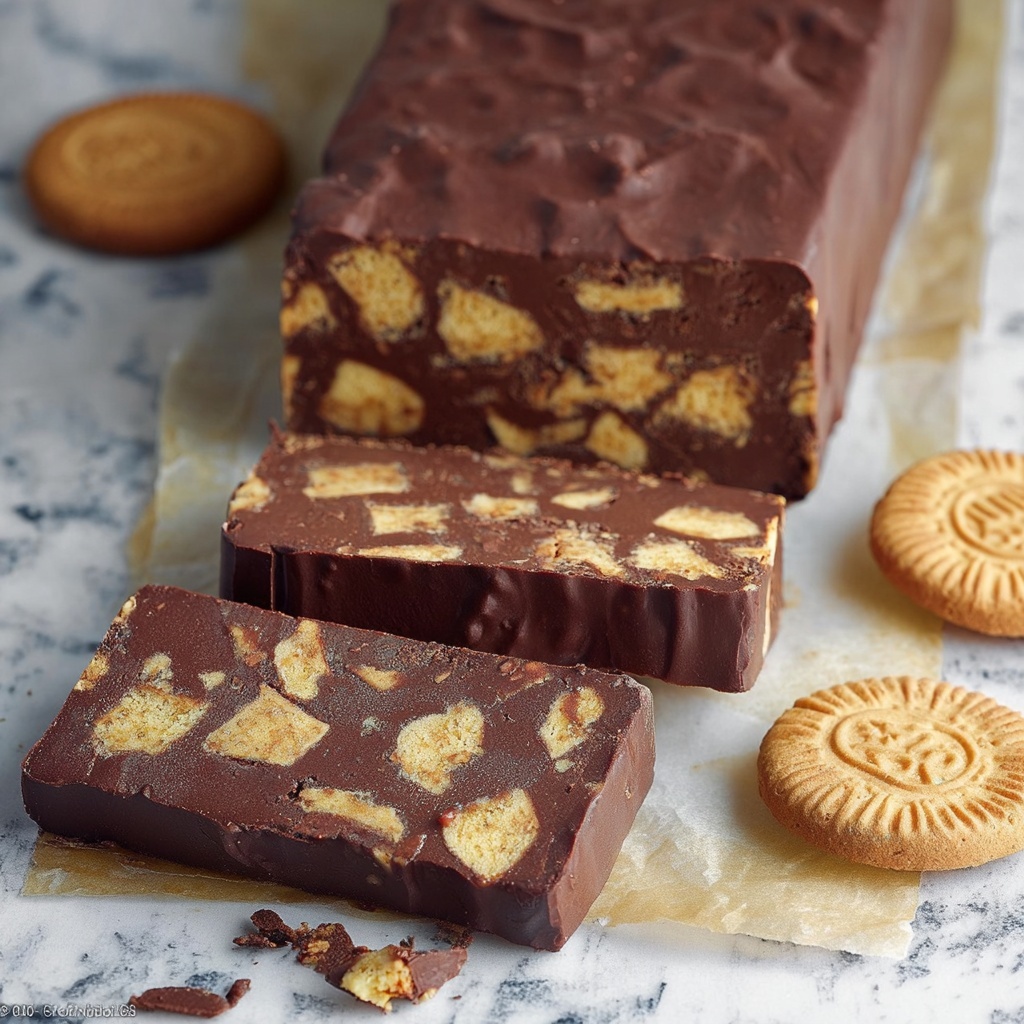
If you have a sweet tooth and love a dessert that’s both indulgently chocolaty and wonderfully simple, this No-Bake Chocolate Biscuit Cake Recipe is about to become your new best friend. Imagine crunchy biscuit bits enveloped in a rich, glossy chocolate mixture that sets into a sliceable, irresistibly delicious treat without ever needing to turn on the oven. It’s the perfect solution for those warm days when baking feels like too much work or when you want a dessert that’s quick but still impresses everyone at the table.
Ingredients You’ll Need
Gathering the right ingredients for this no-fuss dessert is half the fun. Each component plays a starring role in balancing flavor, texture, and creamy richness that makes this cake truly special.
- Crushed digestive biscuits or tea biscuits: Provide the perfect crunchy base and absorb the chocolate mixture beautifully.
- Chopped nuts (optional): Add delightful crunch and a nutty depth, with walnuts, almonds, or hazelnuts as excellent choices.
- Unsalted butter: Brings creaminess and richness that ties the dessert together.
- Granulated sugar: Sweetens the cake, balancing the bitter cocoa notes perfectly.
- Unsweetened cocoa powder: Delivers deep chocolate flavor without overpowering sweetness.
- Heavy cream: Creates luscious smoothness, making the chocolate mixture silky and indulgent.
- Vanilla extract: Enhances the chocolate with a subtle, warm aroma.
- Pinch of salt: Elevates all the flavors by adding a slight contrast.
- Semi-sweet chocolate chips (for ganache topping, optional): Make the cake look extra luxurious and add a glossy finish.
How to Make No-Bake Chocolate Biscuit Cake Recipe
Step 1: Prepare the Biscuit and Nut Mixture
Start by crushing your digestive biscuits into small pieces but not powder—they should still provide a pleasant crunch. Combine them with chopped nuts if you’re adding them for extra texture and flavor. This combination builds the essential foundation for your cake’s delightful bite.
Step 2: Make the Chocolate Mixture
In a medium saucepan over low heat, melt the unsalted butter, then whisk in sugar, unsweetened cocoa powder, heavy cream, vanilla extract, and a pinch of salt. Keep stirring gently until everything blends into a smooth, glossy chocolate sauce. Bring it just to a gentle simmer—avoid boiling—to ensure it thickens properly without burning.
Step 3: Combine and Coat
Pour the warm chocolate mixture over the crushed biscuits and nuts. Stir thoroughly so that every crumb is generously coated. This step is key to unifying the textures and flavors into one cohesive, fudgy whole ready to be molded.
Step 4: Press into the Pan
Line an 8×4 inch loaf pan or a round cake pan with parchment paper for easy removal. Transfer the chocolate biscuit mix into the pan and press it firmly and evenly until smooth on top. This compacting ensures your cake holds its shape when sliced.
Step 5: Optional Ganache Topping
For an extra touch of decadence, gently heat 1/4 cup of heavy cream until it’s hot but not boiling. Pour over 1/2 cup of semi-sweet chocolate chips, let sit for two minutes, then stir until velvety smooth. Pour this ganache over your biscuit cake base and smooth it out for a shiny, professional-looking finish.
Step 6: Chill and Set
Place the pan in the refrigerator and chill the cake for at least four hours until firm. Once set, carefully lift the cake out using the parchment paper, slice into generous portions, and get ready to wow your taste buds.
How to Serve No-Bake Chocolate Biscuit Cake Recipe
Garnishes
Enhance each slice with a sprinkling of powdered sugar, a few fresh berries, or a dollop of whipped cream. These little touches not only brighten the presentation but add pleasant contrasts to the rich chocolate.
Side Dishes
Serve alongside a scoop of vanilla ice cream or a drizzle of caramel sauce for a truly indulgent experience. A cup of strong coffee or an espresso also pairs beautifully, cutting through the sweetness with its bold bitterness.
Creative Ways to Present
Try cutting your cake into bite-sized squares to serve at parties as finger food, or layer it in a clear glass trifle bowl with whipped cream and fresh fruit for a stunning dessert display everyone will admire before diving in.
Make Ahead and Storage
Storing Leftovers
This cake stores wonderfully in the refrigerator for up to five days when wrapped tightly or kept in an airtight container. The flavors actually meld and deepen after a day, making leftovers just as tasty.
Freezing
If you want to keep it longer, wrap the cake well in plastic wrap and then aluminum foil before freezing. It can be frozen for up to one month and thawed overnight in the refrigerator to maintain its creamy texture.
Reheating
This dessert is best enjoyed chilled, so no reheating is necessary. Simply let slices sit at room temperature for 10 minutes before serving if they are too firm from the fridge or freezer.
FAQs
Can I use gluten-free biscuits for this cake?
Absolutely! Using gluten-free biscuits is a great alternative for those with gluten sensitivities, and the cake will still hold together well with the same lovely flavor and texture.
Is there a way to make this recipe dairy-free?
Yes, you can substitute the butter and heavy cream with dairy-free alternatives like coconut oil and coconut cream. The flavor will shift slightly but remain deliciously rich and indulgent.
How long does the cake need to chill properly?
Chilling for at least four hours is essential to allow the chocolate to set firmly and the biscuits to soften just enough, creating that perfect fudge-like texture.
Can I add dried fruit to this recipe?
Definitely! Chopped dried fruits like raisins, cherries, or cranberries make fantastic additions that bring bursts of sweetness and chewiness, enhancing the overall flavor profile.
What is the best pan to use for this recipe?
An 8×4 inch loaf pan works perfectly for a traditional shape, but a round cake pan is equally good and can give a nice presentation. Just be sure to line it well with parchment paper for easy removal.
Final Thoughts
There is something truly comforting and joyful about making and sharing this No-Bake Chocolate Biscuit Cake Recipe. It’s straightforward yet so gratifying, combining simple ingredients into a dessert that feels special and homemade. Whether you’re an experienced baker or just starting out, this cake will bring smiles and happy sighs all around. Give it a try—you won’t regret it!
Print
No-Bake Chocolate Biscuit Cake Recipe
- Prep Time: 15 minutes
- Cook Time: 10 minutes
- Total Time: 4 hours 15 minutes
- Yield: 10 slices 1x
- Category: Dessert
- Method: No-Cook
- Cuisine: European
- Diet: Vegetarian
Description
This No-Bake Chocolate Biscuit Cake is a rich and indulgent dessert that combines crunchy digestive biscuits with a smooth, chocolatey mixture. It features a luscious chocolate ganache topping and requires no oven time, making it a quick and easy treat perfect for any occasion. The cake is chilled until firm, resulting in a delightful slice that’s both satisfying and simple to prepare.
Ingredients
Base Ingredients
- 2 cups crushed digestive biscuits or tea biscuits (about 7 ounces)
- 1/2 cup chopped nuts (optional – walnuts, almonds, or hazelnuts)
- 1/2 cup unsalted butter
- 1/2 cup granulated sugar
- 1/2 cup unsweetened cocoa powder
- 1/2 cup heavy cream
- 1 teaspoon vanilla extract
- pinch of salt
Chocolate Ganache Topping (optional)
- 1/2 cup semi-sweet chocolate chips
- 1/4 cup heavy cream
Instructions
- Prepare Biscuit Mixture: In a large mixing bowl, combine the crushed biscuits and chopped nuts if using, mixing them evenly to create a textured base for the cake.
- Make Chocolate Mixture: In a medium saucepan over low heat, melt the butter. Add sugar, cocoa powder, heavy cream, vanilla extract, and a pinch of salt. Whisk continuously until the mixture is smooth and fully combined. Bring to a gentle simmer to incorporate all ingredients thoroughly, then remove from heat.
- Combine Mixtures: Pour the warm chocolate mixture over the crushed biscuits and nuts. Stir thoroughly until every piece is well coated in the chocolate mixture, ensuring an even consistency throughout.
- Press Into Pan: Line an 8×4 inch loaf pan or a round cake pan with parchment paper. Transfer the biscuit mixture into the pan and press it firmly and evenly with the back of a spoon or your hands, smoothing the top surface for an even finish.
- Prepare Ganache Topping: Gently heat the heavy cream until it is hot but not boiling. Pour the hot cream over the semi-sweet chocolate chips in a small bowl and let it sit for 2 minutes to soften the chocolate, then stir until the ganache is smooth and glossy. Pour this ganache evenly over the biscuit cake and smooth out the top with a spatula.
- Chill: Refrigerate the cake for at least 4 hours or until it is completely firm and set, allowing the flavors to meld together and the texture to stabilize.
- Serve: Once set, carefully lift the cake out of the pan using the parchment paper, slice into 10 pieces, and serve chilled for the best texture and flavor.
Notes
- For extra texture and flavor, add chopped dried fruit like raisins or cherries into the biscuit mixture.
- Use gluten-free biscuits to accommodate dietary restrictions.
- Store the cake in the refrigerator where it keeps well for up to 5 days.