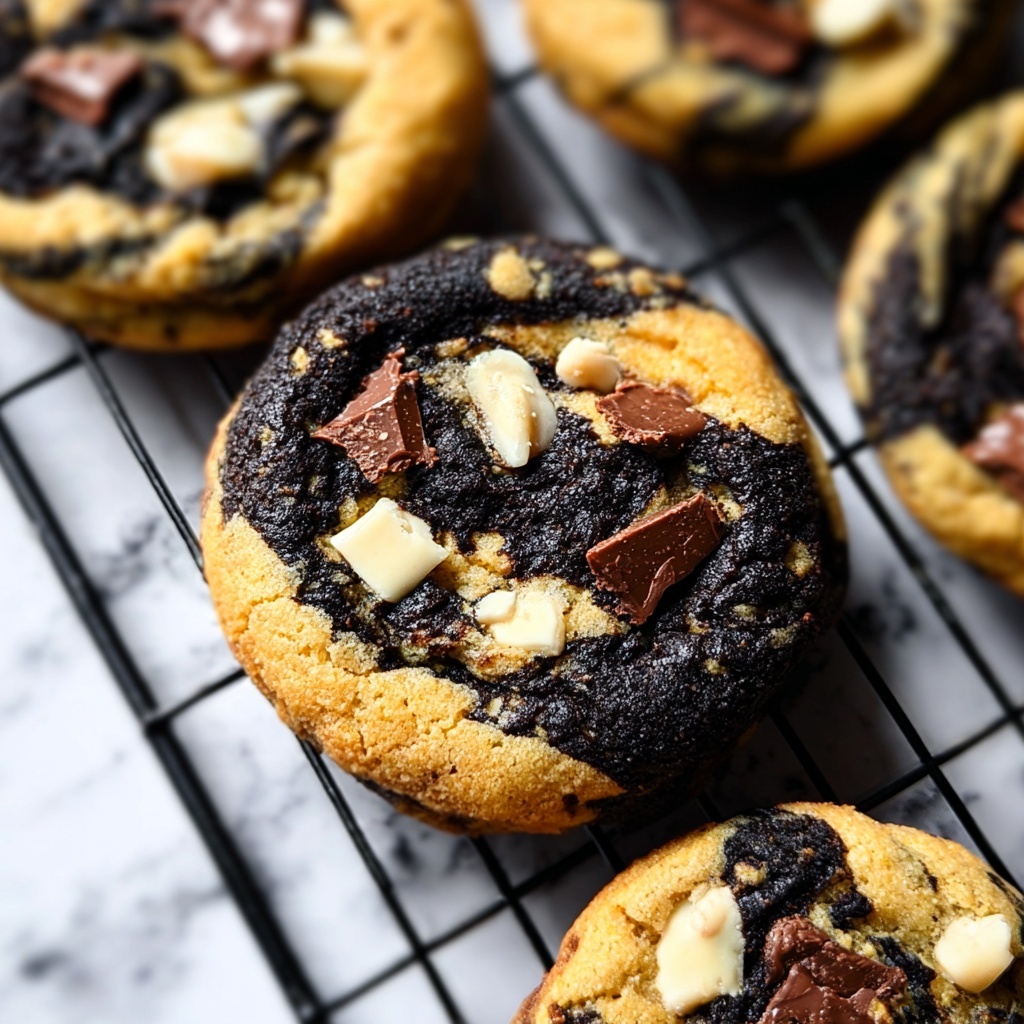
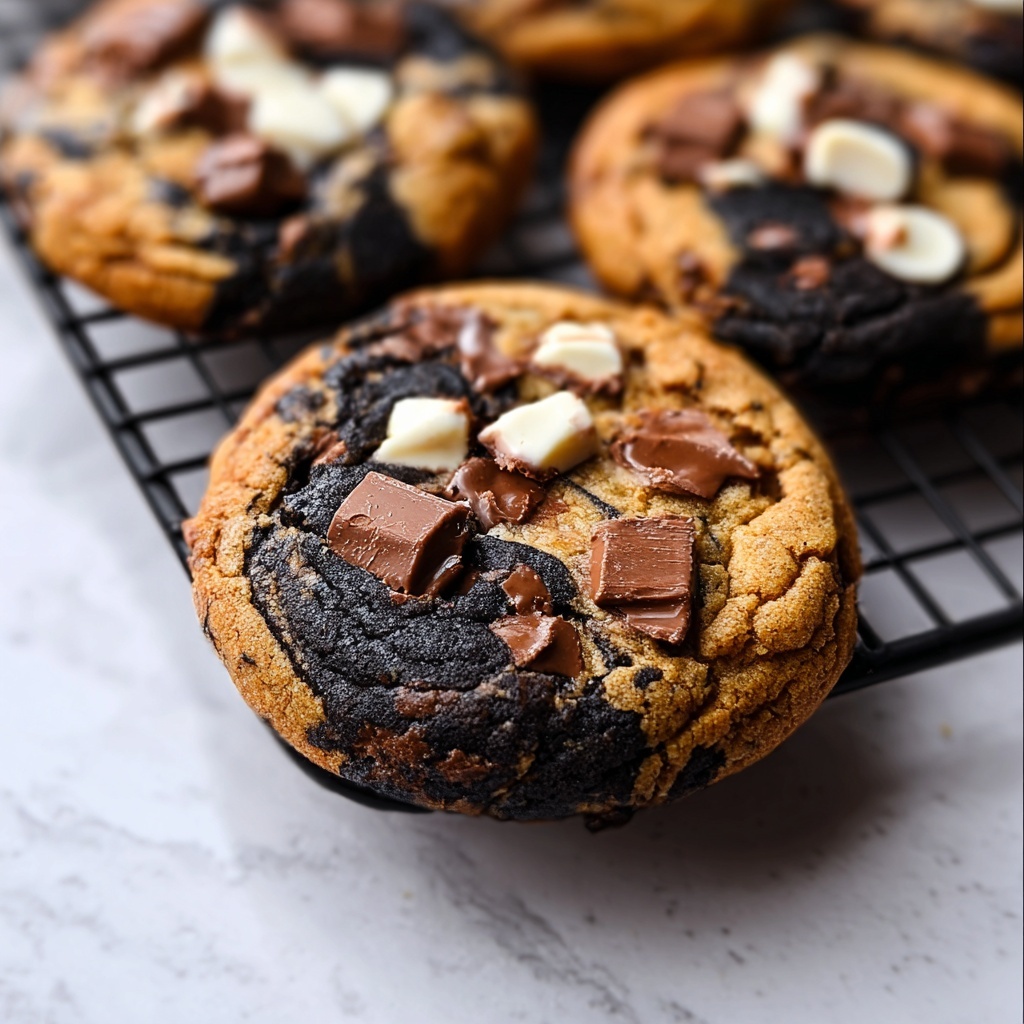
If you are ready to delight your taste buds with a cookie unlike any other, the Toasted Milk Marble Cookies Recipe is your new best friend in the kitchen. These cookies combine the warmth of toasted milk powder with a beautiful marble swirl of buttery dough to create a treat that is irresistibly tender, nutty, and comforting. Every bite offers a subtle caramel note that comes from gently toasting the dry milk powder, adding a depth of flavor not found in ordinary cookies. Whether you’re baking for a cozy afternoon or a special gathering, these Toasted Milk Marble Cookies will quickly become the star of your dessert tray.

Ingredients You’ll Need
Nothing complicated or elusive here — just simple, pantry-friendly ingredients that each bring something special to the table. From the tender crumb of the all-purpose flour to the rich flavor punch of toasted milk powder, each component plays an essential role in creating the perfect cookie.
- All-purpose flour (1 ¾ cups): Provides the sturdy base and gives structure to your cookies.
- Dry milk powder (½ cup + extra for toasting): Toasting this adds a toasty, caramel-like depth that makes these cookies stand out.
- Baking soda (½ teaspoon): A gentle leavening agent that helps the cookies rise just enough for a tender bite.
- Salt (¼ teaspoon): Enhances all the flavors and balances the sweetness.
- Unsalted butter (¾ cup, softened): Creates a rich, creamy texture and helps marry all the ingredients beautifully.
- Granulated sugar (½ cup): Adds sweetness and a slight crispness to the edges.
- Powdered sugar (½ cup): Contributes to the light, tender crumb consistent with bakery-style cookies.
- Large egg (1): Binds everything together and adds moisture.
- Vanilla extract (1 teaspoon): Brings warmth and enhances the toasty flavors.
How to Make Toasted Milk Marble Cookies Recipe
Step 1: Toast the Milk Powder
Start by heating your oven to 350°F (175°C). Spread about ½ cup of dry milk powder evenly on a baking sheet. Pop it in the oven and toast for around 5 to 7 minutes, stirring once or twice. Keep a close eye on it because it can go from perfectly golden to burnt very quickly. You will know it’s ready when it smells like caramelized white chocolate and the color turns a warm, golden brown. Once toasted, set it aside to cool completely before using.
Step 2: Mix Your Dry Ingredients
In a medium bowl, whisk together the all-purpose flour, baking soda, and salt. This ensures your leavening and seasoning are evenly distributed and prevents any lumps in your dough.
Step 3: Cream Butter and Sugars
In a large mixing bowl, cream the softened unsalted butter with both granulated and powdered sugars until the mixture is light, fluffy, and pale. This step is crucial because it creates air pockets that give your cookies a delicate texture.
Step 4: Incorporate Egg and Vanilla
Beat in your egg and vanilla extract until the mixture is combined and smooth. This adds moisture and flavor, binding the sugars and butter together.
Step 5: Combine Dry Ingredients and Form Dough
Gradually add the dry flour mixture to the wet ingredients, mixing gently until a soft, cohesive dough forms. Be careful not to overmix; you want the dough tender, not tough.
Step 6: Divide and Flavor Half the Dough
Split the dough into two equal parts. Fold the cooled toasted milk powder into one half, blending it thoroughly. The other half remains plain, providing the perfect contrast in the final cookies.
Step 7: Shape the Marble Cookies
Pinch off small pieces from each dough ball — about one tablespoon each — and gently swirl or twist the plain dough with the toasted dough together. This marbling effect is what makes these cookies visually stunning and flavorfully balanced. Place the marble balls onto a parchment-lined baking sheet, spacing them roughly 2 inches apart to allow for gentle spreading.
Step 8: Bake and Cool
Bake at 350°F (175°C) for 10 to 12 minutes. You will know they’re done when the edges are set and just beginning to turn golden. Let them cool on the baking sheet for about 5 minutes before transferring to a wire rack, which ensures they finish cooling without becoming soggy.
How to Serve Toasted Milk Marble Cookies Recipe
Garnishes
While these cookies shine on their own, a light dusting of powdered sugar, a drizzle of white chocolate, or a sprinkle of finely chopped toasted nuts will elevate their elegant look and add an extra layer of texture. These subtle touches make your cookies look like they belong in a gourmet bakery.
Side Dishes
Pairing these cookies with a creamy cup of hot tea, coffee, or even a chilled glass of milk brings out their toasted milk richness beautifully. For a special treat, serve alongside fresh berries or a dollop of whipped cream to brighten the palate between bites.
Creative Ways to Present
Try stacking these marble cookies alternating colors or arranging them in a cookie bouquet for a wow-worthy display. They can also be crumbled on top of ice cream or layered between cake slices, making their versatility just as impressive as their flavor.
Make Ahead and Storage
Storing Leftovers
To keep your Toasted Milk Marble Cookies fresh, store them in an airtight container at room temperature. They will maintain their soft, chewy texture and nutty flavor for up to 5 days, making them perfect for enjoying over the week or sharing with friends and family.
Freezing
If you want to make these cookies ahead of time, you can freeze the dough balls before baking. Simply shape the marbled dough balls, place them on a baking sheet to freeze until solid, then transfer to a freezer bag. When ready, bake straight from the freezer, adding a minute or two to the baking time.
Reheating
For that freshly-baked warmth, gently reheat cookies in a 300°F oven for 5 minutes or microwave for about 10 seconds. This revives their softness and accentuates the toasty aroma, making every batch seem freshly baked.
FAQs
What exactly does toasting the milk powder do?
Toasting the milk powder transforms its flavor by developing rich, caramel-like notes similar to toasted nuts or browned butter. This simple technique adds a warm depth that makes these marble cookies uniquely delicious.
Can I substitute dry milk powder with liquid milk?
This recipe requires dry milk powder to create the right texture and allow for toasting, which liquid milk cannot replicate. Using liquid milk would alter the dough’s consistency and lose that signature toasted flavor.
Is it necessary to divide the dough and marble it?
The division creates the beautiful contrast in both flavor and appearance. The plain dough balances the toasted milk dough’s nutty richness, resulting in a cookie that’s as delicious as it is eye-catching.
How long do these cookies stay fresh?
Stored properly in an airtight container, these cookies will remain fresh and tender for up to five days at room temperature, perfect for enjoying multiple times without losing their special appeal.
Can I make the dough ahead of time?
Yes! You can prepare the dough, shape the marbled balls, and refrigerate or freeze them before baking. This makes it super convenient to bake fresh cookies whenever the craving hits.
Final Thoughts
There is something truly special about the Toasted Milk Marble Cookies Recipe that makes it a must-try for anyone who loves baking and bold flavors. Its simplicity, combined with that rich, toasty twist, means these cookies are destined to become a classic in your cookie repertoire. Go ahead and bake a batch—your taste buds will thank you, and your friends will be asking for the recipe before the cookies disappear!
Print
Toasted Milk Marble Cookies Recipe
- Prep Time: 20 minutes
- Cook Time: 12 minutes
- Total Time: 32 minutes
- Yield: 24 cookies 1x
- Category: Dessert
- Method: Baking
- Cuisine: Fusion
- Diet: Vegetarian
Description
Delight in the rich, nutty flavor of Toasted Milk Marble Cookies, where golden toasted milk powder blends beautifully with classic buttery dough for a unique, bakery-style treat that’s both visually appealing and irresistibly delicious.
Ingredients
Dry Ingredients
- 1 ¾ cups all-purpose flour
- ½ cup dry milk powder (plus extra ½ cup for toasting)
- ½ teaspoon baking soda
- ¼ teaspoon salt
Wet Ingredients
- ¾ cup unsalted butter (softened)
- ½ cup granulated sugar
- ½ cup powdered sugar
- 1 large egg
- 1 teaspoon vanilla extract
Instructions
- Preheat and Toast Milk Powder: Preheat the oven to 350°F (175°C). Spread ½ cup of the dry milk powder evenly on a baking sheet and toast it in the oven for 5 to 7 minutes, stirring once halfway through, until it turns golden brown and releases a fragrant, nutty aroma. Be careful to watch closely to avoid burning. Remove from the oven and let it cool completely.
- Mix Dry Ingredients: In a medium bowl, combine the all-purpose flour, baking soda, and salt, whisking them together evenly to prepare the dry mixture.
- Cream Butter and Sugars: In a large bowl, use a mixer to cream the softened unsalted butter with granulated sugar and powdered sugar until the mixture is light and fluffy, which usually takes a few minutes.
- Add Egg and Vanilla: Beat in the large egg and vanilla extract to the creamed butter-sugar mixture until well combined.
- Combine Dough: Gradually add the dry flour mixture to the wet ingredients, mixing continuously until a soft dough forms without overworking.
- Divide and Flavor Dough: Divide the dough evenly into two halves. Mix the cooled toasted milk powder into one half of the dough, leaving the other half plain for contrast.
- Form Marble Cookies: Pinch off small pieces, about 1 tablespoon each, from both dough halves. Gently swirl or twist pieces from the toasted and plain dough together to create marble-like cookie balls.
- Arrange on Baking Sheet: Place the marble dough balls on a parchment-lined baking sheet, spacing them about 2 inches apart to allow for spreading during baking.
- Bake: Bake the cookies in the preheated 350°F (175°C) oven for 10 to 12 minutes, or until the edges are set and just starting to turn golden brown.
- Cool: Allow the cookies to cool on the baking sheet for 5 minutes before transferring them to a wire rack to cool completely.
Notes
- Toasting the milk powder brings out a rich, nutty flavor reminiscent of caramelized white chocolate.
- If the dough feels too soft to handle, chilling it in the refrigerator for 15 to 30 minutes will make it easier to work with.
- Store cookies in an airtight container at room temperature for up to 5 days to maintain freshness.