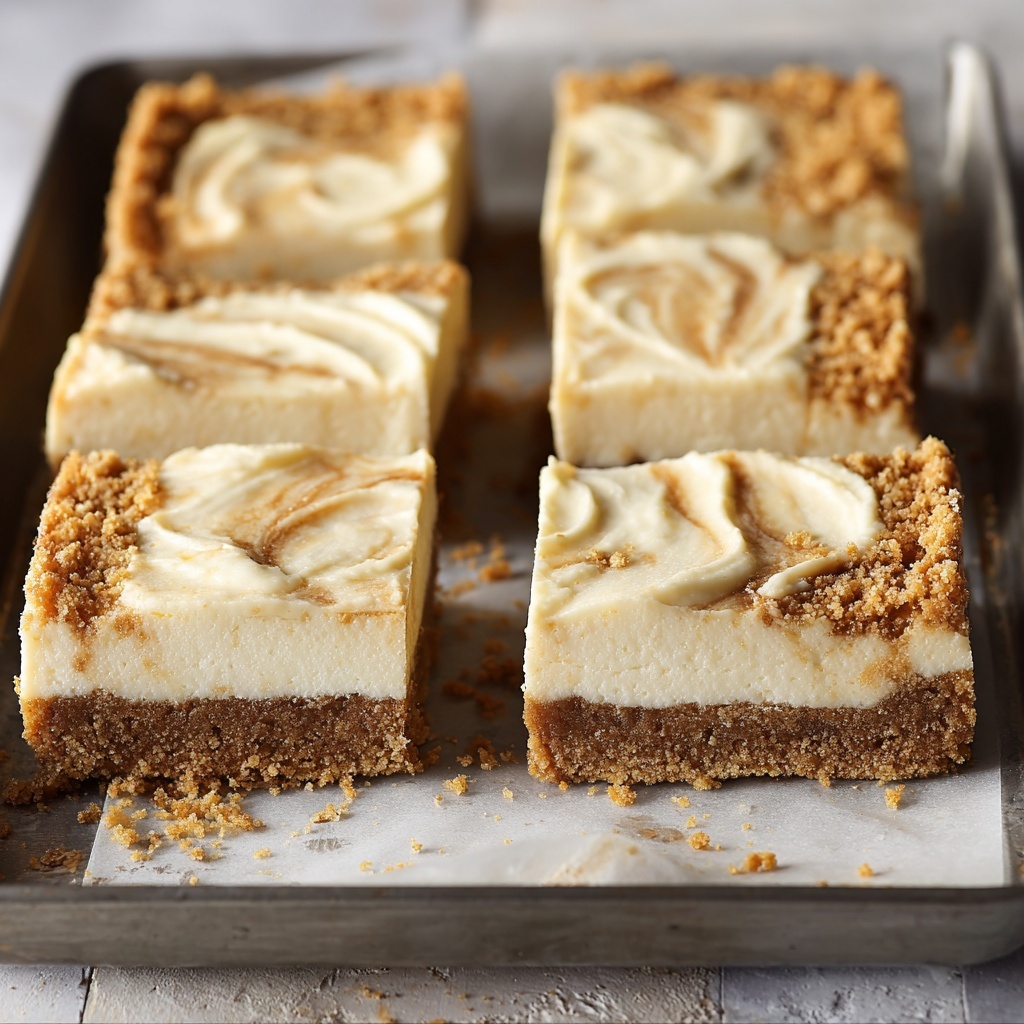
If you’re craving a dessert that feels indulgent yet doesn’t require turning on the oven, this No Bake Cheesecake Bars Recipe is exactly what you need. These bars boast a buttery graham cracker crust topped with a luxuriously creamy, tangy cheesecake layer that sets perfectly in the fridge. With minimal effort and a handful of simple, wholesome ingredients, you can have a crowd-pleasing treat that’s as refreshing as it is satisfying. Trust me, once you try these bars, they’ll become your go-to dessert for warm days and last-minute gatherings alike.

Ingredients You’ll Need
Gathering a small list of easy-to-find ingredients makes this No Bake Cheesecake Bars Recipe approachable for any home cook. Each element thoughtfully contributes to the final texture and flavor — from the crispy, buttery crust to the silky, lemon-kissed filling that melts in your mouth.
- 1 ½ cups graham cracker crumbs: This is the star of the crust, giving you that classic chew with a hint of sweetness and a satisfying crunch.
- ⅓ cup melted butter: Binds the crumbs together while adding a rich, buttery flavor essential for a sturdy base.
- 2 cups cream cheese, softened: Provides the creamy, tangy heart of the cheesecake — make sure it’s room temperature for the smoothest mix.
- 1 cup powdered sugar: Sweetens the filling without graininess, blending effortlessly into the cream cheese.
- 1 teaspoon vanilla extract: Adds warmth and depth, balancing the citrus and cream beautifully.
- 1 ½ cups heavy cream: Whipped into stiff peaks, this creates the light, airy texture that makes these bars feel so heavenly.
- 1 tablespoon lemon juice: Infuses just the right amount of brightness, cutting through the richness and making every bite fresh.
- Fresh fruit compote (optional topping): A vibrant way to add extra flavor and color, elevating the presentation and taste.
How to Make No Bake Cheesecake Bars Recipe
Step 1: Prepare the Crust
Start by mixing the graham cracker crumbs and melted butter in a medium bowl. Stir until the mixture looks like wet sand, ensuring each crumb is coated in butter so the crust will hold together nicely. Then, press this mixture firmly into the bottom of an 8×8-inch pan lined with parchment paper. Pop it into the fridge to chill while you prepare the filling — a chilled crust is key to a firm, tasty base.
Step 2: Whip the Cream Cheese
Next, beat the softened cream cheese in a large bowl until smooth and creamy. This base needs to be well-aerated to achieve that dreamy, melt-in-your-mouth texture that makes cheesecake so beloved.
Step 3: Sweeten and Flavor the Filling
Add the powdered sugar and vanilla extract to the cream cheese, mixing until fully incorporated. This step brings out a gentle sweetness and aromatic notes that balance the tang of the cheese beautifully.
Step 4: Whip the Cream
In a separate bowl, whip the heavy cream until stiff peaks form. This means when you lift your whisk, the cream holds a firm shape without collapsing. This whipped cream is what lightens the cheesecake filling, making the bars airy and luscious.
Step 5: Combine and Add Lemon
Gently fold the whipped cream into the cream cheese mixture, taking care not to deflate the air you’ve just whipped in. Stir in the lemon juice until well blended. The lemon adds a slight zing that wakes up the flavors, making every bite feel fresh and balanced.
Step 6: Assemble and Chill
Pour the cheesecake filling over the chilled crust, spreading it evenly so each bar holds the perfect ratio of crust to filling. Cover and refrigerate for at least 4 hours or, for best results, overnight. This chilling time allows the bars to set firmly while melding the flavors into a harmonious whole.
Step 7: Add Toppings Before Serving
When you’re ready to serve, top the cheesecake bars with fresh fruit compote or any topping of your choice to add an extra layer of flavor and color. This step is optional but highly recommended for a show-stopping finish.
How to Serve No Bake Cheesecake Bars Recipe

Garnishes
The way you garnish these bars can turn a simple dessert into a stunning centerpiece. Fresh berries, a drizzle of chocolate or caramel sauce, or a sprinkle of toasted nuts add texture and contrast that elevate every bite. Whipped cream dollops or a dusting of lemon zest can bring a beautiful pop of color and reinforce the fresh flavor theme.
Side Dishes
These cheesecake bars pair wonderfully with light, fresh accompaniments. Consider serving them alongside a crisp fruit salad or a scoop of tangy sorbet for an extra refreshing touch. A cup of fruity herbal tea or a cold glass of sparkling water with lemon also complements the creamy richness perfectly.
Creative Ways to Present
Don’t hesitate to play with presentation! Serve the bars on a rustic wooden board for a casual vibe or on elegant dessert plates sprinkled with edible flowers for a special occasion. Cutting into bite-sized squares and serving with small forks or spoons makes these bars easy finger food for parties and gatherings.
Make Ahead and Storage
Storing Leftovers
Keep any leftover No Bake Cheesecake Bars Recipe tightly wrapped in the refrigerator to preserve freshness. Stored properly, they will stay creamy and delicious for up to 4 days. Keeping them chilled is essential to maintain their structure and prevent the filling from becoming too soft.
Freezing
You can freeze the cheesecake bars to enjoy later or prep in advance. Wrap individual bars or the whole pan tightly with plastic wrap and then aluminum foil to prevent freezer burn. When frozen, they keep well for up to 1 month. Thaw in the refrigerator overnight before serving for the best texture.
Reheating
Since these bars are no bake and meant to be enjoyed cold, reheating is not recommended. Serve them straight from the fridge after thawing, or add a short rest at room temperature (10-15 minutes) if you prefer a slightly softer bite.
FAQs
Can I use a different crust instead of graham crackers?
Absolutely! You can swap graham cracker crumbs for crushed digestive biscuits, vanilla wafers, or even Oreo crumbs depending on your flavor preference. Just keep the butter ratio the same to ensure a sturdy crust.
How long does it take for the cheesecake bars to set?
While the recipe calls for at least 4 hours of chilling, setting overnight is ideal. This allows the filling to firm up completely and the flavors to develop beautifully.
Is this recipe suitable for kids?
Definitely. The bars are mild, creamy, and sweet without being overly rich. Plus, the no bake preparation is fun for kids to help with, especially folding in the whipped cream and pressing the crust.
Can I make this dessert vegan or dairy-free?
For a vegan or dairy-free version, substitute the cream cheese and heavy cream with plant-based alternatives like vegan cream cheese and coconut cream. Keep in mind texture and flavor may vary slightly but it will still be delicious.
What toppings work best with these cheesecake bars?
Fresh fruits like strawberries, blueberries, or raspberries are classic choices. You could also use a homemade fruit compote, chocolate shavings, caramel drizzle, or even chopped nuts to add texture and flair.
Final Thoughts
With its creamy texture, zesty brightness, and buttery crust, this No Bake Cheesecake Bars Recipe is a true crowd-pleaser that anyone can make. It’s perfect for those warm days when you want something impressive but easy, or whenever you need a sweet pick-me-up. Once you try these bars, they’ll hold a special place in your dessert rotation. Enjoy the simplicity, share the happiness, and savor every luscious bite!
Print
No Bake Cheesecake Bars Recipe
- Prep Time: 15 minutes
- Cook Time: 0 minutes
- Total Time: 4 hours 15 minutes
- Yield: 9 servings 1x
- Category: Dessert
- Method: No-Cook
- Cuisine: American
Description
Delicious and creamy no-bake cheesecake bars featuring a buttery graham cracker crust and a smooth, tangy cream cheese filling. Ready in just over 4 hours with simple ingredients and no oven required, these bars are perfect for a quick yet elegant dessert option.
Ingredients
Crust
- 1 ½ cups graham cracker crumbs
- ⅓ cup melted butter
Filling
- 2 cups cream cheese, softened
- 1 cup powdered sugar
- 1 teaspoon vanilla extract
- 1 ½ cups heavy cream
- 1 tablespoon lemon juice
Topping (Optional)
- Fresh fruit compote
Instructions
- Prepare the crust: Combine graham cracker crumbs and melted butter in a medium bowl, stirring until the mixture resembles wet sand.
- Set the crust: Press the graham cracker mixture firmly into the bottom of an 8×8-inch baking pan lined with parchment paper, then refrigerate to set.
- Beat cream cheese: In a large bowl, beat the softened cream cheese until smooth and creamy.
- Add sugar and vanilla: Mix in powdered sugar and vanilla extract until fully combined and smooth.
- Whip heavy cream: In a separate bowl, whip heavy cream until stiff peaks form.
- Combine filling: Gently fold the whipped heavy cream into the cream cheese mixture to keep it airy and light.
- Add lemon juice: Stir in lemon juice evenly throughout the filling mixture.
- Assemble cheesecake bars: Pour the cheesecake filling over the chilled crust, spreading it evenly with a spatula.
- Chill to set: Refrigerate the assembled cheesecake bars for at least 4 hours or overnight until firm and set.
- Serve: Before serving, top with fresh fruit compote or your favorite toppings for added flavor and presentation.
Notes
- Ensure the cream cheese is softened to room temperature for smooth mixing.
- Press the crust firmly to prevent crumbling when cutting bars.
- Chill time is essential for the bars to set; avoid skipping this step.
- Fresh fruit compote adds natural sweetness and a burst of color but can be omitted or replaced with other toppings like chocolate or caramel sauce.
- Store leftover bars in the refrigerator for up to 3 days.