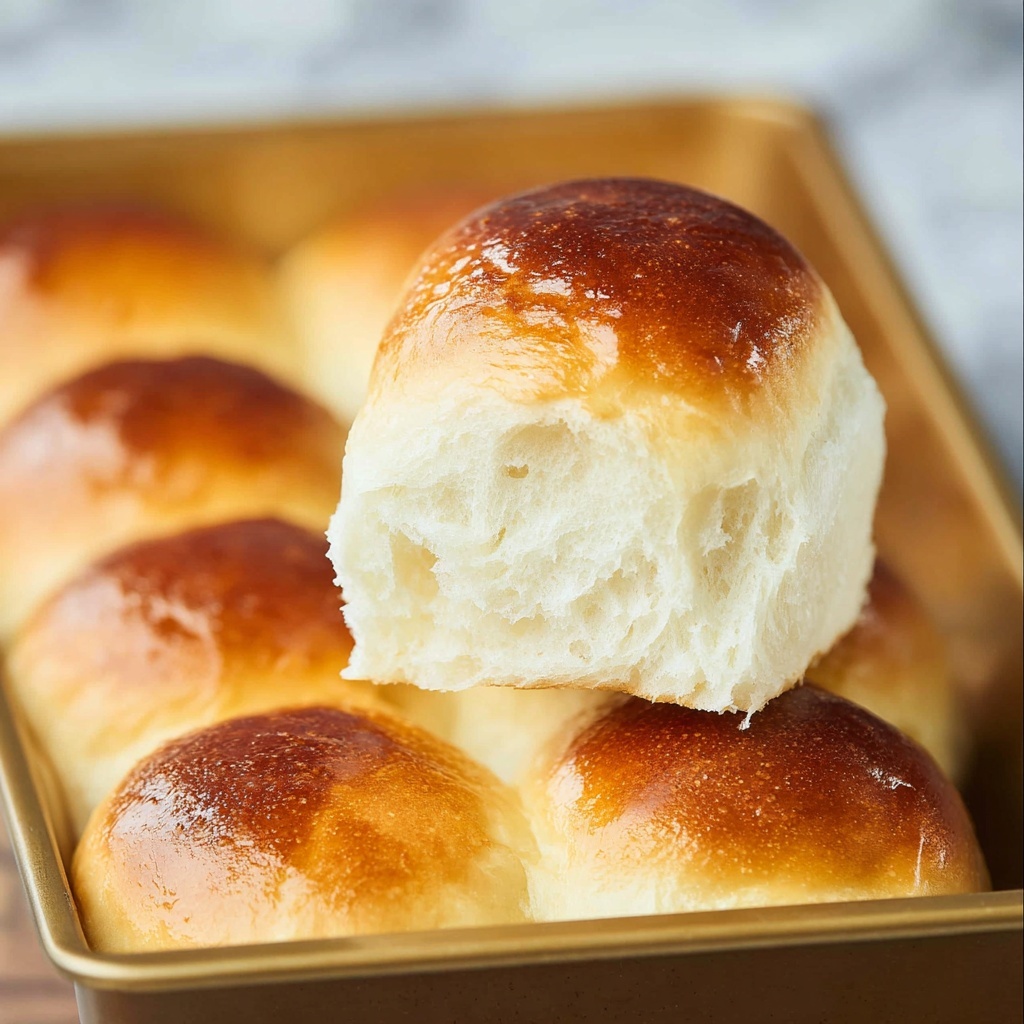
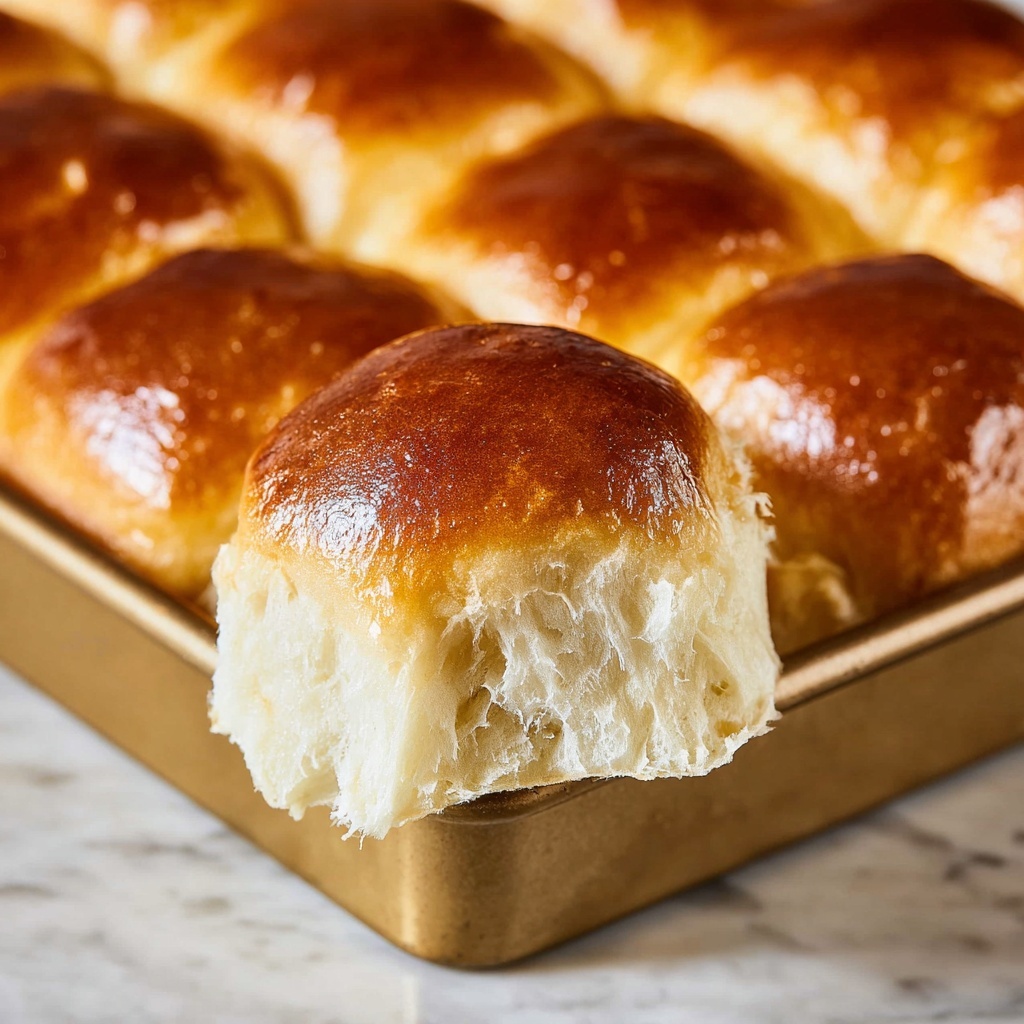
There is something truly heartwarming about the warm, fluffy rolls that instantly remind you of your favorite lunchtime memories. This School Cafeteria Yeast Rolls Recipe brings that nostalgic comfort straight to your kitchen, creating soft, tender rolls with a slightly sweet flavor and the perfect golden crust. Whether you’re serving them at a family dinner or craving a batch of classic homemade bread, these rolls are incredibly simple to make and a guaranteed crowd-pleaser. Get ready to fill your home with the irresistible aroma of fresh-baked goodness that takes you right back to those cheerful school days.
Ingredients You’ll Need
These ingredients are simple staples, but together they work magic to create the softness, flavor, and beautiful texture that make this School Cafeteria Yeast Rolls Recipe a true classic. Each element plays its own special role from helping the dough rise perfectly to delivering that mouthwatering golden finish.
- 2½ Tbsp yeast: The key to that airy, fluffy rise you’re after.
- ¾ cup warm water: Activates the yeast gently without overheating.
- 6½ cups bread flour: Provides structure and chewiness for tender rolls.
- 11 Tbsp instant non-fat dry milk powder: Adds subtle richness and a slightly sweet flavor.
- 6½ Tbsp sugar: Feeds the yeast and gives a delicate sweetness to the rolls.
- 1 Tbsp salt: Balances the sweetness and enhances flavor depth.
- 6½ Tbsp vegetable oil: Ensures a soft crumb and helps the dough stay moist.
- 1¼ cups water: Combines with oil to create a smooth, pliable dough.
How to Make School Cafeteria Yeast Rolls Recipe
Step 1: Activate the Yeast
Start by dissolving your yeast in warm water. This little resting period is crucial because it wakes up the yeast and ensures your rolls rise beautifully later. After mixing, set it aside while you prepare the rest of the ingredients.
Step 2: Combine Dry Ingredients
In your stand mixer bowl, mix together the bread flour, sugar, salt, and dry milk powder. This combination provides the essential dry base that will give your rolls sweetness, flavor, and structure.
Step 3: Add Wet Ingredients and Mix
Pour in the vegetable oil and the additional water. Start mixing everything together on low speed for a few minutes to help these ingredients begin bonding into a dough that is smooth and soft.
Step 4: Incorporate Yeast and Knead
Now it’s time to add the activated yeast mixture to the mixer. Increase the speed to medium and knead the dough for about 8 minutes. You want it smooth and elastic with just the right amount of bounce when pressed.
Step 5: First Rise
Cover the bowl loosely to keep in warmth and humidity. Find a cozy, draft-free spot for approximately 45 minutes, or until the dough doubles in size. This is where all the magic happens, transforming the dough into airy, pillowy perfection.
Step 6: Shape the Rolls
Give the dough a gentle punch to release excess air, then divide it into 24 equally sized balls. Arrange them in a cooking spray-coated 9×13-inch baking dish. Cover again and let rise for 30 minutes until doubled. These steps make sure your rolls bake up soft and uniform.
Step 7: Bake to Golden Perfection
Preheat your oven to 400ºF. Slide the rolls in and bake for 18 to 20 minutes. Keep an eye out for that glorious golden-brown top that signals they’re ready to come out.
Step 8: Finish with Butter
Brush the freshly baked rolls with melted butter right after taking them out. This final touch adds shine, extra softness, and a rich buttery flavor that elevates every bite.
How to Serve School Cafeteria Yeast Rolls Recipe
Garnishes
These rolls are incredible on their own, but you can dress them up with a sprinkle of flaky sea salt, a little garlic butter, or even a dusting of fresh herbs like parsley to enhance both look and flavor.
Side Dishes
School cafeteria yeast rolls are amazingly versatile. They pair wonderfully with hearty winter soups, stews, or classic comfort meals like roasted chicken and mashed potatoes. Their soft texture soaks up gravy and sauces beautifully.
Creative Ways to Present
For a fun twist, slice your rolls in half and use them as slider buns with fillings like ham and cheese or pulled pork. They also make an excellent base for mini sandwiches during brunch or family gatherings.
Make Ahead and Storage
Storing Leftovers
If you have leftover rolls (which is rare!), store them in an airtight container at room temperature. They stay fresh for about 2 days and maintain their soft texture if properly sealed.
Freezing
These rolls freeze beautifully. Wrap them tightly in plastic wrap and place in a freezer bag. Freeze for up to 3 months. When you’re ready, thaw overnight in the fridge or on the countertop for a few hours.
Reheating
To revive the rolls, pop them in the oven at 300ºF for 10 minutes or microwave with a damp paper towel wrapped around to keep moisture in. They come out soft, warm, and just as delicious as fresh.
FAQs
Can I use active dry yeast instead of instant yeast in this School Cafeteria Yeast Rolls Recipe?
Yes! Just make sure to proof the active dry yeast in warm water for about 5 to 10 minutes until it’s bubbly before adding it to your dough mixture. This step ensures your rolls rise perfectly.
What if I don’t have dry milk powder? Can I substitute it?
If you don’t have dry milk powder, you can substitute with the same amount of regular milk by reducing the added water slightly. This will keep your rolls rich and tender, just like the classic recipe.
How do I know when the dough has risen enough?
The dough should roughly double in size and look puffy and airy. A good test is to gently press your finger into the dough; if the indentation remains, it’s ready for the next step.
Can I make these rolls without a stand mixer?
Absolutely! You can knead the dough by hand on a lightly floured surface for about 10 to 12 minutes until smooth and elastic. It’s a great way to connect with the dough and really feel when it’s ready.
Is this recipe suitable for vegan diets?
With a small tweak substituting the dry milk powder for a plant-based alternative and using vegan butter for the finish, this School Cafeteria Yeast Rolls Recipe can easily be made vegan without sacrificing softness or flavor.
Final Thoughts
Making a batch of these School Cafeteria Yeast Rolls Recipe fills your kitchen with warmth and nostalgia while delivering unbeatable flavor and comfort. Whether for a busy weeknight or a special occasion, these rolls are a timeless favorite everyone will love. So, don’t hesitate—grab your ingredients and dive into making this beloved classic today. Your family and friends will thank you with every delicious bite!
Print
School Cafeteria Yeast Rolls Recipe
- Prep Time: 20 minutes
- Cook Time: 20 minutes
- Total Time: 2 hours 3 minutes
- Yield: 24 rolls 1x
- Category: Bread
- Method: Baking
- Cuisine: American
- Diet: Vegetarian
Description
These classic School Cafeteria Yeast Rolls are soft, fluffy, and slightly sweet, perfect for pairing with any meal. Made with simple ingredients and a straightforward method, these rolls have a tender crumb and a golden crust that kids and adults alike will love. Ideal for feeding a crowd with 24 servings, they bring nostalgic comfort and homemade goodness to your table.
Ingredients
Yeast Mixture
- 2½ Tbsp yeast
- ¾ cup warm water
Dry Ingredients
- 6½ cups bread flour
- 11 Tbsp instant non-fat dry milk powder
- 6½ Tbsp sugar
- 1 Tbsp salt
Wet Ingredients
- 6½ Tbsp vegetable oil
- 1¼ cups water
Instructions
- Activate Yeast: In a small bowl, combine the yeast and ¾ cup of warm water. Set aside and allow it to activate for a few minutes until it becomes bubbly and frothy, indicating the yeast is alive and ready to use.
- Combine Dry Ingredients: In the bowl of an electric stand mixer, mix together the bread flour, sugar, salt, and instant non-fat dry milk powder until evenly distributed.
- Add Wet Ingredients: Pour in the vegetable oil and 1¼ cups water to the dry mixture. Mix on low speed for about 3 minutes to begin forming the dough.
- Knead Dough: Add the activated yeast mixture to the stand mixer bowl. Knead on medium speed for 8 minutes, until the dough is smooth, elastic, and slightly tacky, but not sticky.
- First Rise: Loosely cover the bowl with a clean towel or plastic wrap. Place the bowl in a warm, draft-free spot and let the dough rise until it has doubled in size, about 45 minutes.
- Shape Rolls: Punch down the risen dough to release gases. Lightly spray a 9×13-inch baking dish with cooking spray. Divide the dough into 24 equal portions, shaping each into a ball. Place the rolls evenly in the prepared dish, cover loosely, and let them rise again in a warm spot until doubled, about 30 minutes.
- Bake Rolls: Preheat the oven to 400ºF. Bake the rolls for 18 to 20 minutes until they turn golden brown and sound hollow when tapped.
- Finish and Serve: Remove rolls from the oven and immediately brush the tops with melted butter for a soft, flavorful crust. Serve warm and enjoy these classic yeast rolls at your table.
Notes
- Use warm water (about 110°F) to activate the yeast effectively; too hot or too cold will affect yeast activity.
- If you don’t have instant non-fat dry milk powder, regular dry milk powder can be used but adjust liquid slightly.
- Vegetable oil can be substituted with canola or other neutral oils if preferred.
- For softer rolls, cover the baking dish with foil for the first half of baking, removing it to brown the tops in the last 5 minutes.
- These rolls freeze well; cool completely before freezing in airtight containers.