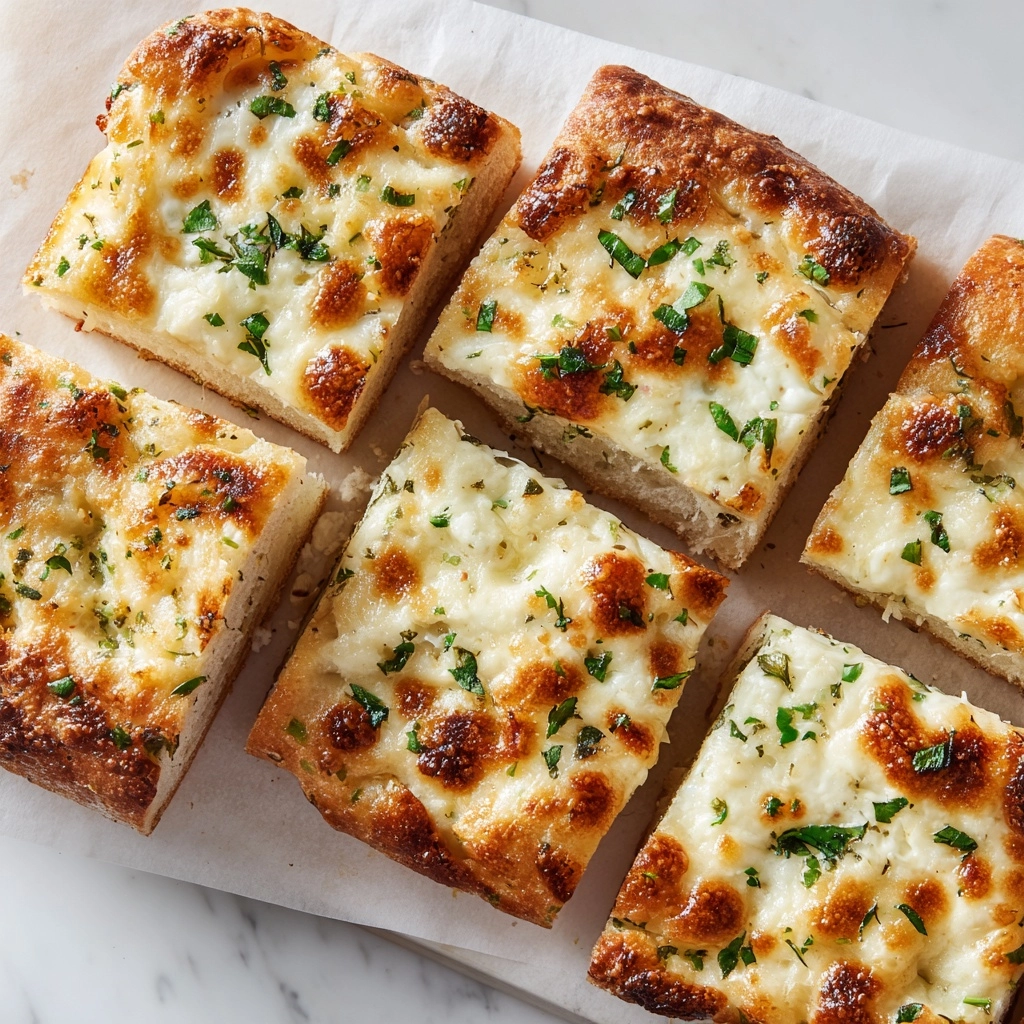
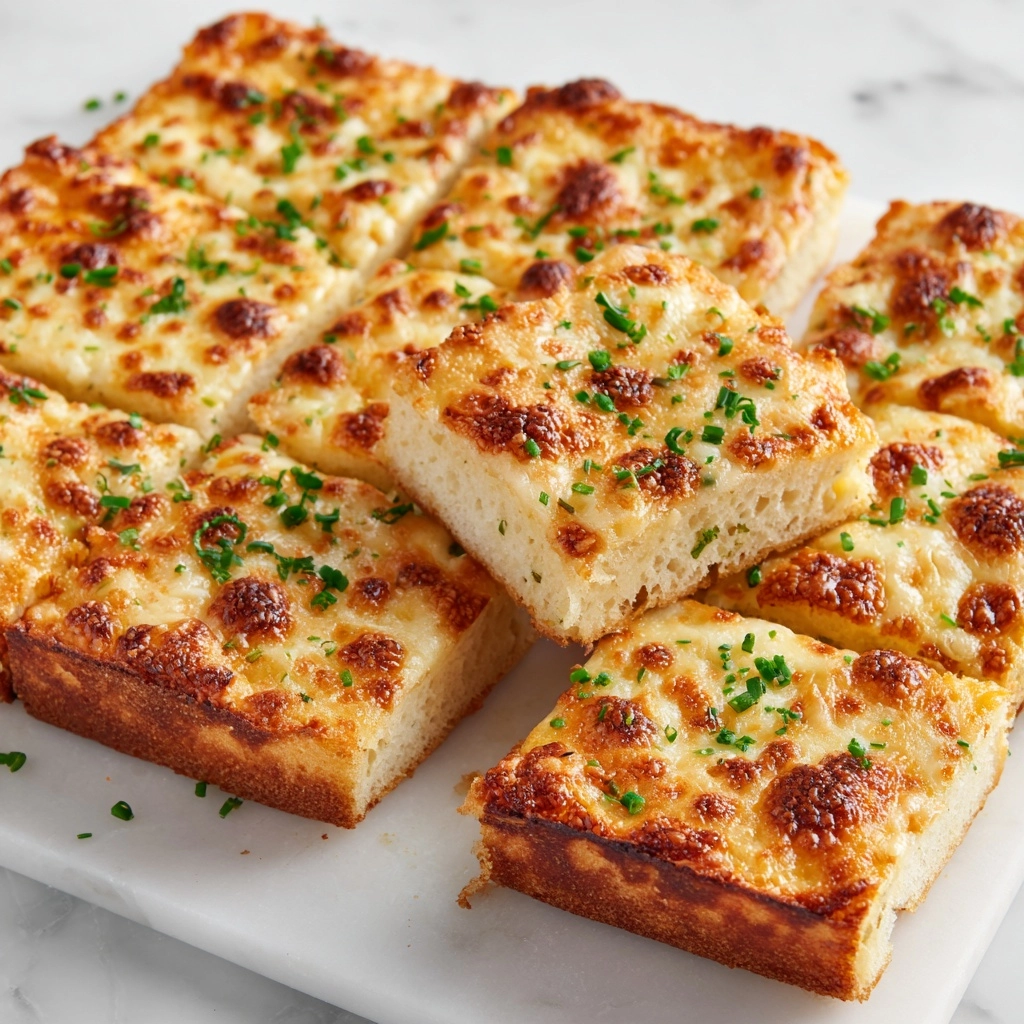
If there’s one thing that makes everyone’s eyes light up at the dinner table, it’s the promise of warm, buttery garlic breadsticks. With this Garlic Breadsticks Recipe, you’ll be amazed at how simple ingredients can create something truly irresistible. Each bite is soft, flavorful, and smells heavenly with fresh garlic and melted butter. Whether you’re serving them alongside a bowl of pasta, dunking them in tomato soup, or sneaking a warm one straight from the baking sheet, these breadsticks have a way of making any meal feel extra special.
Ingredients You’ll Need
The beauty of this Garlic Breadsticks Recipe is in its simplicity. Each ingredient has a purpose—from building that soft, fluffy inside to the addictive garlicky top. Here’s what you’ll need, and why you’ll love each piece of the puzzle.
- Active dry yeast: Gives your breadsticks a tender, airy lift—make sure it’s active and bubbly!
- Warm water (110°F): The magic temperature to activate yeast and get your dough just right.
- Granulated sugar: Feeds the yeast and gives a touch of sweetness that balances the garlic flavors.
- All-purpose flour: The foundation for structure and that perfect breadstick chewiness.
- Salt: A must for both the dough and the topping—don’t skip this essential seasoning.
- Olive oil: Adds richness and helps create a soft, moist crumb in every bite.
- Unsalted butter (melted): The buttery base for the garlic glaze you’ll be craving all week.
- Minced garlic: The star flavor, infusing each breadstick with undeniable garlicky goodness.
- Fresh parsley (chopped): For a pop of freshness and color—plus, it makes them look downright irresistible.
- Garlic powder: Boosts the garlic aroma and ensures every inch is packed with flavor.
- Salt (for topping): A finishing touch of salt on top really brings that flavor home.
- Optional grated Parmesan cheese: Sprinkle for an extra layer of cheesy goodness—your secret weapon for wow-factor.
How to Make Garlic Breadsticks Recipe
Step 1: Activate the Yeast
Start by combining warm water, active dry yeast, and granulated sugar in a large bowl. You’re looking for that magical transformation where the mixture becomes foamy after 5–10 minutes. This means your yeast is ready to work its magic, ensuring that your Garlic Breadsticks Recipe turns out fluffy and beautifully risen every time.
Step 2: Mix the Dough
Once your yeast mixture is frothy, add the all-purpose flour, salt, and olive oil. Mix everything together until a shaggy dough forms. This is when things start to look—and feel—like real bread! Transfer to a lightly floured surface and knead for about 6–8 minutes until your dough is smooth, springy, and elastic.
Step 3: Let the Dough Rise
Put your dough back in the bowl, cover it with a kitchen towel, and place it somewhere warm. After about an hour, it should double in size—the perfect sign that you’re on your way to pillowy soft breadsticks. This rise is key to the irresistible texture of the final Garlic Breadsticks Recipe.
Step 4: Shape the Breadsticks
Once your dough has risen, punch it down to release extra air and divide it into 12 equal pieces. Roll each one into a 6–8 inch rope, then lay them neatly on your prepared baking sheet. Give them a final, short rise under a towel (about 20 minutes), letting them puff up just a little more.
Step 5: Make the Garlic Butter
While the breadsticks are rising, stir together melted unsalted butter, minced garlic, garlic powder, and a pinch of salt. This garlicky blend is what takes the recipe over the top, making every bite unbelievably fragrant and rich.
Step 6: Brush and Bake
Brush half of the garlic butter over the unbaked breadsticks—you want every inch covered! Slide the tray into your preheated 400°F oven and bake them for 15 to 18 minutes, or until golden brown with just the right amount of crispy edges.
Step 7: Add the Finishing Touches
As soon as those hot breadsticks come out of the oven, brush them with the rest of your garlic butter and shower on chopped parsley and (if you like) a generous sprinkle of Parmesan cheese. These final steps bring out color, contrast, and even more flavor for the ultimate Garlic Breadsticks Recipe experience.
How to Serve Garlic Breadsticks Recipe

Garnishes
A sprinkle of chopped fresh parsley adds a fresh, herby note and makes your breadsticks look absolutely stunning. For a little extra pizzazz, try freshly grated Parmesan or even some chili flakes for subtle heat. These simple garnishes are all about making your Garlic Breadsticks Recipe truly shine.
Side Dishes
These breadsticks are perfect allies for saucy pasta dishes, hearty lasagna, or simple tomato soup. The subtle garlic and butter flavors make them a comforting match for creamy sauces or light salads—you really can’t go wrong. Personally, they’re my go-to with spaghetti night, where they always seem to disappear before I can have seconds!
Creative Ways to Present
Don’t be afraid to think outside the basket! Stack your baked breadsticks in a colorful napkin-lined bread bowl, tie a bundle with kitchen twine for a rustic touch, or serve with a flight of dipping sauces like marinara, pesto, or cheesy alfredo. The Garlic Breadsticks Recipe adapts to any occasion—just add a little imagination.
Make Ahead and Storage
Storing Leftovers
If you find yourself with any leftovers (which is a big “if” in my house), pop them in an airtight container or zip-top bag. They’ll stay soft for up to 2 days at room temperature, so you can enjoy bakery-fresh breadsticks with tomorrow’s lunch or dinner.
Freezing
Breadsticks freeze beautifully! Let them cool completely, then wrap each one individually in foil or plastic wrap and stash them in a freezer bag. They’ll keep for up to two months. This makes the Garlic Breadsticks Recipe ideal for meal-prepping or feeding an unexpected crowd.
Reheating
To bring your breadsticks back to life, simply pop them in a 350°F oven for about 5–7 minutes, or until warm and pillowy again. Spritz with a little water before reheating if you want to mimic that fresh-from-the-oven texture—then brush with more melted butter for an extra treat!
FAQs
Can I make this Garlic Breadsticks Recipe with whole wheat flour?
Absolutely! You can substitute up to half of the all-purpose flour with whole wheat flour for a heartier, nuttier breadstick. Just keep in mind that the texture will be a bit denser, but still delicious.
Do I have to use fresh parsley, or can I use dried?
While fresh parsley offers a brighter pop of flavor and color, dried parsley works well too. Use 1 teaspoon of dried parsley in place of the fresh to keep things flavorful and convenient.
Can I make the dough ahead of time?
You can! Prepare the dough and let it rise, then store it covered in the fridge overnight. Before baking, bring the dough to room temperature, shape, and proceed with the recipe as written. It’s a handy hack for stress-free entertaining.
Is there a vegan version of this Garlic Breadsticks Recipe?
Yes! Simply swap out the butter for vegan butter or olive oil, and skip the Parmesan (or use a dairy-free alternative). The results are just as tender and garlicky—you’ll be the hero of any plant-based gathering.
How do I keep my breadsticks from getting too crispy or hard?
If your breadsticks get too brown or hard, you may have baked them a little too long. To ensure softness, bake just until golden and always brush them with melted butter right after they come out of the oven. Covering leftovers tightly will also keep them fresh.
Final Thoughts
There’s simply nothing like the smell and taste of homemade breadsticks wafting through your kitchen. Whether you’re a garlic lover or just craving some classic comfort, this Garlic Breadsticks Recipe delivers every single time. Bring a batch to your next meal and watch them disappear—you might just make this recipe a permanent part of your family’s tradition!
Print
Garlic Breadsticks Recipe
- Prep Time: 20 minutes
- Cook Time: 15 minutes
- Total Time: 1 hour 35 minutes
- Yield: 12 breadsticks 1x
- Category: Side Dish
- Method: Baking
- Cuisine: Italian-American
- Diet: Vegetarian
Description
Delight your taste buds with these homemade Garlic Breadsticks that are soft, flavorful, and perfect for pairing with your favorite pasta dishes. These breadsticks are infused with garlic, parsley, and butter, making them a savory treat for any occasion.
Ingredients
Dough:
- 1 package (about 1 tablespoon) active dry yeast
- 1 1/2 cups warm water (110°F)
- 2 tablespoons granulated sugar
- 3 1/2 cups all-purpose flour
- 1 teaspoon salt
- 2 tablespoons olive oil
Topping:
- 4 tablespoons unsalted butter (melted)
- 3 cloves garlic (minced)
- 1 tablespoon fresh parsley (chopped)
- 1/2 teaspoon garlic powder
- 1/4 teaspoon salt (for topping)
- Optional: grated Parmesan cheese for garnish
Instructions
- Prepare the Dough: Combine warm water, yeast, and sugar in a bowl. Let sit until foamy. Add flour, salt, and olive oil. Knead until smooth. Let rise for 1 hour.
- Shape the Breadsticks: Preheat oven. Divide dough, roll into ropes, and place on a baking sheet. Let rise. Prepare garlic butter.
- Bake: Brush breadsticks with garlic butter. Bake until golden. Brush with remaining garlic butter. Garnish with parsley and Parmesan. Serve warm.
Notes
- You can substitute dried parsley for fresh.
- For extra cheesiness, sprinkle with mozzarella and broil briefly.
Nutrition
- Serving Size: 1 breadstick
- Calories: 160
- Sugar: 2g
- Sodium: 210mg
- Fat: 6g
- Saturated Fat: 3g
- Unsaturated Fat: 2g
- Trans Fat: 0g
- Carbohydrates: 23g
- Fiber: 1g
- Protein: 3g
- Cholesterol: 10mg