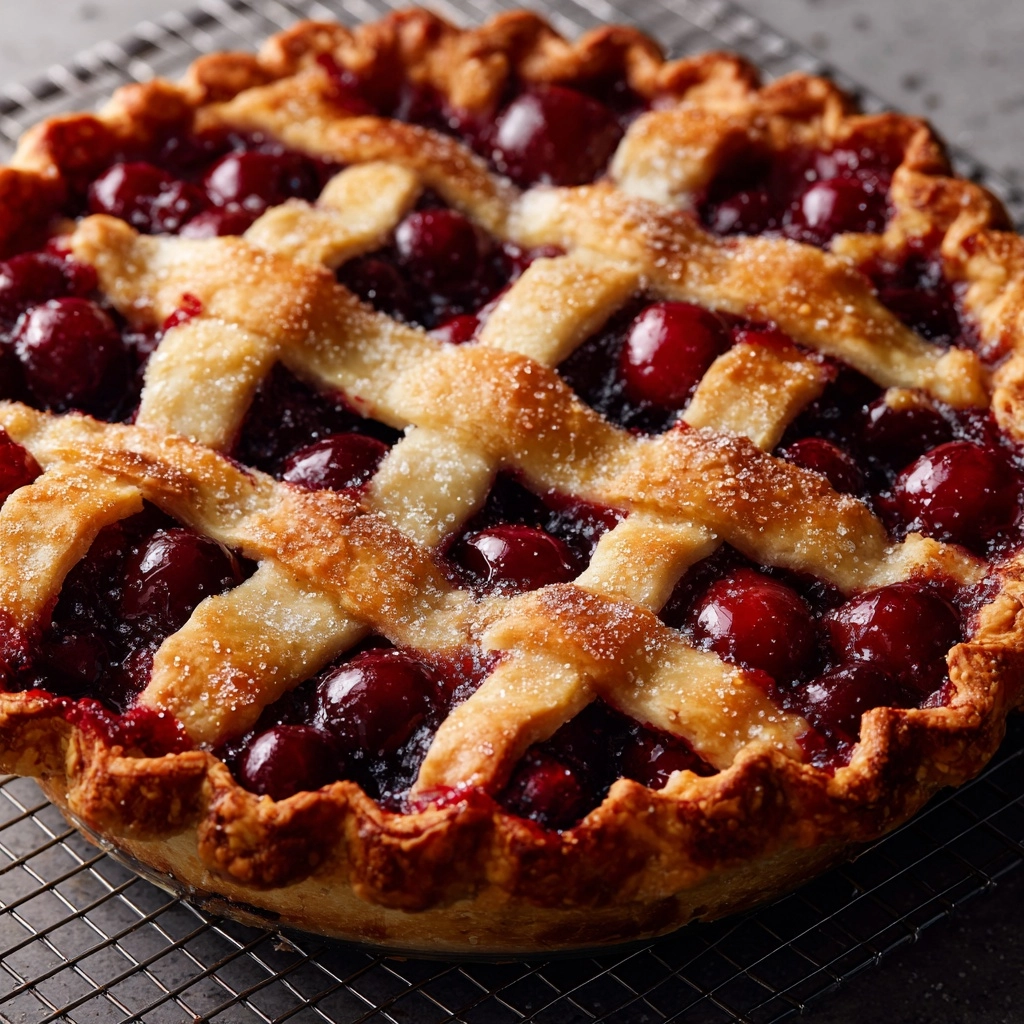
If you’ve ever wondered what pure summer tastes like, look no further than this Baked Fresh Cherry Pie. Every bite bursts with the juicy sweetness of ripe cherries, brightened with a splash of lemon and embraced in a golden, flaky pastry. This pie is the kind of showstopper that draws everyone into the kitchen, noses twitching at the wonderful aroma, eager to snag a still-warm slice. The contrast of tart juicy fruit, buttery crust, and sparkly sugar topping is irresistible—and delightfully easy to create at home, even if you’ve never made a pie from scratch before. Whether for a special celebration or a laid-back Sunday roasting in the sun, this Baked Fresh Cherry Pie will become your favorite new tradition.
Ingredients You’ll Need
Making a classic Baked Fresh Cherry Pie is all about letting the simple, prime ingredients shine. Each one plays an essential role, from the vibrant cherries to the golden, flaky crust. Here’s what you’ll need and why each is a must:
- Fresh sweet cherries (4 cups, pitted): The star of this pie—choose ripe, plump cherries for the most flavorful filling and a beautiful natural color.
- Granulated sugar (3/4 cup): Balances tartness and brings out the lush, fruity sweetness in the cherries.
- Cornstarch (3 tablespoons): Thickens the cherry juices as they bake, ensuring you get luscious filling that slices cleanly and doesn’t run.
- Lemon juice (1 tablespoon): Adds brightness and just enough acidity to make the cherries pop, without overwhelming their natural flavor.
- Almond extract (1/2 teaspoon): A little goes a long way—this gives your filling a subtle, bakery-style nuance that complements cherries perfectly.
- Unsalted butter (1 tablespoon, cut in small pieces): Melts into the fruit, making the filling glossy and rich.
- Refrigerated pie crusts (1 package/14 oz—2 crusts): Super convenient and reliably flaky, perfect for beginners or when time is tight.
- Large egg (1, beaten): Brushing the crust with egg adds a golden, glossy finish that’s picture-perfect.
- Coarse sugar (1 tablespoon, optional): Sprinkle this on top for bakery-style sparkle and a pleasant crunch with every bite.
How to Make Baked Fresh Cherry Pie
Step 1: Prep the Oven and Ingredients
Begin by preheating your oven to 425°F so it’s nice and hot when your pie goes in. While it heats, pit your fresh cherries—a job made easier with a cherry pitter, but not impossible with a small knife. Making sure all the pits are gone is crucial for a perfect Baked Fresh Cherry Pie and no accidental crunches!
Step 2: Make the Cherry Filling
In a large mixing bowl, gently combine your pitted cherries, granulated sugar, cornstarch, lemon juice, and almond extract. Stir softly to keep the cherries whole. The sugar will draw out some juices which combine with the cornstarch to make the filling just thick enough as it bakes.
Step 3: Prepare the Pie Crust
Unroll one pie crust and fit it carefully into a 9-inch pie dish, letting the edges hang a bit over the rim. Try not to stretch the dough—gentle pressure is all it takes. If any cracks appear, patch them with trimmed dough offcuts.
Step 4: Fill and Top the Pie
Pour your cherry mixture into the lined pie dish and dot the top evenly with small pieces of unsalted butter. Next, either place the second crust on top entirely (don’t forget to cut a few slits for steam to escape!) or get creative by cutting the dough into strips to create a beautiful lattice pattern. Trim any excess dough, then fold and crimp the edges for a rustic, homemade look.
Step 5: Add the Finishing Touches
Brush the top crust with the beaten egg, making sure to coat the edges as well for even golden color. If you want a sparkly finish, sprinkle on the coarse sugar now. This little step will make your Baked Fresh Cherry Pie crust truly inviting.
Step 6: Bake the Pie
Set the pie on a baking sheet (to catch any delicious bubbling over!), and bake at 425°F for 20 minutes. Then, lower the temperature to 375°F and bake for another 30–35 minutes. Watch for a deep golden crust and thick, bubbling filling. If the edges brown too quickly, cover them with foil. Let the pie cool completely before slicing—this is a test of patience, but it makes sure every slice stays neat and full of perfect cherry filling.
How to Serve Baked Fresh Cherry Pie

Garnishes
Fresh cherry halves, a little dusting of powdered sugar, or a dollop of softly whipped cream make ideal garnishes for your Baked Fresh Cherry Pie. For an extra decadent touch, add a scoop of creamy vanilla ice cream—the contrast of the cold ice cream and the cozy pie is pure comfort in every bite.
Side Dishes
This treat shines all on its own, but if you’re serving it as part of a larger meal, consider pairing it with a light green salad or a platter of crisp, fresh fruit. These sides balance the sweetness and make the Baked Fresh Cherry Pie feel like part of a festive feast, whether it’s a holiday table or a backyard cookout.
Creative Ways to Present
Transform your pie into individual servings by baking the filling in small ramekins and topping each with a round of pastry for sweet cherry pot pies. Or, simply serve the pie in generous wedges with a drizzle of cherry sauce for a modern dessert plate. For summer gatherings, try serving Baked Fresh Cherry Pie cold, picnic-style, with a pitcher of lemonade and bowls of fresh berries for a picture-perfect spread.
Make Ahead and Storage
Storing Leftovers
If there are any leftovers (that’s a big “if” with this pie!), cover the pie loosely with foil or plastic wrap and keep it at room temperature for up to one day. For longer storage, pop it in the fridge where it will stay fresh for up to four days. The flavors mingle and deepen, making every sneaky midnight slice even more delicious.
Freezing
To save your Baked Fresh Cherry Pie for a later date, let it cool completely, wrap it snugly in foil, then in plastic wrap, and freeze it for up to three months. You can freeze the whole pie or individual slices, making it easy to indulge in homemade cherry pie cravings whenever they strike.
Reheating
Rewarming is a breeze: place slices on a baking sheet in a 325°F oven for 10–15 minutes, or until warmed through. This refreshes the crust and brings the filling back to that just-baked, juicy goodness. Microwave reheating works in a pinch, though your crust won’t be as flaky.
FAQs
Can I use frozen cherries instead of fresh?
Absolutely! If using frozen cherries, thaw and drain them well before using. You may want to increase the cornstarch slightly, as frozen cherries can be more juicy. The flavor will still be fantastic, and you’ll enjoy Baked Fresh Cherry Pie even out of season!
How do I keep my bottom crust from getting soggy?
For a crispier bottom crust, you can preheat your baking sheet in the oven and set the pie directly on it, or brush a thin layer of beaten egg white on the crust before adding the filling. Either tip will help the bottom bake up flaky and golden, even with the juicy cherry filling.
Can I make this pie gluten free?
Yes! Simply swap the packaged pie crusts for your favorite gluten-free variety (store-bought or homemade) and be certain your cornstarch is certified gluten free. Your Baked Fresh Cherry Pie will still be just as delightful.
My filling is runny—what did I do wrong?
This usually happens if the pie is sliced too soon or if there wasn’t quite enough thickener. Make sure to cool the pie completely so the filling sets, and use the full amount of cornstarch listed for the best results every time.
Can I prepare Baked Fresh Cherry Pie in advance?
Definitely! The baked pie keeps well for a day at room temperature or up to four days in the fridge. If you want to work ahead, you can even freeze it whole—just be sure to cool and wrap it well. It’s a recipe tailor-made for busy schedules and worry-free entertaining.
Final Thoughts
There’s a reason Baked Fresh Cherry Pie is a classic—it’s as beautiful to look at as it is satisfying to eat, and the process of making it is just as enjoyable as the first forkful. Give it a try the next time you come across plump, ruby cherries at the market and watch as everyone falls in love, slice by slice. Happy baking!
Print
Baked Fresh Cherry Pie Recipe
- Prep Time: 25 minutes
- Cook Time: 55 minutes
- Total Time: 1 hour 20 minutes
- Yield: 8 servings 1x
- Category: Dessert
- Method: Baking
- Cuisine: American
- Diet: Vegetarian
Description
Indulge in the deliciousness of this Baked Fresh Cherry Pie, a classic American dessert that bursts with the sweet flavors of fresh cherries encased in a buttery, flaky crust. Perfect for any occasion, this pie is sure to be a hit!
Ingredients
Filling:
- 4 cups fresh sweet cherries, pitted
- 3/4 cup granulated sugar
- 3 tablespoons cornstarch
- 1 tablespoon lemon juice
- 1/2 teaspoon almond extract
- 1 tablespoon unsalted butter, cut into small pieces
Crust:
- 1 package (14 oz) refrigerated pie crusts (2 crusts)
- 1 large egg, beaten
- 1 tablespoon coarse sugar for sprinkling (optional)
Instructions
- Preheat the oven: Preheat the oven to 425°F.
- Prepare the filling: In a large bowl, combine cherries, sugar, cornstarch, lemon juice, and almond extract. Mix gently.
- Assemble the pie: Roll out one pie crust and place it in a 9-inch pie dish. Pour the cherry filling into the crust, dot with butter, cover with the second crust, or create a lattice top.
- Final steps: Brush the top crust with beaten egg, sprinkle with coarse sugar, and bake for 20 minutes at 425°F. Then, reduce the temperature to 375°F and bake for an additional 30–35 minutes until golden brown and bubbly. Cool before slicing.
Notes
- For a tarter pie, use sour cherries and increase sugar to 1 cup.
- You can make the pie a day ahead; store at room temperature loosely covered.
- Enhance with vanilla ice cream or whipped cream for a classic pairing.
Nutrition
- Serving Size: 1 slice
- Calories: 350
- Sugar: 27 g
- Sodium: 210 mg
- Fat: 15 g
- Saturated Fat: 6 g
- Unsaturated Fat: 8 g
- Trans Fat: 0 g
- Carbohydrates: 52 g
- Fiber: 2 g
- Protein: 3 g
- Cholesterol: 25 mg