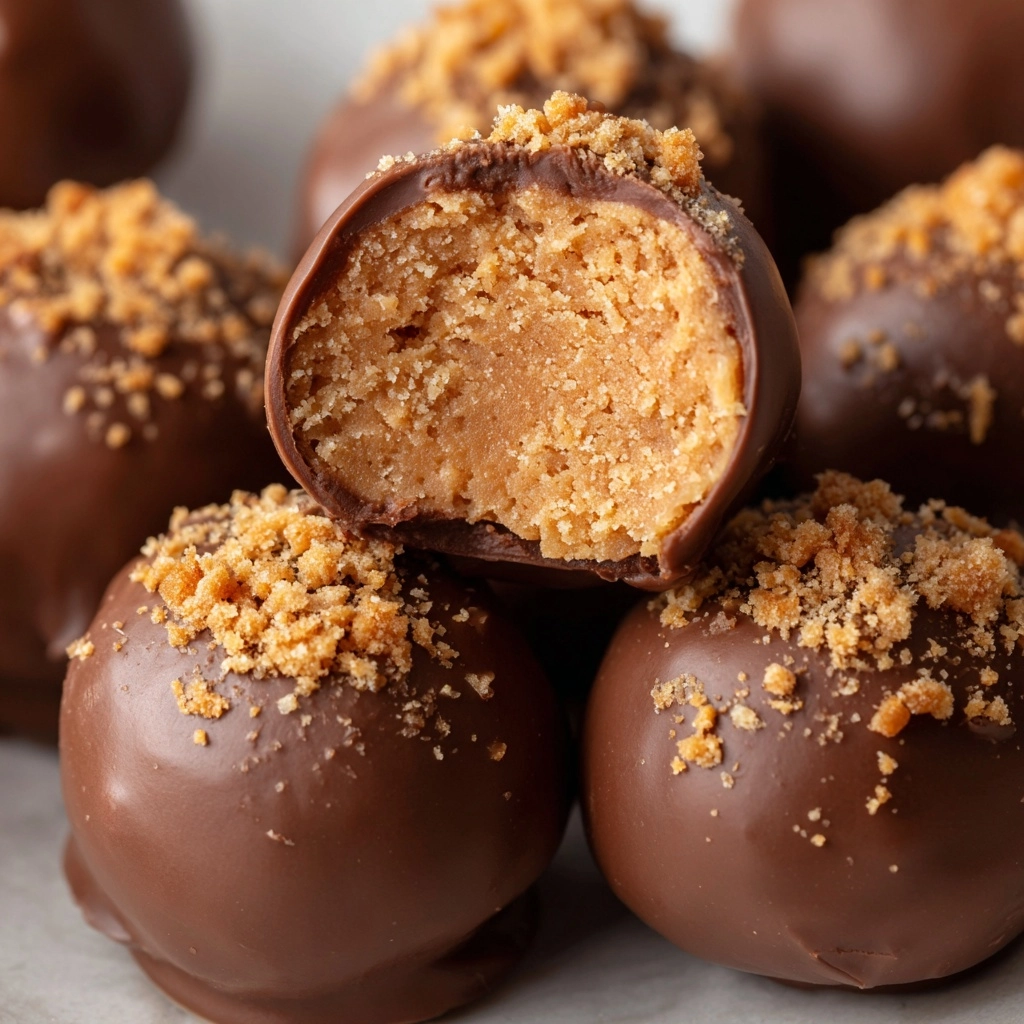
If you have a sweet tooth and a soft spot for nostalgic candy, Butterfinger Balls are about to become your new favorite no-bake treat! Imagine the creamy tang of cream cheese, the nutty crunch of Nutter Butter cookies, and the unmistakable peanut-buttery snap of Butterfinger candy, all hugged by a silky chocolate shell. These bite-sized delights are a breeze to make but taste like something you picked up at a fancy bakery. Whether you’re prepping a party platter or sneaking a few for yourself, Butterfinger Balls deliver the perfect blend of texture and flavor in every single bite.
Ingredients You’ll Need
The magic of Butterfinger Balls is in their simplicity—each ingredient truly brings something special to the table, from crunch to creaminess to that signature candy bar flavor. Here’s what you’ll need and why it matters:
- Nutter Butter cookies (16 oz package, crushed): These peanut butter sandwich cookies form the rich, crumbly base and add a nutty depth that complements the Butterfinger candy.
- Cream cheese (8 oz package, softened): Cream cheese brings everything together with its creamy, slightly tangy goodness, making the mixture easy to shape and utterly delicious.
- Crushed Butterfinger candy bars (1 cup): The star of the show! Butterfinger bits add that irresistible crunch and signature peanut butter flavor throughout each ball.
- Semi-sweet or milk chocolate chips (12 oz): These melt into the perfect coating, giving the Butterfinger Balls a glossy, chocolatey finish.
- Coconut oil or shortening (1 tablespoon, optional): A touch of this helps the chocolate stay smooth and easy to dip, resulting in a beautifully set shell.
- Additional crushed Butterfinger (optional, for topping): Sprinkle on top for extra crunch and a show-stopping presentation.
How to Make Butterfinger Balls
Step 1: Mix the Base
Start by combining the crushed Nutter Butter cookies, softened cream cheese, and crushed Butterfinger candy bars in a large mixing bowl. Grab a sturdy spatula or use clean hands—this is where the magic happens! You want everything fully incorporated and smooth, so there are no dry spots or lumps. The mixture should be thick and a little sticky, perfect for shaping into balls.
Step 2: Shape the Balls
With your dough ready, use a tablespoon or small cookie scoop to portion the mixture. Roll each scoop gently between your palms to form 1-inch balls. Place them in neat rows on a parchment-lined baking sheet. This step is a little messy but so satisfying, and the anticipation of tasting the finished Butterfinger Balls makes it all worthwhile!
Step 3: Chill Until Firm
Slide your tray of balls into the refrigerator or freezer for at least 30 minutes. This quick chill firms them up, making them easier to dip in chocolate later. Don’t skip this step—if the balls are too soft, they might fall apart during coating.
Step 4: Melt the Chocolate
While your Butterfinger Balls are chilling, melt the chocolate chips in a microwave-safe bowl. Heat in 30-second bursts, stirring after each, until smooth and glossy. If you’re using coconut oil or shortening, stir it in now for that professional, shiny finish. The key is silky, dippable chocolate that clings perfectly to each ball.
Step 5: Dip and Decorate
Working quickly, dip each cold Butterfinger Ball into the melted chocolate, making sure it’s fully coated. Let any excess drip off, then return the ball to the parchment-lined sheet. If you’re feeling fancy, shower the tops with extra crushed Butterfinger before the chocolate sets. Once all your balls are coated and decorated, pop the tray back in the fridge until the chocolate shell is set and snappy.
How to Serve Butterfinger Balls

Garnishes
A little garnish goes a long way to make your Butterfinger Balls look truly irresistible! A sprinkle of extra crushed Butterfinger on top adds color, crunch, and a visual cue to what’s inside. For a festive touch, you could also drizzle with some melted white chocolate or scatter a few colorful sprinkles if you’re making them for a special occasion.
Side Dishes
These sweet treats pair wonderfully with a scoop of vanilla ice cream or a small bowl of fresh strawberries for a balanced dessert plate. If you’re serving Butterfinger Balls at a party, arrange them alongside other bite-sized desserts like brownie bites or mini cheesecakes for a crowd-pleasing dessert buffet.
Creative Ways to Present
Presentation is half the fun! Try piling Butterfinger Balls high on a tiered cake stand or nestling them in colorful cupcake liners for an easy, grab-and-go option. For gift-giving, tuck a few into cellophane bags tied with ribbon. At holiday time, arrange them in a decorative tin lined with parchment for a homemade treat everyone will adore.
Make Ahead and Storage
Storing Leftovers
Butterfinger Balls keep beautifully in the fridge. Store them in an airtight container, layered with parchment or wax paper to prevent sticking. They’ll stay fresh and delicious for up to one week—if they last that long!
Freezing
If you want to make a big batch ahead of time, Butterfinger Balls freeze like a dream. Simply place them in a single layer on a baking sheet to freeze solid, then transfer to a freezer-safe container or zip-top bag. They’ll keep their flavor and texture for up to three months. Thaw in the fridge overnight before serving.
Reheating
These treats are meant to be enjoyed chilled or at room temperature, so there’s no need for reheating. If you like a softer bite, let them sit out at room temperature for 10 to 15 minutes before serving. The chocolate shell will stay firm, but the inside gets wonderfully creamy.
FAQs
Can I use a different cookie instead of Nutter Butters?
Absolutely! Graham crackers or Oreos are popular swaps. Each will give your Butterfinger Balls a unique twist, so feel free to experiment with your favorite flavors.
Do I need to use cream cheese, or is there a substitute?
Cream cheese is what gives these balls their creamy texture and helps the mixture bind. If you need a substitute, try mascarpone or a thick Greek yogurt, but the taste and texture will change slightly.
How do I crush Butterfinger candy bars without making a mess?
The easiest way is to place the candy bars in a zip-top bag and use a rolling pin or meat mallet to gently crush them. This keeps crumbs contained and makes cleanup a breeze.
Can I make Butterfinger Balls ahead for a party?
Definitely! They’re perfect for making a day or two in advance. Just keep them chilled until you’re ready to serve, and they’ll be a hit at any event.
Are Butterfinger Balls gluten-free?
As written, this recipe uses Nutter Butter cookies, which contain gluten. For a gluten-free version, substitute with your favorite gluten-free sandwich cookies and double-check all other ingredients.
Final Thoughts
There’s just something magical about Butterfinger Balls—every bite is a mix of creamy, crunchy, chocolatey, and peanut-buttery bliss. If you’re looking for a dessert that’s easy to make but impossible to resist, give these a try. They’re sure to earn a spot in your regular treat rotation. Happy snacking!
Print
Butterfinger Balls Recipe
- Prep Time: 25 minutes
- Cook Time: 0 minutes
- Total Time: 25 minutes
- Yield: 24 balls 1x
- Category: Dessert
- Method: No-Bake
- Cuisine: American
- Diet: Vegetarian
Description
Butterfinger Balls are a delightful no-bake dessert featuring a creamy mixture of crushed Nutter Butter cookies, cream cheese, and Butterfinger candy bars, all coated in smooth melted chocolate and topped with extra candy crunch. Perfect for parties or a sweet treat, these bite-sized truffles combine rich chocolate and crunchy candy for a deliciously indulgent flavor.
Ingredients
Base Mixture
- 1 (16 oz) package Nutter Butter cookies, crushed
- 1 (8 oz) package cream cheese, softened
- 1 cup crushed Butterfinger candy bars
Coating
- 12 oz semi-sweet or milk chocolate chips
- 1 tablespoon coconut oil or shortening (optional, for smoother chocolate)
Topping (Optional)
- Additional crushed Butterfinger candy bars for topping
Instructions
- Prepare the Mixture: In a large mixing bowl, combine the crushed Nutter Butter cookies, softened cream cheese, and crushed Butterfinger candy bars. Mix thoroughly until the mixture is well combined and smooth.
- Form the Balls: Roll the mixture into 1-inch diameter balls using your hands. Place the balls on a parchment-lined baking sheet, ensuring they are evenly spaced to avoid sticking.
- Chill the Balls: Refrigerate or freeze the rolled balls for at least 30 minutes, or until they become firm enough to handle for dipping.
- Melt the Chocolate: While chilling, melt the chocolate chips in a microwave-safe bowl by heating in 30-second intervals. Stir well between each interval until the chocolate melts completely and becomes smooth. Stir in coconut oil or shortening if using, to achieve a glossy finish.
- Dip the Balls: Using a fork or dipping tool, coat each chilled ball completely with the melted chocolate. Place the coated balls back onto the parchment-lined baking sheet.
- Add Topping: Immediately sprinkle additional crushed Butterfinger candy bars over the chocolate-coated balls for an extra crunch and decorative touch, if desired.
- Final Chill: Return the coated balls to the refrigerator to chill again until the chocolate coating is fully set.
- Serve: Once set, serve the Butterfinger Balls chilled or at room temperature for a delicious and easy sweet snack.
Notes
- Store the Butterfinger Balls in an airtight container in the refrigerator for up to one week.
- For longer storage, you can freeze the balls for several weeks.
- You may substitute Nutter Butter cookies with graham crackers or Oreos to experiment with different flavor bases.
- If coconut oil or shortening is not available, the chocolate can be melted and used without it, though texture may vary slightly.
Nutrition
- Serving Size: 1 ball
- Calories: 160
- Sugar: 14g
- Sodium: 85mg
- Fat: 10g
- Saturated Fat: 5g
- Unsaturated Fat: 4g
- Trans Fat: 0g
- Carbohydrates: 17g
- Fiber: 1g
- Protein: 2g
- Cholesterol: 10mg