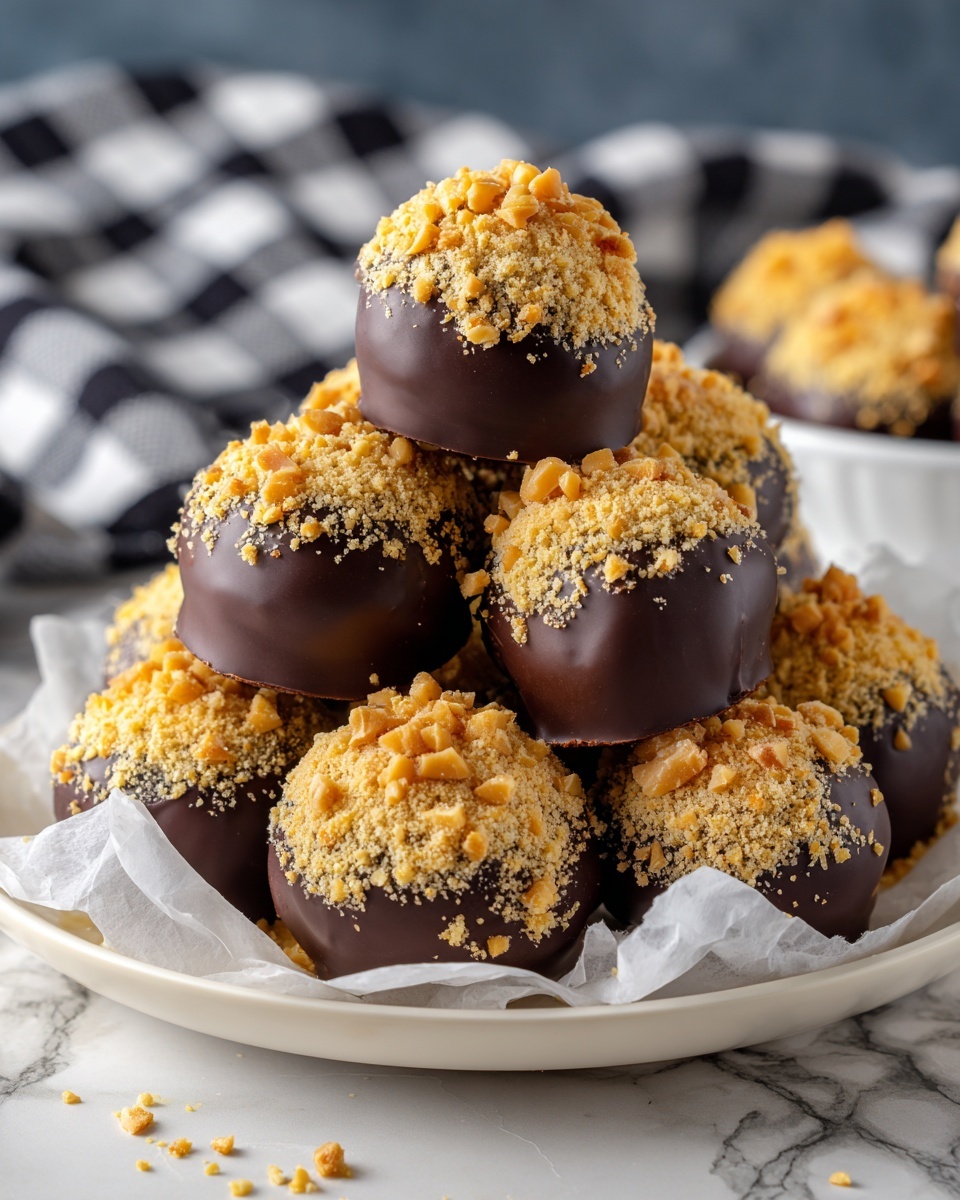
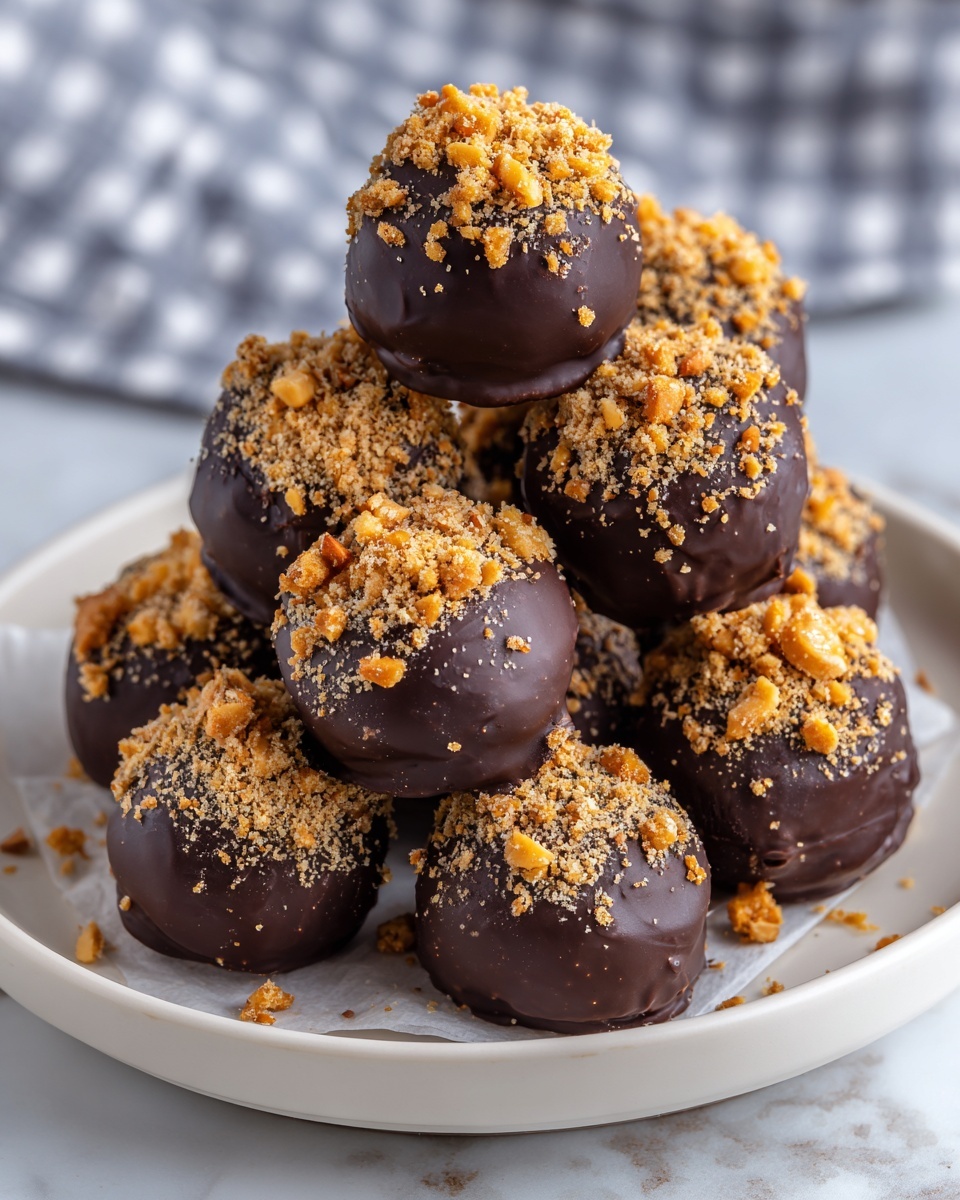
If you have a sweet tooth that craves something crunchy, creamy, and utterly addictive, this Butterfinger Balls Recipe is about to become your new favorite go-to treat. These delightful bite-sized candies blend the rich creaminess of peanut butter with the irresistible crunch of Butterfinger candy bars, creating a texture that’s just as playful as it is decadent. Whether dipped in luscious chocolate or enjoyed in their natural form, these Butterfinger balls carry a perfect balance of flavors that make them impossible to stop eating. Trust me, once you try this recipe, it’ll be your secret weapon for parties, gifts, or anytime you want a quick indulgence that feels homemade and special.
Ingredients You’ll Need
Don’t let the simplicity of these ingredients fool you. Each one plays a crucial role in building the rich texture, balanced sweetness, and unmistakable flavor of this Butterfinger Balls Recipe. From the creamy peanut butter that binds everything together to the crispy Butterfinger pieces that add a satisfying crunch, everything is essential.
- Creamy peanut butter: The smooth base that adds richness and helps hold the mixture.
- Unsalted butter, softened: Adds creaminess and enhances the overall texture.
- Powdered sugar: Sweetens and gives the mixture structure, ensuring it holds its shape.
- Vanilla extract: Brings a warm, fragrant note to brighten the flavors.
- Pinch of salt: Balances the sweetness and intensifies the peanut butter taste.
- Butterfinger candy bars, finely crushed: The star ingredient that provides crunch and that iconic butterscotch-peanut butter flavor.
- Semisweet or milk chocolate, chopped (optional): For coating the balls, adding a silky finish and extra indulgence.
How to Make Butterfinger Balls Recipe
Step 1: Prepare the Peanut Butter Mixture
Start by combining the creamy peanut butter, softened unsalted butter, powdered sugar, vanilla extract, and a pinch of salt in a mixing bowl. Use an electric mixer for an easy, quick blend or mix by hand until everything is silky smooth and well incorporated. This base is where all the magic begins, creating that luscious, sweet foundation your Butterfinger Balls will rest on.
Step 2: Incorporate the Butterfinger Bars
Next, gently fold in the finely crushed Butterfinger candy bars. This step is crucial because these crispy bits add both texture and the signature flavor that will elevate your bite-sized treats. Make sure the crushed pieces are evenly distributed so that every ball packs that satisfying crunch.
Step 3: Form the Balls
Line a baking sheet with parchment or wax paper—this keeps things neat and makes cleanup a breeze. Scoop out tablespoon-sized portions of the peanut butter mixture and roll them between your palms into smooth, round balls. Place each one carefully on the prepared sheet. This part is fun because you get to play with texture and size—and feel like a candy-making pro!
Step 4: Dip in Chocolate (Optional)
If you want to take these Butterfinger balls to the next level, melt your chopped chocolate over low heat on the stove, stirring until glossy and smooth, or use short intervals in the microwave with stirring to avoid burning. Using a fork or dipping tool, coat each ball completely in the melted chocolate, tap off any excess, and set them back on the baking sheet. This step adds a luxurious finishing touch that turns these bites into elegant little desserts.
Step 5: Chill and Set
Pop your tray of Butterfinger balls into the refrigerator for about 30 minutes. This chilling time lets the chocolate harden if you dipped them, while the peanut butter mixture firms up too, ensuring they hold their shape perfectly when served.
Step 6: Serve and Store
Once chilled and set, these Butterfinger Balls are ready to enjoy! They’re also easy to store—transfer them into an airtight container and keep refrigerated. They’ll stay fresh for up to a week, making them a convenient, crowd-pleasing treat you can whip out whenever the craving strikes.
How to Serve Butterfinger Balls Recipe
Garnishes
While these balls are scrumptious just as they are, you can sprinkle a little extra fun on top. Consider dusting lightly with crushed Butterfinger pieces or decorating with a drizzle of contrasting white chocolate. A pinch of sea salt on the chocolate coating adds an addictive salty-sweet combo that keeps the flavors vibrant and exciting.
Side Dishes
Butterfinger Balls shine as a delightful sweet nibble alongside a hot cup of coffee or creamy hot chocolate. They also pair beautifully with simple vanilla ice cream or fresh fruit to create a balanced dessert plate. Whatever you choose, they bring a nostalgic, homemade charm that guests will love.
Creative Ways to Present
Presentation can make even a simple recipe feel special. Try arranging these Butterfinger Balls in mini cupcake liners or on a tiered dessert tray for parties. Wrapping individual balls in colorful cellophane tied with a ribbon makes a charming edible gift that’s sure to impress friends and family. The playful, bite-sized nature of this recipe invites creativity, so have fun with your serving style!
Make Ahead and Storage
Storing Leftovers
Your Butterfinger Balls keep wonderfully in the refrigerator for up to a week when stored in an airtight container. This means you can make them ahead of time and enjoy the convenience of having a ready-made treat whenever you want, without losing any of their delicious texture or flavor.
Freezing
For longer storage, freeze the Butterfinger Balls on a tray until firm, then transfer them to a freezer-safe container or bag. They will keep well for up to two months. When you’re ready for a snack, just thaw them in the refrigerator overnight—perfect for planning ahead for celebrations or cravings.
Reheating
Since these are no-bake treats, reheating is hardly necessary. However, if you prefer your chocolate coating a bit softer, simply let the balls sit at room temperature for 10-15 minutes before serving to bring out that perfect melt-in-your-mouth quality without melting them completely.
FAQs
Can I use crunchy peanut butter instead of creamy?
You can, but creamy peanut butter helps achieve a smoother mixture and fudgier texture. Using crunchy peanut butter will add extra texture but might make the balls a bit crumbly.
Are Butterfinger Bars essential, or can I substitute another candy?
The Butterfinger candy bars give this recipe its signature flavor and crunch. While you can try other crunchy candy bars, the taste will definitely differ—so if you want that classic Butterfinger Balls Recipe experience, stick to the original.
What chocolate works best for dipping?
Semisweet or milk chocolate are both excellent choices. Semisweet offers a nice balance to the sweetness, while milk chocolate adds creaminess. Choose based on your personal preference or even mix them for a unique twist.
Can I skip the chocolate coating? Will the balls hold together?
Yes! The chocolate coating is optional. The balls will hold together just fine without it, but chocolate adds a lovely finish and extra decadence if you’re in the mood for it.
How can I make the Butterfinger balls less sweet?
Reducing powdered sugar too much could affect the texture, but you might try using natural peanut butter with no added sugar or balancing sweetness by using dark chocolate for dipping. The pinch of salt also helps keep flavors from becoming overwhelming.
Final Thoughts
There’s just something incredibly satisfying about making and sharing these Butterfinger Balls Recipe bites. They’re easy, fun, and deliver that perfect combination of creamy peanut butter and crunchy candy bar that feels comforting and a little bit indulgent all at once. Whether you’re surprising friends, planning a party snack, or just treating yourself, these Butterfinger Balls will quickly become a beloved staple in your dessert rotation. Give them a try—you’ll be glad you did!
Print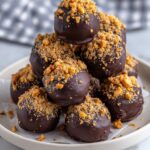
Butterfinger Balls Recipe
- Prep Time: 15 minutes
- Cook Time: 0 minutes
- Total Time: 15 minutes plus 30 minutes chilling
- Yield: 20 servings 1x
- Category: No-Cook
- Method: No-Cook
- Cuisine: American
Description
Butterfinger Balls are a delightful no-bake treat featuring creamy peanut butter mixed with crushed Butterfinger candy bars and powdered sugar, optionally dipped in rich semisweet or milk chocolate. These bite-sized snacks are perfect for parties, dessert tables, or anytime you crave a sweet, crunchy, peanut buttery indulgence.
Ingredients
Peanut Butter Mixture
- 1 cup creamy peanut butter
- 1/4 cup unsalted butter, softened
- 2 cups powdered sugar
- 1 teaspoon vanilla extract
- Pinch of salt
Add-ins
- 6 Butterfinger candy bars, finely crushed
Chocolate Coating (Optional)
- 12 ounces semisweet or milk chocolate, chopped
Instructions
- Prepare the Peanut Butter Mixture: In a mixing bowl, combine the creamy peanut butter, softened butter, powdered sugar, vanilla extract, and a pinch of salt. Mix thoroughly until smooth and well incorporated using either an electric mixer or by hand.
- Incorporate the Butterfinger Bars: Gently fold in the finely crushed Butterfinger candy bars, ensuring they are evenly distributed throughout the peanut butter mixture.
- Form the Balls: Line a baking sheet with parchment or wax paper. Using a tablespoon-sized scoop, form the peanut butter mixture into balls and place them on the prepared baking sheet.
- Dip in Chocolate (Optional): Melt the semisweet or milk chocolate in a small saucepan over low heat while stirring constantly, or melt it in the microwave in short intervals, stirring between each session. Dip each ball into the melted chocolate using a fork or dipping tool to coat them evenly. Tap off any excess chocolate and return them to the baking sheet.
- Chill and Set: Refrigerate the Butterfinger Balls for about 30 minutes or until the chocolate coating sets and the balls firm up.
- Serve and Store: Once set, transfer the Butterfinger Balls to an airtight container and refrigerate for up to one week to keep fresh.
Notes
- For a richer flavor, use natural peanut butter with no added sugar.
- The chocolate coating is optional but adds a delicious finish and texture contrast.
- Make sure to finely crush the Butterfinger bars to avoid large chunks that make rolling difficult.
- Store in an airtight container in the refrigerator to maintain freshness.
- These treats are best enjoyed within a week for optimal flavor and texture.