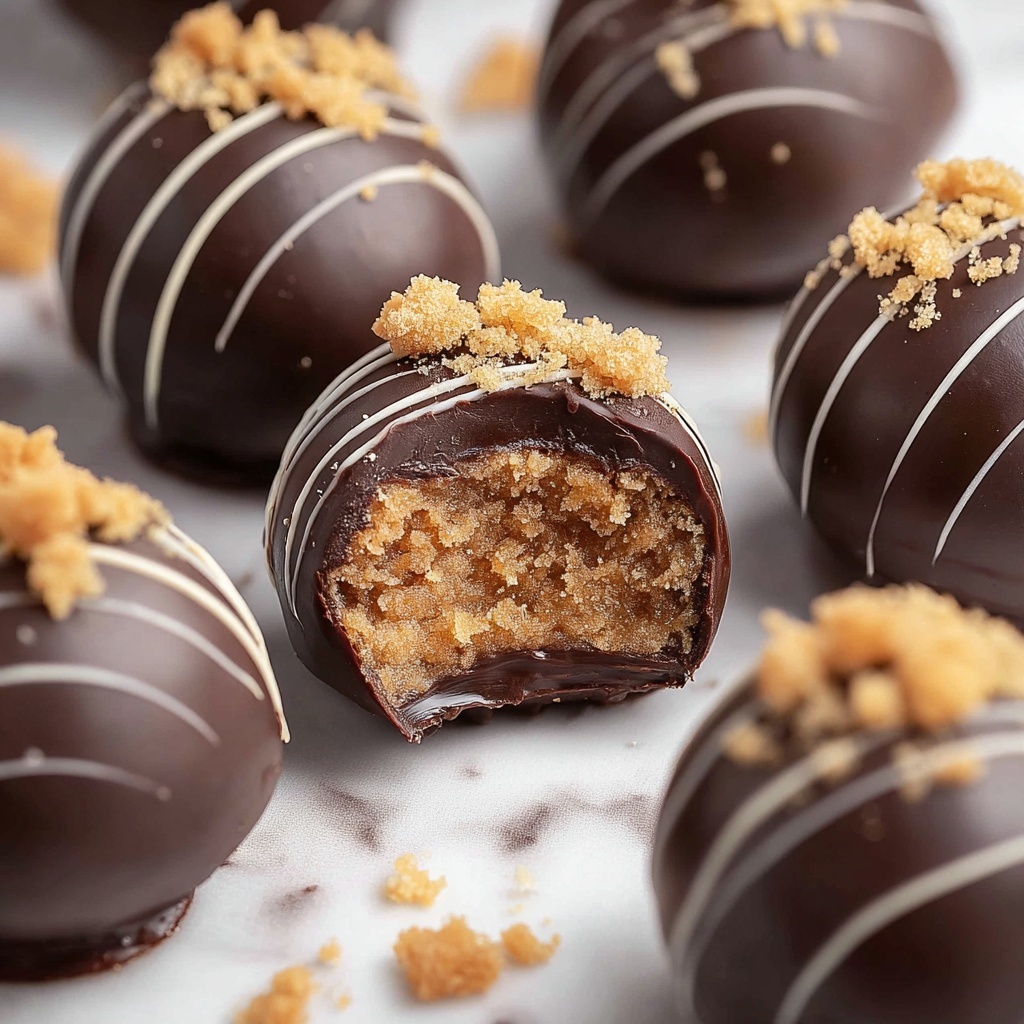
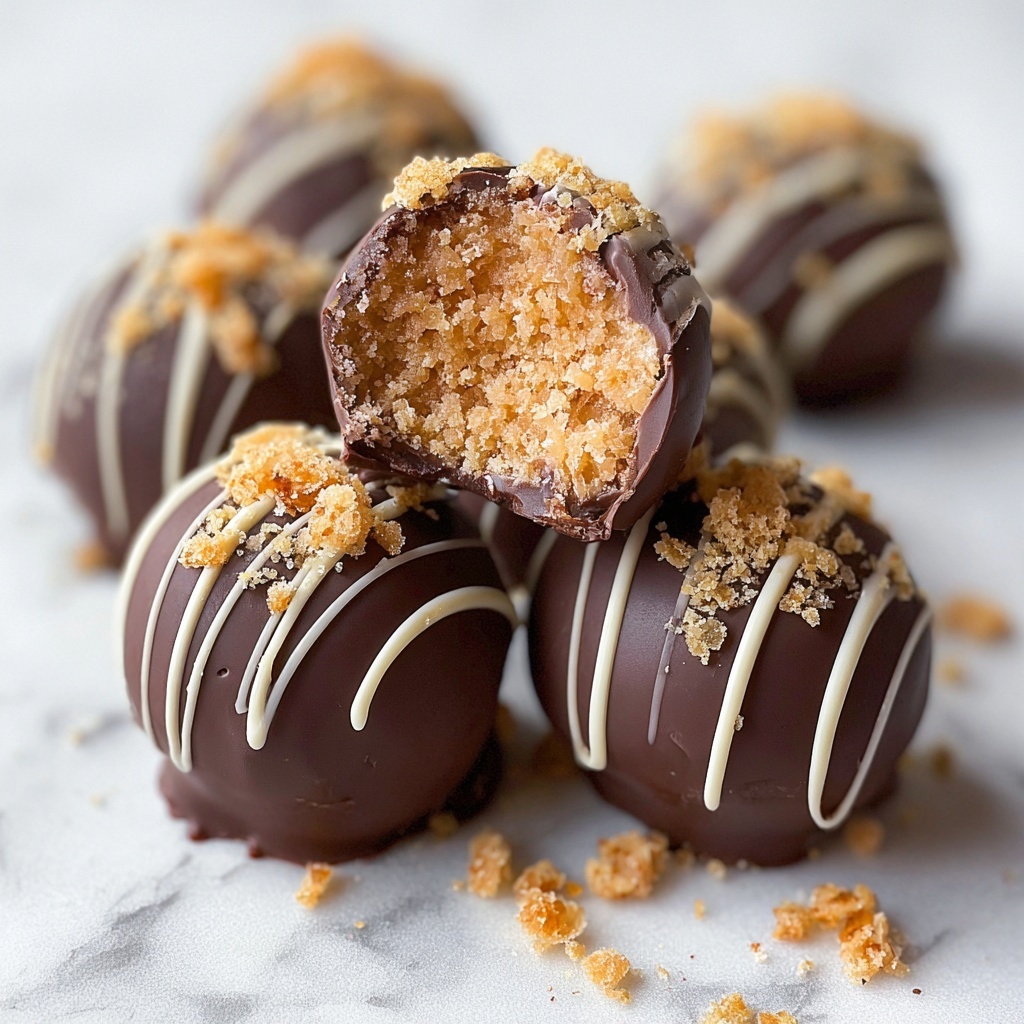
If you have a serious sweet tooth and a craving for something rich, crunchy, and absolutely irresistible, this Butterfinger Balls Recipe is going to become your new best friend. These little bites pack the perfect combination of creamy peanut butter, buttery graham cracker crumbs, and that unmistakable crunch and flavor of Butterfinger bars, all wrapped in a smooth chocolate coating. They are unbelievably easy to make, impressive to serve, and absolutely delightful to eat. Whether you’re preparing for a party, a holiday treat, or just want to indulge in a homemade candy that feels special, this recipe checks every box and will have you hooked from the very first bite.
Ingredients You’ll Need
This Butterfinger Balls Recipe keeps it sweet and simple with a handful of ingredients that work together beautifully. Each component plays a crucial role, from the buttery texture and crunch to that rich peanut buttery flavor and the final chocolatey finish.
- Powdered sugar: Adds just the right amount of sweetness and helps bind the mixture together for easy rolling.
- Graham cracker crumbs: Provide a buttery, slightly crunchy texture that balances out the peanut butter perfectly.
- Butterfinger bars, crushed: The star ingredient, delivering that unique crispy candy bar crunch and flavor in every bite.
- Butter, melted: Adds richness and moisture, making the mixture easy to shape.
- Crunchy peanut butter: Infuses a creamy, nutty taste essential for true Butterfinger Ball goodness.
- Chocolate almond bark or chocolate candy coating: Coats the balls in a luscious chocolate shell that hardens beautifully for that irresistible snap.
How to Make Butterfinger Balls Recipe
Step 1: Mix Ingredients
Grab a large bowl and combine the powdered sugar, graham cracker crumbs, crushed Butterfinger bars, melted butter, and crunchy peanut butter. Stir everything together until you have a uniform, well-mixed dough-like consistency. The mixture should be thick but malleable, ready to be shaped into little balls.
Step 2: Form Balls
Using your hands or a small cookie scoop, roll the mixture into 1-inch balls. Aim for uniform sizes so they’ll chill and coat in chocolate evenly. Place each ball on a baking sheet lined with parchment paper to prevent sticking and make cleanup a breeze.
Step 3: Chill
Pop the tray into the refrigerator for 30 minutes. Chilling is a key step here because it firms up the balls, making them easier to dip in chocolate without falling apart. Plus, it enhances their overall texture perfectly.
Step 4: Melt Chocolate
While your balls are chilling, melt the chocolate almond bark or candy coating according to the package instructions. Whether you opt for microwave or stovetop, be sure to melt it slowly and stir frequently so the chocolate stays smooth and glossy.
Step 5: Dip Balls
Once chilled, one at a time, dip each ball into the melted chocolate. Use a fork or dipping tool to fully coat the ball, then lift and gently tap off excess chocolate. Place the coated balls back onto the parchment paper-lined tray. This coating seals in the luscious flavors and provides a stunning chocolate shell.
Step 6: Set Chocolate
Allow the chocolate to set completely at room temperature or in the fridge. Once hardened, these Butterfinger Balls are ready to enjoy or package up as delightful gifts!
How to Serve Butterfinger Balls Recipe

Garnishes
Want to sprinkle a little extra magic on your Butterfinger Balls Recipe? Consider finely chopping extra Butterfinger bars for a crunchy topping or lightly dusting with cocoa powder or sea salt for a subtle contrast that highlights the rich chocolate flavor.
Side Dishes
While these balls are sweet and satisfying on their own, they pair wonderfully with a cold glass of milk or a hot cup of coffee. For a more decadent experience, serve them alongside vanilla ice cream or fresh berries to balance the richness.
Creative Ways to Present
For parties, arrange your Butterfinger Balls on a decorative platter lined with parchment or cupcake liners for easy picking. You can also skewer a few onto colorful sticks for candy kabobs, or dip them in white chocolate and drizzle with colored melts to match any holiday or celebration theme.
Make Ahead and Storage
Storing Leftovers
After enjoying your Butterfinger Balls, keep any leftovers in an airtight container in the refrigerator. They stay fresh and delicious for up to one week, which is perfect for nibbling over several days.
Freezing
If you want to save them longer, Butterfinger Balls freeze beautifully. Place them in a single layer on a baking sheet to flash freeze, then transfer to a freezer-safe container or bag. They’ll keep well for up to three months and thaw quickly when ready to enjoy.
Reheating
No need to reheat these treats since they taste best cold or at room temperature. If they get too firm from the fridge or freezer, just let them sit out for a few minutes to soften slightly before serving.
FAQs
Can I use creamy peanut butter instead of crunchy?
Definitely! Creamy peanut butter will give you a smoother texture, but the crunch from crunchy peanut butter adds an extra delightful bite. It’s all about what you prefer or have on hand.
What if I don’t have graham cracker crumbs?
You can substitute with crushed graham crackers made from scratch or even finely crushed digestive biscuits. They provide a similar buttery crunch and flavor that complements the other ingredients.
Can I use regular chocolate instead of almond bark?
Yes! Regular chocolate works just fine. Just be sure to temper it properly or add a little vegetable oil to smooth it out for dipping so you get that nice hard shell.
How long do Butterfinger Balls take to set?
Depending on room temperature or refrigeration, the chocolate coating usually sets in about 15 to 30 minutes. You can speed this up by placing them in the fridge.
Are Butterfinger Balls gluten-free?
Traditional graham crackers generally contain gluten, so if you need a gluten-free treat, look for certified gluten-free graham crackers or use an alternative gluten-free crumb base.
Final Thoughts
There is something purely joyous about creating and sharing homemade candies like this Butterfinger Balls Recipe. The blend of crunchy Butterfinger pieces, peanut butter richness, and silky chocolate coating creates a snack that’s both nostalgic and exciting. I encourage you to whip up a batch, share it with friends or family, and savor every delicious bite. You might just discover your new favorite sweet treat!
Print
Butterfinger Balls Recipe
- Prep Time: 15 minutes
- Cook Time: 0 minutes
- Total Time: 45 minutes
- Yield: 40 servings 1x
- Category: Dessert
- Method: No-Cook
- Cuisine: American
Description
These Butterfinger Balls are a delicious no-bake treat combining the crunch of crushed Butterfinger bars and graham cracker crumbs with creamy peanut butter, all coated in a smooth layer of chocolate. Perfect for parties or holiday gifting, they offer a delightful sweet and crunchy bite.
Ingredients
Main Ingredients
- 1 (16-oz) box powdered sugar
- 2½ cups graham cracker crumbs
- 5 (1.9-oz) Butterfinger bars, crushed
- 1¼ cups butter, melted
- 1½ cups crunchy peanut butter
Coating
- 1 (24-oz) package chocolate almond bark or your preferred chocolate candy coating
Instructions
- Mix Ingredients: In a large bowl, combine the powdered sugar, graham cracker crumbs, crushed Butterfinger bars, melted butter, and crunchy peanut butter. Stir well until all ingredients are fully incorporated into a uniform mixture.
- Form Balls: Roll the mixture into 1-inch diameter balls using your hands. Place each formed ball onto a baking sheet lined with parchment paper to prevent sticking.
- Chill: Refrigerate the balls for 30 minutes to allow them to firm up, making them easier to dip and handle.
- Melt Chocolate: Melt the chocolate almond bark or your preferred chocolate candy coating following the package instructions, ensuring smooth and even consistency for coating.
- Dip Balls: Dip each chilled ball into the melted chocolate, covering it evenly. Use a fork or dipping tool to remove excess chocolate and place the coated balls back onto parchment paper.
- Set Chocolate: Let the chocolate coating set completely at room temperature or in the refrigerator before serving or storing.
Notes
- Use parchment paper on the baking sheet to prevent sticking and ease cleanup.
- You can substitute crunchy peanut butter with smooth peanut butter for a different texture.
- Refrigerate coated balls to speed up the chocolate setting process.
- The mixture can be rolled larger or smaller according to your preference, but adjust chilling time accordingly.
- Store in an airtight container in the refrigerator for up to one week.