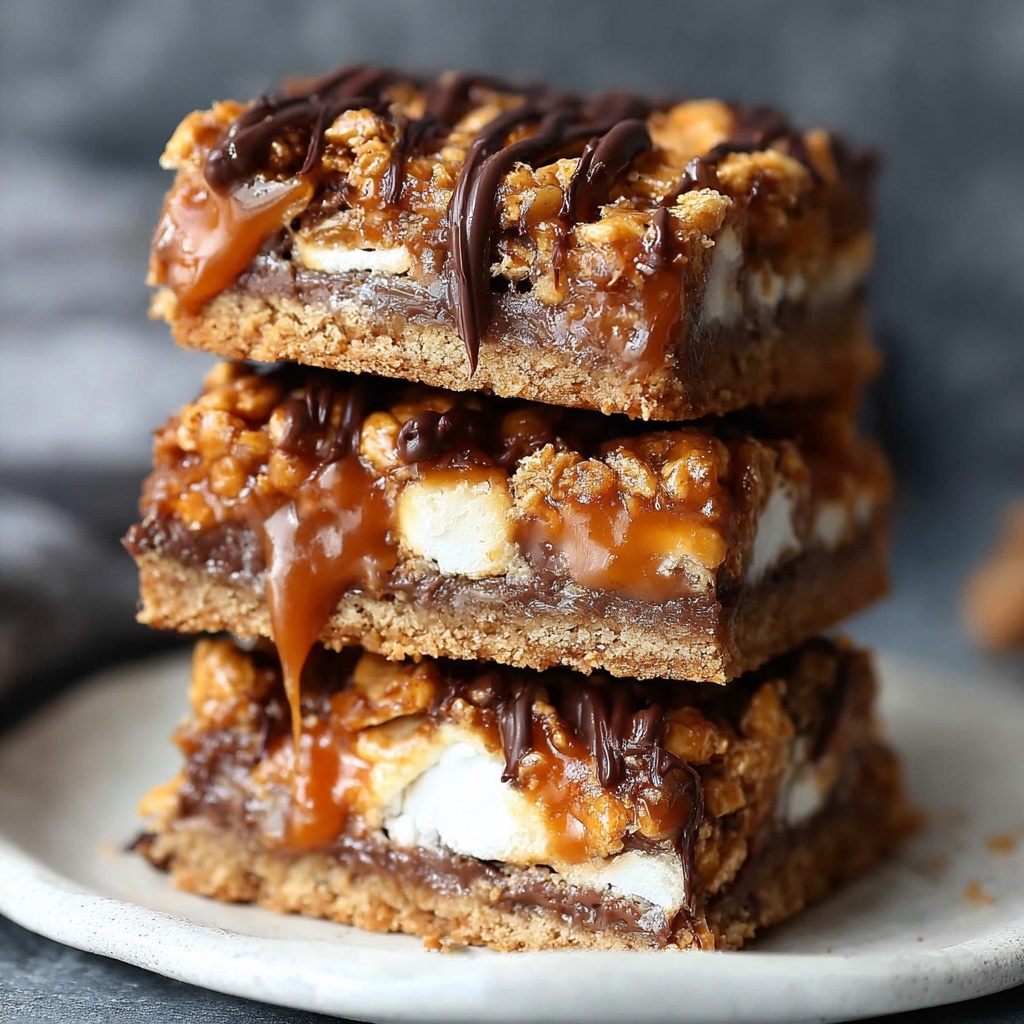
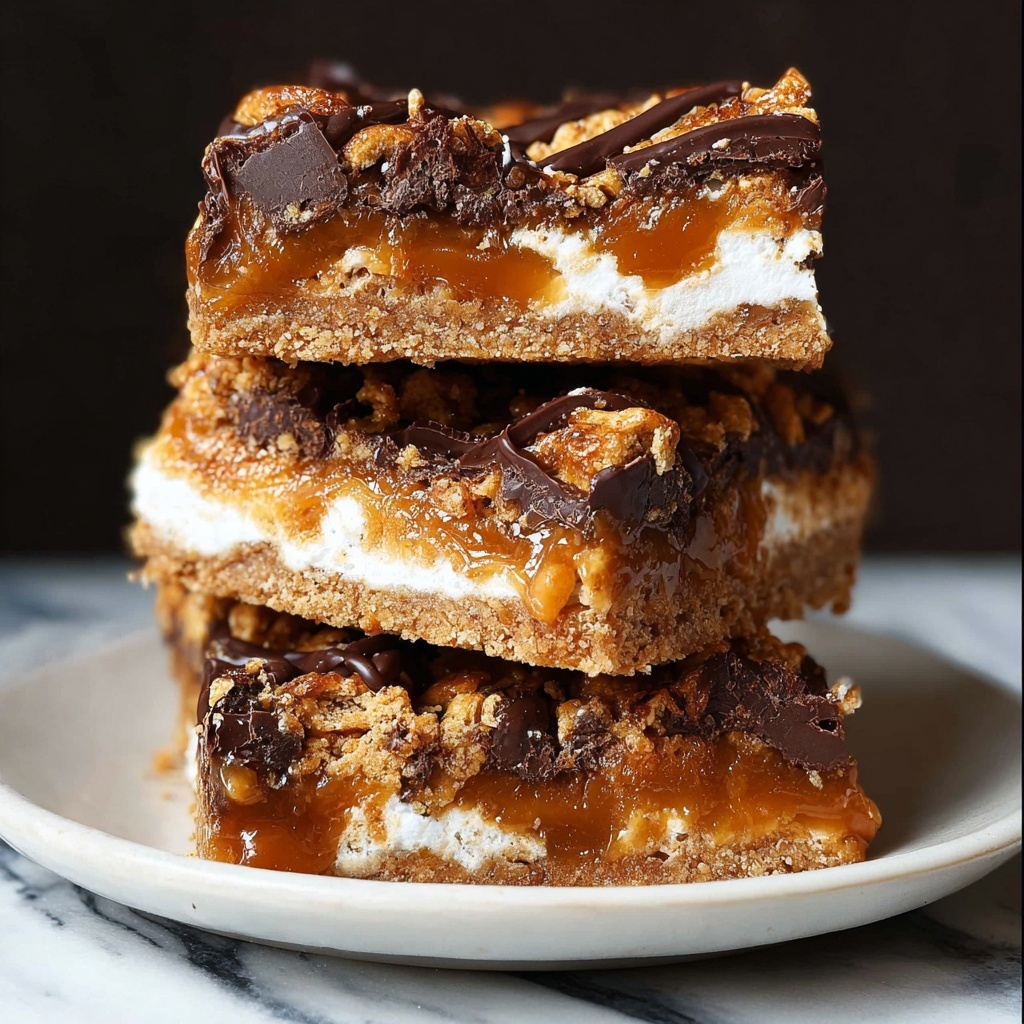
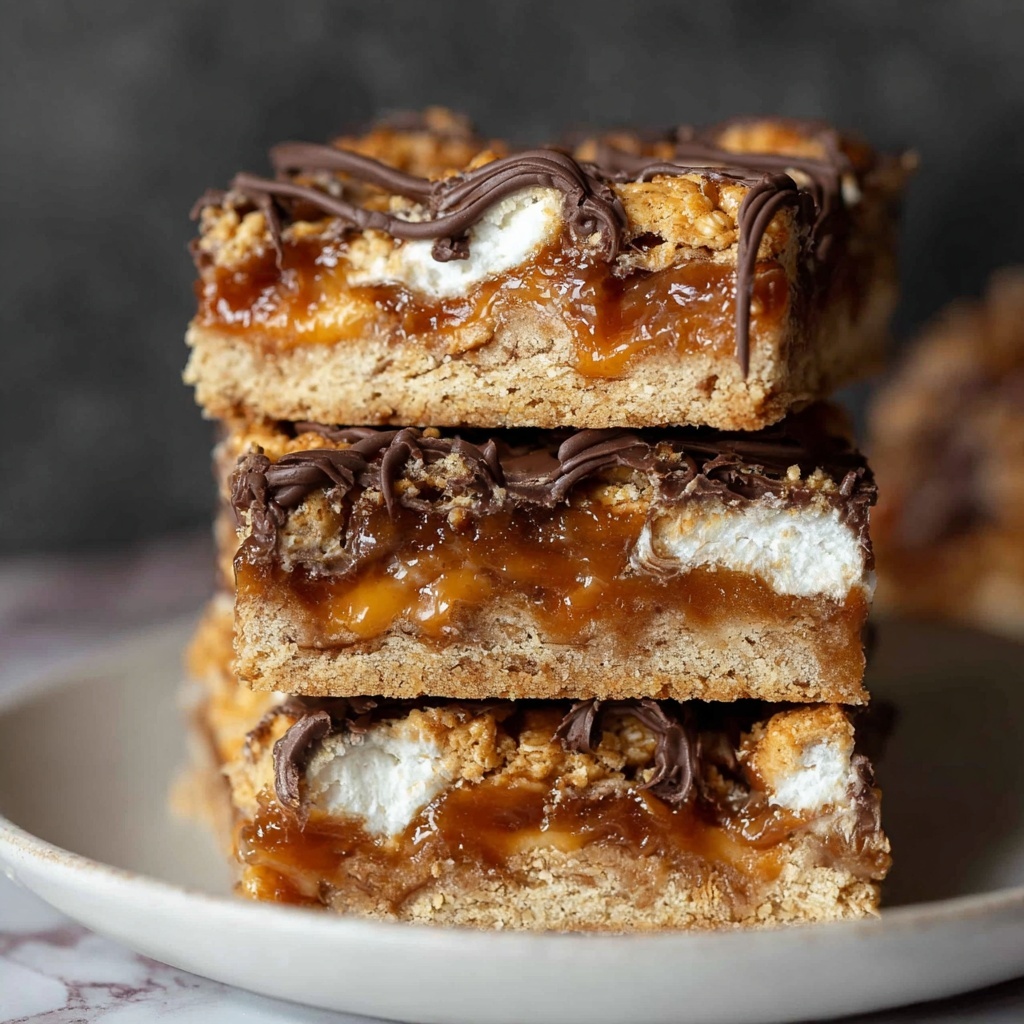
If you are on the lookout for a delightful treat that combines layers of crunch, chewiness, and rich chocolatey goodness, the Butterfinger Caramel Bars Recipe is your new best friend. These bars are the perfect marriage of graham crackers, marshmallows, gooey caramel, and the irresistible crunch of Butterfinger candy, all tied together with a luscious chocolate drizzle. Every bite delivers a sophisticated play of textures and flavors that feels like a cozy celebration in your mouth. Whether you’re making a dessert for a gathering or just treating yourself, this recipe will quickly become that go-to indulgence everyone raves about.
Ingredients You’ll Need
Gathering the right ingredients is half the fun and success of making these bars. Each item plays a vital role in balancing sweetness, texture, and flavor to create those unforgettable Butterfinger Caramel Bars.
- Graham crackers: These act as the crunchy, flavorful base that adds subtle honey notes and sturdy support for the toppings.
- Mini marshmallows: Their chewiness and melty texture add that nostalgic, gooey dimension everyone loves.
- Caramel bits: Essential for that luscious caramel layer, they melt perfectly to glue everything together with a rich buttery taste.
- Milk: Added to the caramel to create a creamy consistency that coats the marshmallows beautifully.
- Butterfinger Bites: The star ingredient offering that signature crispy peanut butter crunch packed throughout the bars.
- Semi-sweet chocolate: For the prettiest and most delicious finishing drizzle, adding a touch of bittersweet contrast.
How to Make Butterfinger Caramel Bars Recipe
Step 1: Prepare the Base
Start by lining a 9×9 baking pan with foil, ensuring there’s enough hanging over the edges for easy removal later. Give the foil a quick spritz of cooking spray so the bars won’t stick. Carefully fit the graham crackers at the bottom, breaking pieces where needed to create a solid, even layer. This creates a sturdy foundation that gives the bars structure and that beloved crunch.
Step 2: Add the Marshmallows
Evenly sprinkle mini marshmallows over the graham cracker base. They’ll melt slightly under the caramel, providing a chewy contrast that perfectly complements the sturdy crackers. This layer also helps the caramel stick better, forming a tender and sticky middle layer.
Step 3: Melt and Pour the Caramel
In a microwave-safe bowl, melt the caramel bits with the milk by heating for one minute, then stirring thoroughly. Continue in 30-second bursts until everything is silky smooth. Pour this luscious caramel evenly over the marshmallows, spreading gently so it covers every nook and cranny. It’s okay if the marshmallows soften a bit; this is what makes these bars decadently chewy.
Step 4: Add the Butterfinger Crunch
Sprinkle the coarsely chopped Butterfinger Bites generously over the warm caramel layer. Press them gently into the mixture so they stick well without sinking. This step ensures each bar gets that signature crispy peanut buttery surprise.
Step 5: Drizzle with Chocolate
Melt the semi-sweet chocolate in short bursts in the microwave, stirring frequently until just smooth. Use a spoon or piping bag to drizzle the chocolate over the top of the bars in an artistic zigzag pattern. This chocolate drizzle adds both richness and a beautiful finishing touch.
Step 6: Chill to Set
Pop the entire pan into the refrigerator for about an hour, or until the bars have fully set. Chilling firm ups the caramel and chocolate so you can slice perfect squares without any messy melting.
Step 7: Slice and Serve
Once chilled, carefully lift the foil edges to remove the slab from the pan. Cut into 12 bars with a sharp knife, wiping the blade between cuts for clean edges. Now, you’re all set to enjoy these irresistible Butterfinger Caramel Bars!
How to Serve Butterfinger Caramel Bars Recipe
Garnishes
While these bars are stunning on their own, consider adding a sprinkle of flaky sea salt on top to enhance the caramel’s depth. A light dusting of powdered sugar can also add a festive touch and a hint of extra sweetness without overpowering the candy flavors.
Side Dishes
Butterfinger Caramel Bars pair beautifully with a scoop of vanilla ice cream or a dollop of whipped cream, creating a full dessert experience. For beverages, a rich cup of coffee or a cold glass of milk complements the sweet, crunchy bars perfectly.
Creative Ways to Present
Try stacking the bars on a pretty dessert platter with fresh berries scattered around for a pop of color. Wrapping individual bars in parchment paper tied with twine makes them delightful homemade gifts or party favors that everyone will adore.
Make Ahead and Storage
Storing Leftovers
Keep your Butterfinger Caramel Bars fresh by storing them in an airtight container at room temperature. They will stay delicious for up to 3 days, maintaining their sticky, crunchy texture without drying out.
Freezing
If you want to enjoy these bars later, freeze them by wrapping each bar tightly in plastic wrap and placing them in a freezer-safe container. They freeze well for up to a month, so you can have a sweet treat ready whenever the craving strikes.
Reheating
For a cozy dessert, gently warm a bar in the microwave for about 10 seconds to soften the caramel and chocolate without melting the Butterfinger chunk completely. This gives you that fresh-baked feel anytime you want.
FAQs
Can I use a different type of candy instead of Butterfinger?
Absolutely! While Butterfinger’s crispy peanut butter center is iconic for this recipe, you can experiment with chopped Snickers, Heath bars, or even your favorite peanut butter cups for a unique twist.
What if I don’t have caramel bits? Can I use caramel sauce?
You can substitute with caramel sauce, but keep in mind that it’s usually thinner. Reduce some milk or adjust the quantity so the mixture isn’t too runny and can still coat the marshmallows evenly.
Is it necessary to line the pan with foil?
Lining the pan with foil is a game-changer for easy removal and clean slicing. It helps you lift the entire dessert out in one piece, making serving a breeze and keeping your bars neat and tidy.
Why do I need to chill the bars before cutting?
Chilling firms up the caramel and chocolate drizzle, helping you slice perfect bars without sticky mess or crumbling edges. Cutting them warm usually results in gooey edges and uneven pieces.
Can this recipe be made gluten-free?
Yes, simply swap the graham crackers for gluten-free graham cracker alternatives. Just ensure your other ingredients don’t contain gluten for a safe and delicious version of these bars.
Final Thoughts
This Butterfinger Caramel Bars Recipe is a little slice of magic, blending crunch, chew, sweetness, and chocolate in a way that’s hard to resist. Once you make it, you’ll want to share it with friends and family as your secret weapon for special occasions or just everyday indulgence. Give it a try soon and watch how this joyful treat becomes an instant classic in your dessert repertoire.
Print
Butterfinger Caramel Bars Recipe
- Prep Time: 10 minutes
- Cook Time: 1 minute (microwave heating only)
- Total Time: 1 hour 11 minutes
- Yield: 12 servings 1x
- Category: Dessert
- Method: No-Cook
- Cuisine: American
Description
These Butterfinger Caramel Bars are a deliciously indulgent treat combining crispy graham crackers, gooey marshmallows, smooth caramel, and crunchy Butterfinger bites, all topped with a drizzling of melted semi-sweet chocolate. Perfect as a no-bake dessert or snack, they come together quickly and easily, making them a crowd-pleaser for parties or family gatherings.
Ingredients
Base Layer
- 6 1/2 graham crackers
- 2 cups mini marshmallows
Caramel Layer
- 1 (11 oz) bag Caramel bits
- 2 Tbsp milk
Toppings
- 1 (10 oz) bag Butterfinger Bites, coarsely chopped
- 2 oz semi-sweet chocolate (for drizzle)
Instructions
- Prepare the Pan: Line a 9×9 inch baking pan with foil, letting the foil hang over the edges for easy removal. Then spray the foil with cooking spray to prevent sticking.
- Create the Base Layer: Arrange the graham crackers evenly on the bottom of the pan, breaking them as needed to fit snugly. Sprinkle the mini marshmallows evenly over the graham crackers.
- Melt Caramel Mixture: In a microwave-safe bowl, combine the caramel bits and milk. Heat on high for 1 minute, stir, and then continue heating in 30-second intervals, stirring after each, until completely melted and smooth.
- Combine Caramel and Marshmallows: Pour the melted caramel mixture evenly over the marshmallows. Gently spread it out to coat everything well. The marshmallows will soften slightly, which is expected—ensure the caramel coats the base so it binds together.
- Add Butterfinger Topping: Sprinkle the coarsely chopped Butterfinger Bites over the caramel-coated marshmallows, pressing them lightly to embed them into the sticky mixture.
- Melt Chocolate Drizzle: Melt the semi-sweet chocolate in a microwave-safe bowl on high power in 30-second increments, stirring between intervals until smooth and fully melted.
- Apply Chocolate Drizzle: Drizzle the melted chocolate evenly over the Butterfinger topping using a spoon or piping technique for an attractive finish.
- Chill and Set: Place the pan in the refrigerator and chill for about 1 hour or until the bars are fully set and firm to the touch.
- Serve: Once set, remove the bars from the pan using the foil overhang. Cut into 12 bars and serve.
Notes
- Use a microwave-safe bowl to melt caramel and chocolate to avoid burns or overheating.
- Pressing the Butterfinger candies into the caramel mix helps them stick better and prevents them from falling off when cutting.
- For easier cutting, warm the knife slightly before slicing through the bars.
- Store leftover bars in an airtight container in the refrigerator for up to 5 days.
- Substitute semi-sweet chocolate with milk or dark chocolate based on preference.