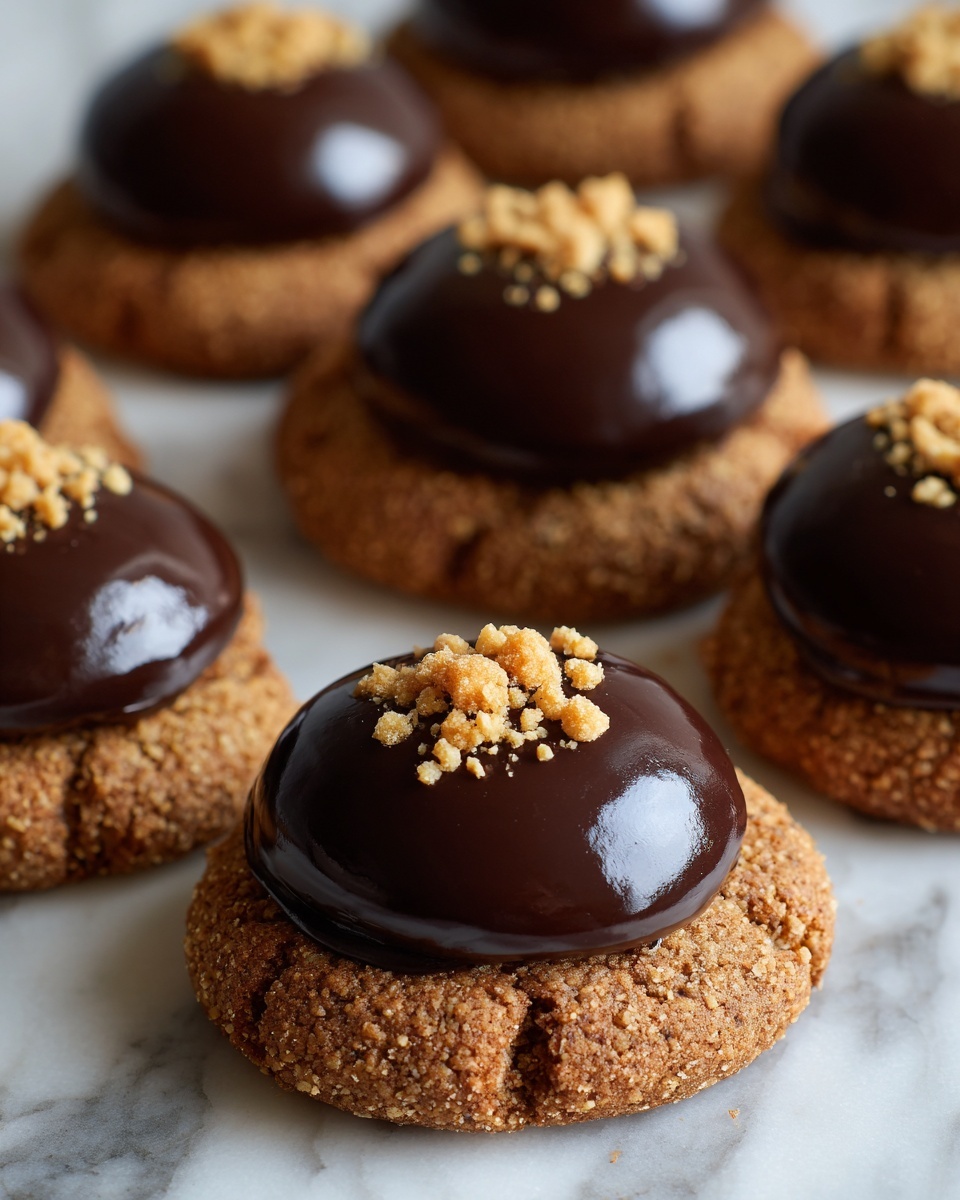
If you adore the perfect balance of rich chocolate and nutty goodness in a cookie, you are absolutely going to love this Chocolate Hazelnut Thumbprint Cookies Recipe. These delightful treats feature a tender, buttery base with a luscious pocket of creamy hazelnut chocolate filling right at their center. Every bite is a harmonious blend of soft dough and indulgent spread that feels just like a warm hug from the inside out. Whether you’re baking for a holiday gathering or a simple afternoon treat, these cookies are guaranteed to become a beloved favorite in your recipe collection.

Ingredients You’ll Need
The magic of this Chocolate Hazelnut Thumbprint Cookies Recipe lies in its straightforward yet thoughtfully chosen ingredients. Each component plays a vital role, from creating tender dough to delivering that irresistible chocolate-hazelnut flavor and crunchy texture.
- All-purpose flour: Provides structure and a tender crumb for the cookie base.
- Unsalted butter: Adds richness and a melt-in-your-mouth texture when creamed with sugar.
- Granulated sugar: Sweetens the dough and helps with browning for a golden edge.
- Brown sugar: Boosts moisture and adds a deeper caramel-like flavor.
- Large egg yolk: Binds ingredients with its richness and adds a smooth texture.
- Vanilla extract: Enhances the overall sweetness and adds aromatic depth.
- Salt: Balances sweetness to bring out all the flavors beautifully.
- Hazelnut chocolate spread: Creates that luscious, ooey-gooey center that steals the show.
- Chopped toasted hazelnuts (optional): For a crunchy, nutty garnish that elevates both flavor and presentation.
How to Make Chocolate Hazelnut Thumbprint Cookies Recipe
Step 1: Prepare the Dough
Start by creaming the softened unsalted butter together with both granulated and brown sugars until the mixture is light, fluffy, and beautifully smooth. This step is key because it introduces air into your dough, making the cookies tender. Then, mix in the egg yolk and vanilla extract until everything is combined in one silky batter.
Step 2: Incorporate the Dry Ingredients
Whisk your all-purpose flour and salt in a separate bowl to blend them evenly. Gradually add this dry blend to your wet mixture, stirring just until a soft, pliable dough forms. It’s crucial not to overmix here, as overworking the dough will toughen the cookies. You want a dough that feels just right—soft but manageable.
Step 3: Chill the Dough
Wrap your dough tightly in plastic wrap and pop it in the refrigerator for at least 30 minutes. This chilling step helps prevent the cookies from spreading too much while baking and ensures that perfectly defined thumbprint wells for the filling remain intact. It’s a little patience that pays off big time.
Step 4: Shape the Cookies
Once chilled, roll the dough into one-inch balls with your hands, making each one nice and uniform. Gently press your thumb into the center of each ball to create a small well that will later hold the hazelnut chocolate spread—this is where the magic happens!
Step 5: Bake the Cookies
Arrange your dough balls on a parchment-lined baking sheet, spacing them evenly so they have room to bake beautifully. Bake in a preheated oven at 350°F (175°C) for about 10 to 12 minutes, or until the edges are just turning a delicate golden brown. They should still look soft in the center, perfect for filling.
Step 6: Add the Hazelnut Filling
As soon as the cookies come out of the oven, quickly fill each thumbprint with about a teaspoon of hazelnut chocolate spread. Then pop the cookies back in the oven for an additional 2 minutes. This melts the spread slightly, locking in that luscious flavor and creating a glossy, irresistible center.
Step 7: Cool and Garnish
Allow the cookies to cool completely on a wire rack before serving. If you want to add an extra touch, sprinkle chopped toasted hazelnuts on top of the filling while it’s still warm. This will add a lovely crunch and enhance the nutty flavor even further.
How to Serve Chocolate Hazelnut Thumbprint Cookies Recipe
Garnishes
A simple dusting of powdered sugar can add an elegant touch to your thumbprint cookies, but nothing beats the texture and flavor boost from chopped toasted hazelnuts sprinkled atop the filling. For a festive twist, try decorating with small chocolate shavings or a sprinkle of coarse sea salt to balance the sweetness.
Side Dishes
These cookies pair beautifully with a warm cup of coffee or a creamy latte, making them a perfect mid-morning or afternoon snack. If you’re serving for dessert, consider pairing them with a scoop of vanilla ice cream or a small bowl of fresh berries to brighten up the rich flavors.
Creative Ways to Present
Arrange these thumbprint cookies on a rustic wooden board or a pretty cake stand to highlight their homemade charm. You can also wrap them in cellophane bags tied with a colorful ribbon for thoughtful, edible gifts. For parties, place them alongside a selection of other small cookies for a festive cookie platter everyone will love.
Make Ahead and Storage
Storing Leftovers
Keep your leftover Chocolate Hazelnut Thumbprint Cookies Recipe in an airtight container at room temperature for up to 4 days. This helps maintain their soft texture and keeps the hazelnut filling from drying out too quickly.
Freezing
If you want to bake ahead, you can freeze the dough balls before baking. Simply place them on a tray to freeze individually, then transfer to a freezer bag for up to 3 months. Bake from frozen by adding a couple of extra minutes to your usual baking time. Alternatively, freeze baked cookies in an airtight container layered with parchment paper.
Reheating
To revive the warmth and softness of your cookies, reheat them in a low oven at 300°F (150°C) for about 5 minutes. This brings back the fresh-baked feeling and slightly melts the hazelnut spread once more for that perfect gooey center.
FAQs
Can I use a different nut butter or spread instead of hazelnut chocolate spread?
Absolutely! While hazelnut chocolate spread is the signature ingredient here, you can swap it for peanut butter, almond butter, or even a fruit jam. Just remember that each alternative will bring its unique flavor and texture, so choose what you love most.
Why do I need to chill the dough before baking?
Chilling the dough solidifies the fats and slows down spreading in the oven, which allows the thumbprint indentations to stay intact. This step also improves texture, making your cookies tender yet perfectly shaped for the filling.
Can I make these cookies gluten-free?
Yes, swapping all-purpose flour for a gluten-free flour blend that measures cup-for-cup can work well. Just be sure your blend contains xanthan gum or another binder for the best texture.
How do I prevent the cookies from spreading too much while baking?
Make sure your butter is properly softened but not melted before you cream it with sugar. Also, chilling your dough thoroughly helps the cookies keep their shape and prevents excessive spreading in the oven.
Are these cookies suitable for freezing after baking?
Definitely. Once baked and fully cooled, these thumbprint cookies freeze wonderfully. Just store them in an airtight container with parchment layers, and they’ll keep their flavor and texture for a few months.
Final Thoughts
Now that you’ve discovered the joy of baking this Chocolate Hazelnut Thumbprint Cookies Recipe, you’re ready to fill your kitchen with warm, nutty aromas and share delightful moments with friends and family. This recipe is as easy to make as it is delicious to eat, making it perfect for both new bakers and seasoned pros alike. Grab your ingredients, and prepare to fall in love with these sweet little morsels all over again!
Print
Chocolate Hazelnut Thumbprint Cookies Recipe
- Prep Time: 15 minutes
- Cook Time: 14 minutes
- Total Time: 45 minutes
- Yield: 24 cookies 1x
- Category: Dessert
- Method: Baking
- Cuisine: American
- Diet: Vegetarian
Description
Delight in these irresistibly buttery and soft Chocolate Hazelnut Thumbprint Cookies. Featuring a tender cookie base with a rich hazelnut chocolate center, these cookies are perfect for any occasion. Simple to prepare and baked to golden perfection, they offer a perfect balance of sweetness and nutty flavor topped with optional toasted hazelnuts for extra crunch.
Ingredients
Cookie Dough
- 1 1/4 cups all-purpose flour
- 1/2 cup unsalted butter, softened
- 1/4 cup granulated sugar
- 1/4 cup brown sugar
- 1 large egg yolk
- 1 teaspoon vanilla extract
- 1/4 teaspoon salt
Filling & Garnish
- Hazelnut chocolate spread (e.g., Nutella), about 2 teaspoons per cookie
- Chopped toasted hazelnuts (optional, for garnish)
Instructions
- Prepare the Dough: Cream the softened unsalted butter with both granulated and brown sugars until the mixture is light and fluffy, creating a smooth base. Add the egg yolk and vanilla extract, mixing until fully combined.
- Incorporate Dry Ingredients: Whisk together the all-purpose flour and salt separately, then gradually add them to the wet mixture. Stir just until a soft, pliable dough forms, being careful not to overmix.
- Chill the Dough: Wrap the dough in plastic wrap and refrigerate for at least 30 minutes to prevent spreading during baking and to maintain the thumbprint cavity.
- Shape the Cookies: Roll the chilled dough into 1-inch balls. Press your thumb gently into the center of each ball to create a small well for the filling.
- Bake the Cookies: Place the dough balls on a parchment-lined baking sheet and bake in a preheated oven at 350°F (175°C) for 10-12 minutes, until just set and golden around the edges.
- Add the Hazelnut Filling: Remove the cookies from the oven and, while still warm, fill each thumbprint indentation with about a teaspoon of hazelnut chocolate spread. Return the cookies to the oven for an additional 2 minutes to slightly melt and lock in the flavor.
- Cool and Garnish: Allow the cookies to cool completely on a wire rack. Optionally, sprinkle chopped toasted hazelnuts over the filling before it sets for added texture and flavor.
Notes
- Ensure the butter is softened at room temperature for easier creaming and a smoother cookie texture.
- Do not overmix the dough after adding flour to prevent tough cookies.
- Chilling the dough is essential to maintain shape and prevent spreading during baking.
- Customize the filling by using your favorite hazelnut chocolate spread or even other nut butters.
- For extra crunch and flavor, toast the hazelnuts lightly before chopping and sprinkling on top.