If you’re craving a treat that’s irresistibly satisfying and wonderfully simple to make, let me introduce you to the amazing Chocolate Peanut Butter Crunch Bars Recipe. This delightful snack boasts the perfect harmony of creamy peanut butter, crispy puffed rice, and rich chocolate that comes together in every crunchy, chewy bite. Whether you’re looking for an energizing breakfast on-the-go, a midday pick-me-up, or an indulgent but wholesome snack, these bars are exactly what you need to brighten your day with just a few wholesome ingredients.
Ingredients You’ll Need
Don’t let the simplicity of these ingredients fool you — each one is vital to achieving the perfect balance of flavor, texture, and richness in this bar. Gathering these essentials is your first step toward snack-time bliss.
- 1 cup natural peanut butter: Use smooth or crunchy, both add creamy, nutty depth and bind everything together.
- 1/2 cup honey or maple syrup: Acts as a natural sweetener and glue, balancing flavors with golden sweetness.
- 1/2 teaspoon vanilla extract: Enhances and rounds out the flavors beautifully.
- 1/4 teaspoon salt: Just a pinch to cut through sweetness and bring out the nutty richness.
- 2 cups old-fashioned rolled oats: Adds chewy texture and wholesome goodness.
- 1 1/2 cups puffed rice cereal: Provides irresistible crunch and lightness.
- 1/2 cup dark chocolate chips: Or dairy-free chocolate chips for that luscious, melting chocolate layer.
- 1 tablespoon coconut oil (optional): Helps the chocolate melt smoothly and gives a subtle richness.
How to Make Chocolate Peanut Butter Crunch Bars Recipe
Step 1: Prepare Your Pan
Start by lining an 8×8-inch baking pan with parchment paper or lightly grease it. This simple preparation ensures your bars come out cleanly without any sticking, making your final presentation effortless.
Step 2: Melt the Peanut Butter and Sweetener
In a microwave-safe bowl, combine the peanut butter and honey (or maple syrup). Heat in 30-second bursts, stirring after each, until the mixture is smooth and well blended. This warm, gooey mixture will bind your crunchy ingredients together perfectly.
Step 3: Flavor It Up
Stir in the vanilla extract and salt into your peanut butter mixture. These small additions lift the flavor and balance the sweetness with a bit of depth and complexity you wouldn’t want to miss.
Step 4: Combine the Dry Ingredients
In a large bowl, toss together the rolled oats and puffed rice cereal. Together, they create that satisfying crunchy texture signature to these bars—one chewy, one crisp, and both essential!
Step 5: Mix It All Together
Pour your peanut butter mixture over the dry ingredients and fold everything until evenly coated. It’s important to get the coating just right so that every bite has that wonderful peanut butter flavor tying everything together.
Step 6: Press Into Your Pan
Transfer the mixture to your prepared pan and press it down firmly to create an even, compact layer. Packing tightly means your bars won’t crumble and will come out perfectly shaped.
Step 7: Melt the Chocolate
Now for the best part: in a microwave-safe bowl, melt the dark chocolate chips with coconut oil (if using), heating in 20-second intervals and stirring in between until smooth and glossy. This luscious topping is where indulgence meets elegance.
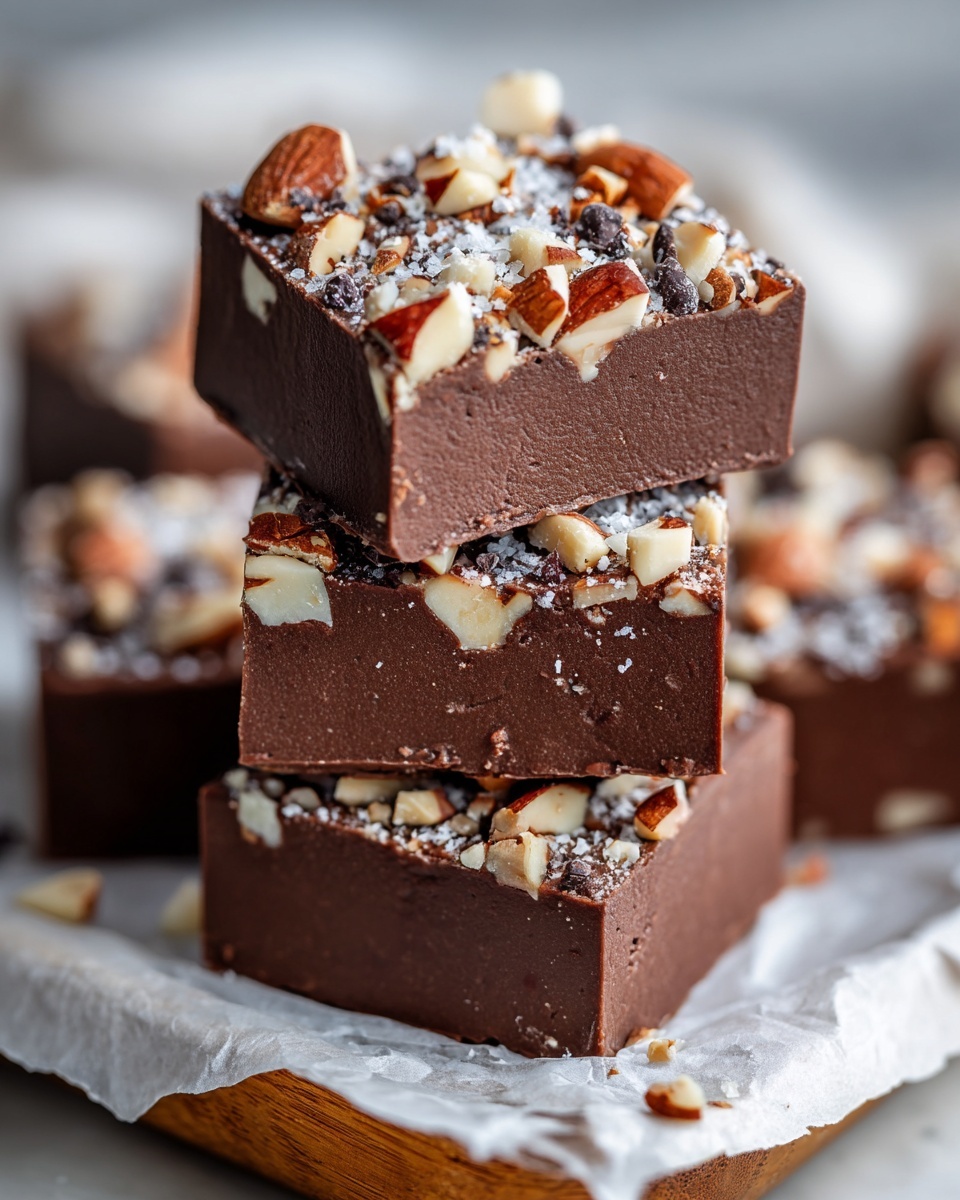
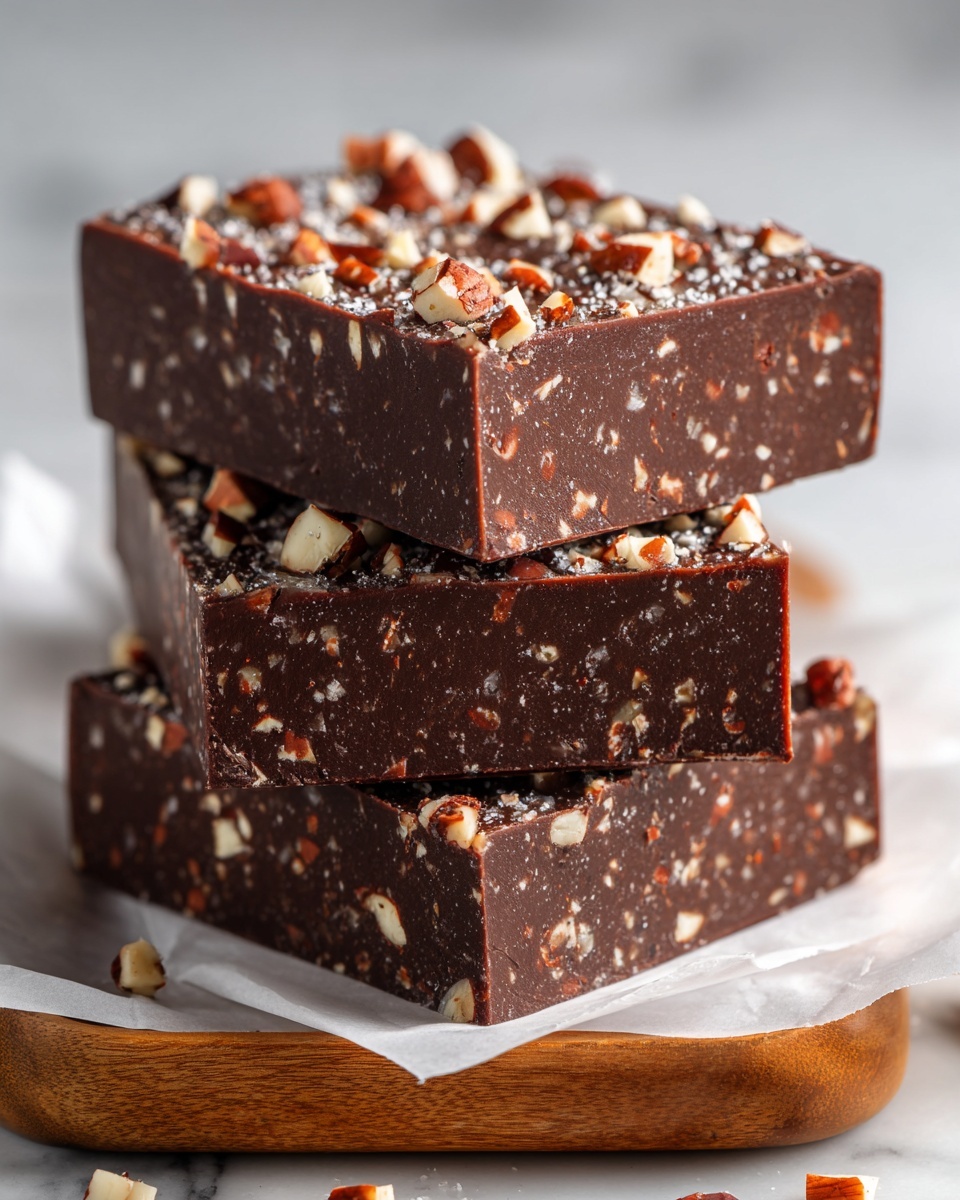
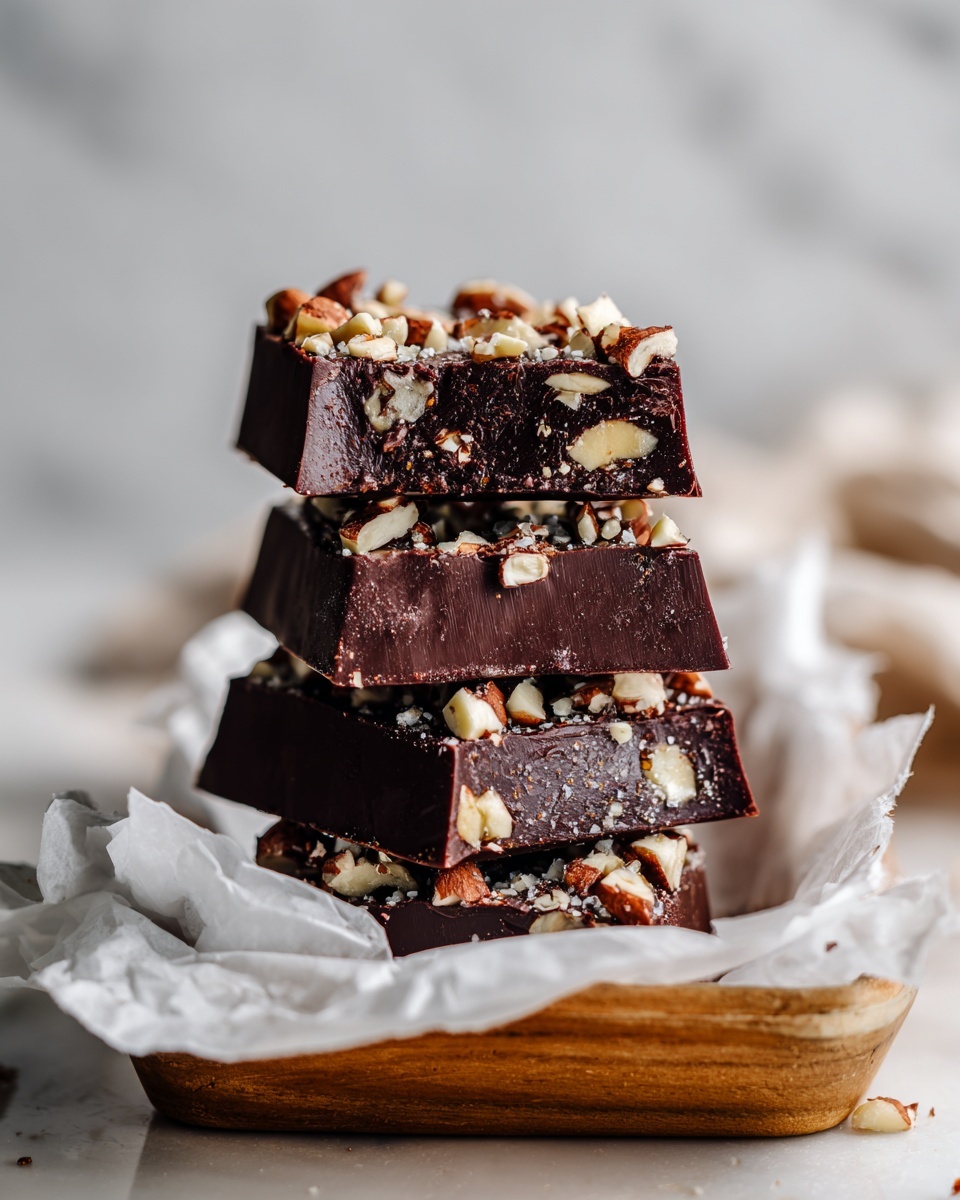
Step 8: Add the Chocolate Layer
Pour the melted chocolate over the peanut butter oat base, spreading it evenly with a spatula or the back of a spoon. This glossy chocolate layer adds a rich finish and a satisfying snap to your bars.
Step 9: Chill and Set
Place your pan in the refrigerator and let the bars chill for at least one hour. This chilling step is key to firming everything up, making your bars easy to slice and handle.
Step 10: Slice and Enjoy
Once set, lift the bars out of the pan using the parchment paper. Cut into 12 even bars, then store them refrigerated. These bars stay fresh and delicious all week, perfect for snacking anytime.
How to Serve Chocolate Peanut Butter Crunch Bars Recipe
Garnishes
To elevate your Chocolate Peanut Butter Crunch Bars Recipe, try sprinkling sea salt flakes or a dusting of cocoa powder on top of the set chocolate layer. Adding mini peanut butter chips or chopped nuts will amp up the texture and make the bars look irresistibly inviting.
Side Dishes
These bars stand beautifully on their own, but pairing them with a cold glass of milk, creamy yogurt, or a fresh fruit salad brings added freshness and balances the rich flavors perfectly, making snack time feel like a special occasion.
Creative Ways to Present
Want to wow your friends or family? Serve these bars on a rustic wooden board with a drizzle of melted peanut butter or chocolate artfully swirled on the plate. Wrapping individual bars in parchment and tying with twine also makes them charming homemade gifts or lunchbox surprises.
Make Ahead and Storage
Storing Leftovers
Your Chocolate Peanut Butter Crunch Bars Recipe bars store beautifully in an airtight container in the refrigerator. Keep them chilled to maintain their perfect texture and flavor, and they’ll stay fresh for up to one week.
Freezing
If you want to keep your bars for longer, they freeze wonderfully. Wrap individual pieces tightly in plastic wrap and place them in a sealed freezer bag. When ready to enjoy, just thaw briefly at room temperature or in the fridge.
Reheating
These bars are best enjoyed cold or at room temperature, but if you’d like to soften them slightly, a few seconds in the microwave will do. Just be careful not to overheat, so you don’t lose that delightful crunch.
FAQs
Can I use crunchy peanut butter instead of smooth?
Absolutely! Crunchy peanut butter adds extra texture and nutty bits that elevate the crunch factor even more. Just choose your favorite, and you’re all set.
Is there a dairy-free option for the chocolate topping?
Definitely. Using dairy-free or vegan chocolate chips works perfectly and ensures everyone can enjoy the rich chocolate layer without compromise.
How can I make these bars nut-free?
You can swap the peanut butter with sunflower seed butter or another seed butter of your choice to make these bars nut-free, while still keeping that creamy binding effect.
Can I substitute the puffed rice cereal with something else?
While puffed rice is key for that signature crunch, you can experiment with puffed quinoa or other light cereals, but keep in mind it may slightly alter the texture and flavor.
What’s the best way to cut the bars cleanly?
Using a sharp knife warmed under hot water and dried before slicing helps create clean, neat edges without cracking the bars or chocolate layer.
Final Thoughts
I truly hope you give this Chocolate Peanut Butter Crunch Bars Recipe a try because it’s one of those magical treats that feels both indulgent and wholesome. Easy to make, packed with flavor, and perfect for any time of day, these bars are destined to become your new go-to snack. Enjoy every crunchy, chocolatey bite!
Print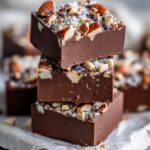
Chocolate Peanut Butter Crunch Bars Recipe
- Prep Time: 15 minutes
- Cook Time: 15 minutes (including melting chocolate)
- Total Time: 1 hour 15 minutes (including refrigeration)
- Yield: 12 servings 1x
- Category: Snack
- Method: No-Cook
- Cuisine: American
- Diet: Vegetarian
Description
These Chocolate Peanut Butter Crunch Bars are a delicious no-bake treat combining creamy peanut butter, crunchy oats, puffed rice cereal, and a rich dark chocolate topping. Perfect for a quick snack or dessert, they are easy to make and naturally sweetened with honey or maple syrup.
Ingredients
Wet Ingredients
- 1 cup natural peanut butter (smooth or crunchy)
- 1/2 cup honey or maple syrup
- 1/2 teaspoon vanilla extract
- 1/4 teaspoon salt
- 1 tablespoon coconut oil (optional)
Dry Ingredients
- 2 cups old-fashioned rolled oats
- 1 1/2 cups puffed rice cereal
- 1/2 cup dark chocolate chips (or dairy-free chocolate chips)
Instructions
- Prepare the Pan: Line an 8×8-inch baking pan with parchment paper or lightly grease it to ensure easy removal of the bars once set.
- Combine Peanut Butter and Sweetener: In a microwave-safe bowl, combine the peanut butter and honey (or maple syrup). Microwave for 30 seconds, then stir until the mixture is smooth and fully combined.
- Add Flavorings: Stir in the vanilla extract and salt to the peanut butter mixture to enhance the flavor profile.
- Mix Dry Ingredients: In a large bowl, mix together the rolled oats and puffed rice cereal evenly.
- Combine Wet and Dry Ingredients: Pour the peanut butter mixture over the oats and cereal, stirring well to coat all dry ingredients evenly with the sticky mixture.
- Press Mixture into Pan: Transfer the combined mixture into the prepared baking pan. Press down firmly and evenly to create a compact layer.
- Melt Chocolate Topping: In a microwave-safe bowl, melt the dark chocolate chips along with the optional coconut oil in 20-second intervals, stirring between each until smooth.
- Apply Chocolate Layer: Pour the melted chocolate evenly over the compacted oat and peanut butter layer, spreading it to cover the surface.
- Chill to Set: Refrigerate the pan for at least 1 hour to allow the bars to firm up and the chocolate to set completely.
- Cut and Store: Once set, remove the bars from the pan using the parchment paper. Cut into 12 bars and store in the refrigerator for up to one week.
Notes
- You can substitute maple syrup with honey to suit dietary preferences or availability.
- For a vegan version, use maple syrup and dairy-free chocolate chips.
- Pressing the mixture firmly into the pan ensures the bars hold together well.
- Storing bars in the refrigerator helps maintain their texture and firmness.
- Coconut oil helps the chocolate topping melt smoothly and adds a subtle richness but is optional.