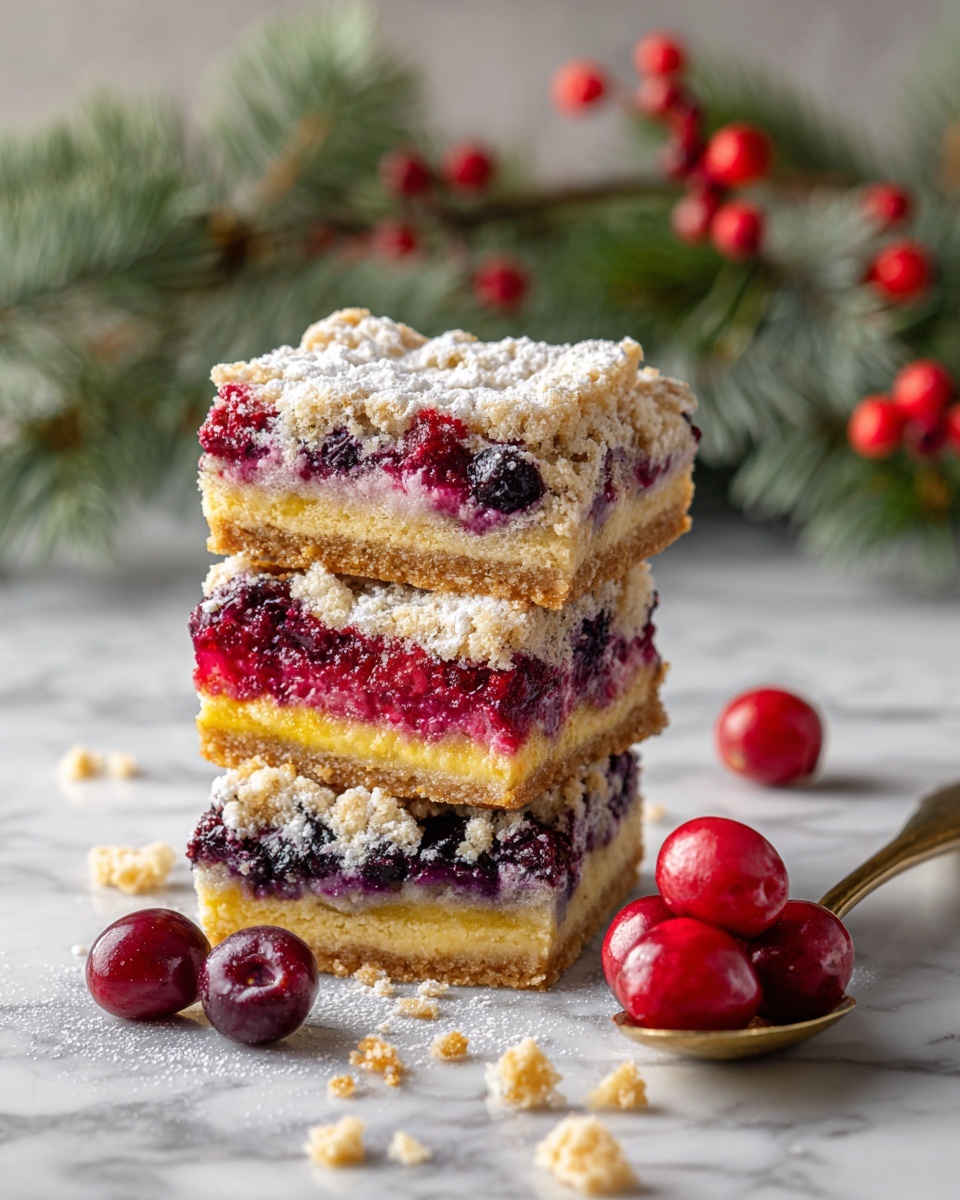
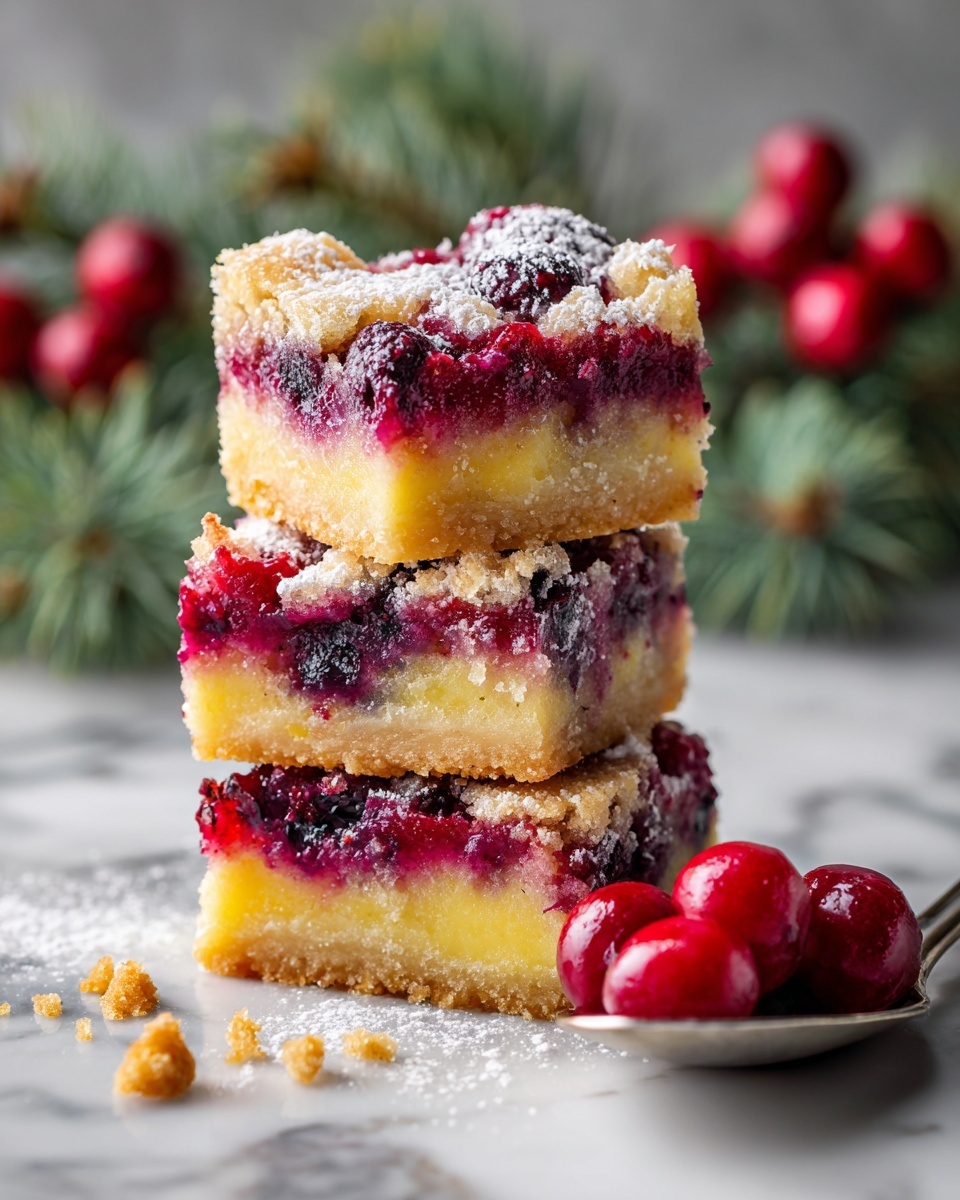
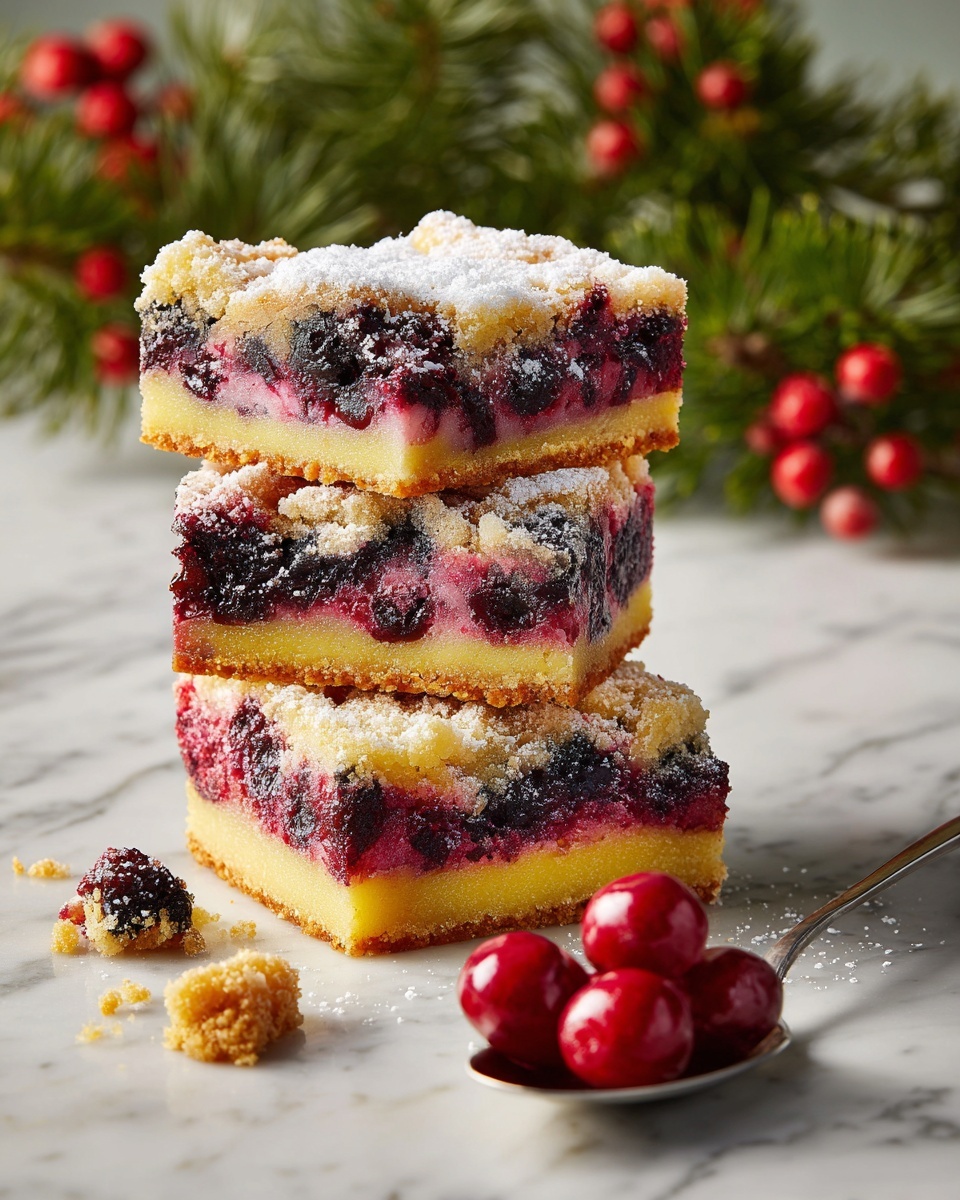
If you’re searching for a festive treat that perfectly captures the spirit of the season, look no further than this Christmas Cherry Bars Recipe. These bars combine buttery, tender crust with a luscious cherry filling and a delicate glaze that brings everything together with just the right amount of sweetness. They bake up into golden squares bursting with bright cherry flavor and a hint of almond, making them the perfect dessert to share with loved ones or to bring along to your holiday gatherings. You’re going to love how simple ingredients come together to create something truly special and memorable.
Ingredients You’ll Need
This Christmas Cherry Bars Recipe uses essential ingredients that are straightforward yet each one plays a crucial role in delivering the perfect balance of flavor and texture. From the tender buttery dough to the rich cherry filling and the smooth glaze on top, these elements combine to make every bite absolutely delightful.
- 1 cup butter, softened: Provides a rich, tender base for the buttery dough.
- 2 cups sugar: Adds sweetness that balances the tart cherry filling perfectly.
- 1 teaspoon salt: Enhances all the flavors without overpowering.
- 4 large eggs, room temperature: Helps to bind the dough and add moisture.
- 1 teaspoon vanilla extract: Lifts the flavor with a warm, inviting note.
- 1/4 teaspoon almond extract: Gives a subtle nutty undertone that pairs perfectly with cherries.
- 3 cups all-purpose flour: Creates the structure for the bars’ luscious crust and topping.
- 2 cans (21 oz each) cherry pie filling: The star of the show, offering vibrant color and tart-sweet bursts.
- 1 cup confectioners’ sugar: For the smooth glaze that adds a finishing touch.
- 1/2 teaspoon vanilla extract: Used in the glaze for harmony with the filling.
- 1/2 teaspoon almond extract: Enhances the glaze with the same lovely almond note.
- 2–3 tablespoons whole milk: Adjusts the glaze to just the right drizzle consistency.
How to Make Christmas Cherry Bars Recipe
Step 1: Prepare Your Pan and Oven
Start by preheating your oven to 350°F (175°C). This ensures a hot, even environment so your bars bake perfectly. Spray a 15×10-inch sheet pan with baking spray to prevent sticking and make cleanup easier. Getting your setup ready first saves time and stress later!
Step 2: Cream the Butter, Sugar, and Salt
In a large bowl, beat together the softened butter, sugar, and salt until the mixture becomes light and fluffy. This step is crucial because it incorporates air into the dough, leading to tender, melt-in-your-mouth bars with a great crumb.
Step 3: Add Eggs and Extracts
Next, add the eggs one at a time, making sure to beat well after each addition so the mixture stays smooth. Then stir in the vanilla and almond extracts, which infuse the dough with cozy holiday flavors that’ll make you smile with every bite.
Step 4: Mix in the Flour
Gradually fold in the flour until a soft dough forms. The dough should be manageable and slightly sticky but firm enough to press into the pan. This creates both the base layer and the crumbly topping that makes these bars so addictive.
Step 5: Press the Dough into the Pan
Press 3 cups of the dough evenly into the bottom of your prepared sheet pan. This becomes the foundation of your Christmas Cherry Bars Recipe, so take your time ensuring it’s spread out smoothly for an even bake.
Step 6: Add Cherry Pie Filling
Spread both cans of cherry pie filling evenly over the dough base. The bright red cherries will peek through the crust, adding an irresistible color and a burst of fruity flavor with every bite. The filling is the festive heart of this dessert.
Step 7: Top with Remaining Dough
Drop spoonfuls of the remaining dough over the cherry filling in small clusters. This rustic topping will bake golden and slightly crumbly, creating a delightful texture contrast between sweet cherries and buttery crust.
Step 8: Bake Until Golden Brown
Place the pan in your preheated oven and bake for 35 to 40 minutes until the top is a gorgeous golden brown and the cherry filling bubbles gently. Allow the bars to cool completely in the pan before moving on. Patience here means they’ll slice more neatly.
Step 9: Prepare the Glaze
While the bars cool, whisk together confectioners’ sugar, vanilla extract, almond extract, and enough whole milk to make a smooth glaze. This sweet drizzle is the final touch that ties the whole Christmas Cherry Bars Recipe together with a lovely sheen and extra flavor.
Step 10: Drizzle and Serve
Drizzle the glaze over the cooled bars. Let it set so it becomes just slightly firm but still melts on your tongue. Then cut into squares and get ready to share the joy with everyone lucky enough to try these festive, flavor-packed treats.
How to Serve Christmas Cherry Bars Recipe
Garnishes
To elevate your presentation, sprinkle a light dusting of powdered sugar or some finely chopped toasted almonds over the glaze. Fresh mint leaves or a few whole cherries placed artistically can add a pop of color and a touch of sophistication that impresses at any holiday party.
Side Dishes
These bars pair wonderfully with a scoop of vanilla ice cream or a dollop of freshly whipped cream for an indulgent experience. Consider serving alongside a warm cup of spiced tea or coffee — the cozy flavors play beautifully against the tartness of the cherries.
Creative Ways to Present
Get creative by serving your Christmas Cherry Bars Recipe on festive platters or in decorative holiday boxes as thoughtful gifts. For parties, cut the bars into bite-sized squares and arrange on tiered dessert stands to showcase their vibrant cherry filling and golden crust.
Make Ahead and Storage
Storing Leftovers
Keep any leftover bars tightly covered at room temperature for up to two days or refrigerated for up to a week. Make sure to keep them in an airtight container to maintain their moist, tender texture and keep the glaze from drying out.
Freezing
If you want to prepare ahead, freeze the bars unglazed in an airtight container or wrapped well in plastic wrap and foil for up to three months. When ready to serve, thaw completely before adding the glaze for the freshest taste and best texture.
Reheating
Warm the bars slightly in a low oven or microwave just before serving. Reheating brings back that freshly baked smell and soft texture. If the glaze feels too firm, just add a little extra drizzle of milk and swirl it in for a fresh finish.
FAQs
Can I use fresh cherries instead of canned pie filling?
While fresh cherries can be delicious, canned cherry pie filling is preferred here because it has the perfect balance of sweetness and consistency, including thick syrup that holds the bars together beautifully. If you want to use fresh cherries, cook them down with sugar and a thickener first.
Is it possible to make these bars gluten-free?
Yes! You can substitute the all-purpose flour with a gluten-free flour blend designed for baking. Just ensure the blend contains xanthan gum or add it separately for structure. The texture may be slightly different but still delicious and festive.
Can I make the dough ahead of time?
Absolutely! You can prepare the dough a day in advance and keep it refrigerated. Before baking, let it come to room temperature to make spreading easier. This makes assembling the bars quicker when you’re ready to bake.
What if I want less sweet bars?
You can reduce the sugar slightly in the dough or opt for a cherry pie filling labeled “no sugar added” or low sugar. However, be cautious about altering glaze sweetness too much or it may not set properly.
How long will these bars keep their best flavor?
For optimal taste and texture, enjoy the Christmas Cherry Bars Recipe within the first week of baking when stored properly. They remain delightful after that but gradually lose their fresh-baked appeal.
Final Thoughts
There is something truly magical about homemade Christmas Cherry Bars Recipe that warms the heart and brightens any holiday table. With simple ingredients and a straightforward process, you can create a dessert that feels both nostalgic and special, perfect for sharing love and joy during the festive season. I can’t wait for you to try this recipe and make it your own holiday tradition!
Print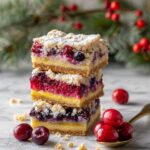
Christmas Cherry Bars Recipe
- Prep Time: 20 minutes
- Cook Time: 40 minutes
- Total Time: 1 hour
- Yield: 24 servings 1x
- Category: Dessert
- Method: Baking
- Cuisine: American
Description
These Christmas Cherry Bars are a festive and delicious dessert featuring a buttery dough base layered with sweet cherry pie filling and topped with a creamy almond and vanilla glaze. Perfect for holiday gatherings, these bars offer a delightful combination of flavors and textures, and are easy to make in a single sheet pan.
Ingredients
For the Dough
- 1 cup butter, softened
- 2 cups sugar
- 1 teaspoon salt
- 4 large eggs, room temperature
- 1 teaspoon vanilla extract
- 1/4 teaspoon almond extract
- 3 cups all-purpose flour
For the Filling
- 2 cans (21 oz each) cherry pie filling
For the Glaze
- 1 cup confectioners’ sugar
- 1/2 teaspoon vanilla extract
- 1/2 teaspoon almond extract
- 2–3 tablespoons whole milk
Instructions
- Preheat Oven: Preheat your oven to 350°F (175°C) and spray a 15×10-inch sheet pan with baking spray to prepare for the dough.
- Cream Butter, Sugar, and Salt: In a large bowl, cream together the softened butter, sugar, and salt until the mixture is light and fluffy, which helps create a tender texture in the final bars.
- Add Eggs and Extracts: Add the eggs one at a time to the creamed mixture, beating well after each addition to ensure smooth incorporation. Then stir in the vanilla and almond extracts for flavor.
- Add Flour: Gradually add the all-purpose flour to the wet ingredients, mixing until a dough forms that is manageable and slightly sticky.
- Press Dough into Pan: Press 3 cups of the dough evenly into the bottom of the prepared sheet pan to form the base layer for your bars.
- Add Cherry Filling: Spread the cherry pie filling evenly over the pressed dough to create a luscious fruity layer.
- Top with Remaining Dough: Drop spoonfuls of the remaining dough over the cherry filling, distributing it in a way that some filling remains visible.
- Bake: Bake in the preheated oven for 35-40 minutes or until the top is golden brown and the dough is fully cooked. Then allow the bars to cool completely in the pan.
- Prepare Glaze: In a small bowl, whisk together the confectioners’ sugar, vanilla extract, almond extract, and 2–3 tablespoons of whole milk until smooth and pourable.
- Glaze and Serve: Drizzle the glaze over the cooled bars evenly. Once the glaze has set, cut the dessert into squares and serve.
Notes
- Ensure butter is softened to room temperature for easier creaming with sugar.
- Room temperature eggs help the batter mix more evenly.
- The almond extract enhances the cherry flavor but can be omitted if unavailable.
- The cherry pie filling is generously spread, but you can adjust the amount to your liking.
- Allow the bars to cool completely before glazing to prevent the glaze from melting.
- The glaze can be made thicker or thinner by adjusting the amount of milk used.
- Store bars in an airtight container for up to 3 days at room temperature or refrigerate for longer freshness.