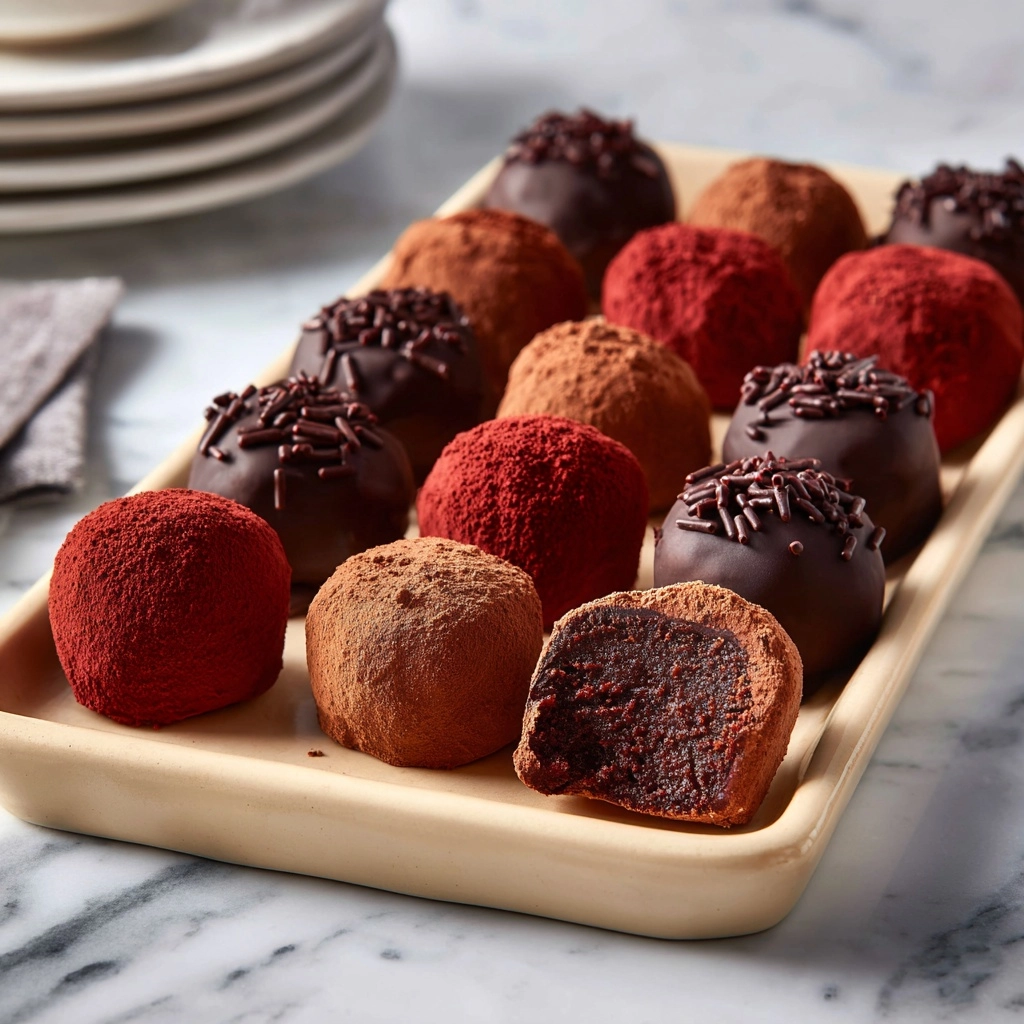
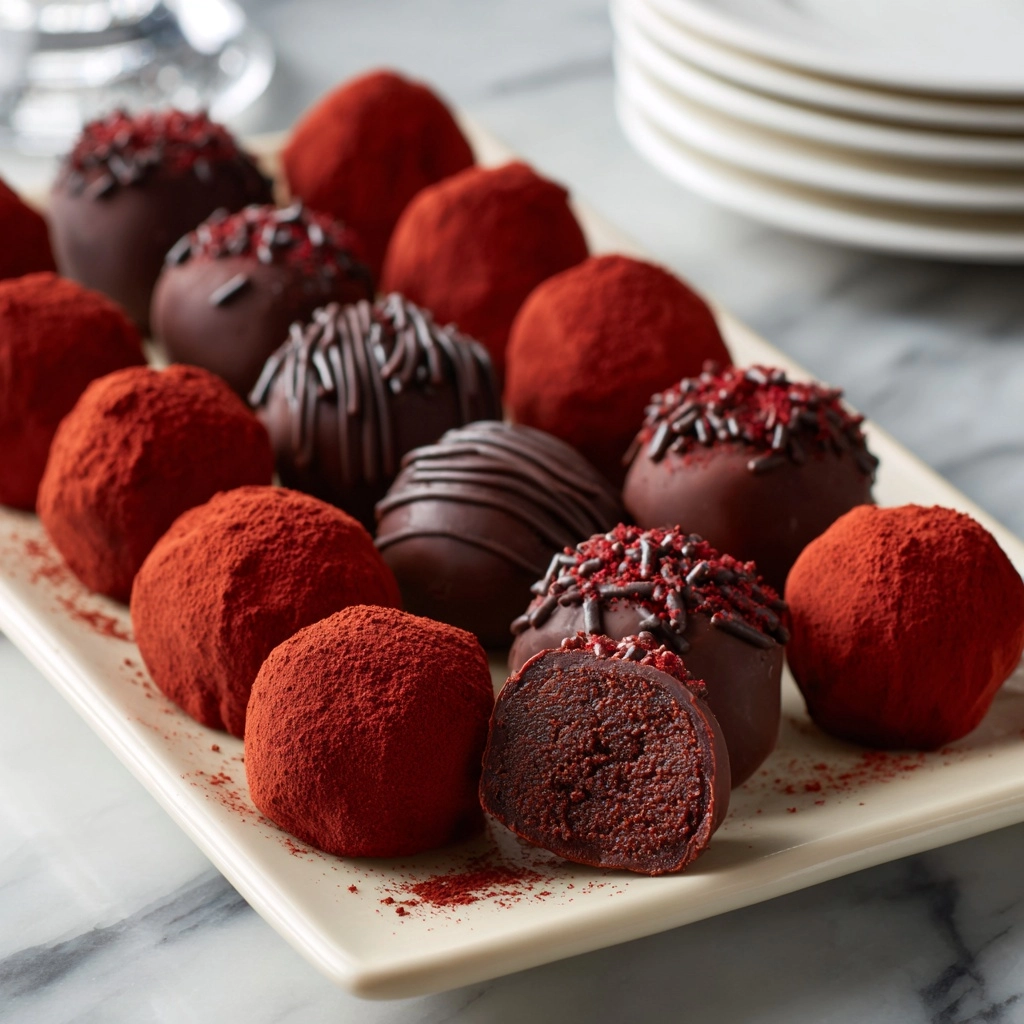
Easy Brownie Truffles are the ultimate treat for anyone who loves rich, chocolatey indulgence but doesn’t want to fuss with complicated recipes. Imagine everything you love about fudgy brownies—deep cocoa flavor, soft centers, and a touch of creaminess—transformed into bite-sized truffles coated in silky chocolate. Whether you use a box mix or your favorite homemade brownies, these truffles are a crowd-pleasing dessert that comes together with just a few ingredients and a sprinkle of creativity. Perfect for parties, gifting, or a midnight snack, you’ll want to make these Easy Brownie Truffles again and again!
Ingredients You’ll Need
You only need a handful of ingredients to whip up these Easy Brownie Truffles, but each one plays a starring role. From the fudgy brownies that form the core to the velvety chocolate coating and playful toppings, every element brings something special to the table.
- Baked Brownies: Use a fresh batch of brownies, either from a box mix or homemade. Fudgy brownies work best for that ultra-moist, decadent texture.
- Cream Cheese: Softened cream cheese adds luscious creaminess and helps bind the truffle mixture together.
- Vanilla Extract (Optional): Just a splash brings out the chocolate flavor, but you can skip it if you want to keep things simple.
- Chocolate Melting Wafers or Chocolate Chips: For the smooth, glossy coating that gives these truffles their irresistible finish.
- Sprinkles, Crushed Nuts, or Cocoa Powder (Optional): These are for decorating, so you can make each truffle as festive or elegant as you like!
How to Make Easy Brownie Truffles
Step 1: Prepare the Brownies
If you haven’t already, bake your brownies according to the package or your favorite recipe instructions. Let them cool completely—this is key to getting the right consistency for truffles. Once cooled, use a fork or your hands to crumble the soft center of the brownies into a large bowl, removing any tough or crispy edges if you prefer a super fudgy result.
Step 2: Mix in Cream Cheese and Vanilla
Add the softened cream cheese to the bowl of brownie crumbles, along with the vanilla extract if you’re using it. Mix everything together until it’s fully combined and smooth. The mixture should be soft but able to hold its shape when pressed together—think of it like edible play dough!
Step 3: Roll Into Balls
Use a small cookie scoop or spoon to portion out the mixture and roll it between your hands to form 1-inch balls. Place each truffle on a parchment-lined baking sheet. Once all the balls are formed, pop the tray into the freezer for 20–30 minutes. This step makes them much easier to dip in chocolate later.
Step 4: Melt the Chocolate
While your truffle centers are chilling, melt the chocolate wafers or chocolate chips. Place them in a microwave-safe bowl and heat in 30-second intervals, stirring after each session, until the chocolate is smooth and silky.
Step 5: Dip and Decorate
Remove the chilled truffle centers from the freezer. Using a fork or a dipping tool, dip each one into the melted chocolate, making sure it’s fully coated. Let any extra chocolate drip off, then return the truffle to the parchment-lined tray. While the chocolate is still wet, add your favorite toppings—sprinkles, crushed nuts, or a dusting of cocoa powder are all delicious choices!
Step 6: Set and Serve
Place the finished truffles in the fridge for 15–20 minutes until the chocolate sets. You can serve them chilled for a firmer bite or let them come to room temperature for a softer, melt-in-your-mouth experience.
How to Serve Easy Brownie Truffles
Garnishes
The beauty of Easy Brownie Truffles is how easily you can jazz them up with simple garnishes. Try rolling them in cocoa powder for a classic look, or sprinkle with sea salt for a sophisticated twist. Colorful sprinkles make them party-perfect, while crushed nuts add crunch and flavor. Don’t be afraid to get creative—each batch can look and taste a little different!
Side Dishes
Pair these truffles with fresh berries or a scoop of vanilla ice cream for an extra-special dessert plate. They’re also fantastic with a cup of coffee, espresso, or even a glass of red wine if you want to elevate your treat to something truly memorable.
Creative Ways to Present
Present your Easy Brownie Truffles on a tiered dessert stand for a festive centerpiece, or box them up in mini cupcake liners for a homemade gift. For parties, try arranging them on a platter with a variety of toppings so everyone can pick their favorite. They’re just as perfect for elegant occasions as they are for casual get-togethers!
Make Ahead and Storage
Storing Leftovers
Keep any leftover Easy Brownie Truffles in an airtight container in the fridge. They’ll stay fresh and delicious for up to 5 days, making them a great make-ahead dessert for busy weeks or special events.
Freezing
These truffles freeze beautifully! Place them in a single layer in a freezer-safe container, separating layers with parchment paper. They’ll keep for up to 1 month. When you’re ready to enjoy, let them thaw in the fridge for a few hours or at room temperature for about 30 minutes.
Reheating
No need to reheat these truffles—they’re best enjoyed chilled or at room temperature. If you do want them a bit softer, just let them sit out on the counter for 10–15 minutes before serving.
FAQs
Can I use store-bought brownies for Easy Brownie Truffles?
Absolutely! Store-bought brownies work great in a pinch. Just make sure they’re fudgy and not too dry for the best truffle texture.
What kind of chocolate is best for dipping?
Chocolate melting wafers or high-quality chocolate chips will give you the smoothest, shiniest coating. Dark, milk, or even white chocolate all work, so use your favorite!
Can I make Easy Brownie Truffles ahead of time?
Yes, you can! These truffles are perfect for making in advance. Store them in the fridge for up to 5 days or freeze for up to a month for easy entertaining.
How do I keep the truffles from falling apart when dipping?
Chilling the truffle centers in the freezer before dipping is key. This firms them up and makes coating in chocolate a breeze—no messy hands or crumbling truffles!
Are there any flavor variations I can try?
Definitely! Use flavored brownies like salted caramel, peanut butter swirl, or even add a few drops of peppermint extract to the cream cheese for a twist. The possibilities are endless!
Final Thoughts
Nothing beats the joy of sharing homemade Easy Brownie Truffles with friends and family. They’re fun to make, endlessly customizable, and absolutely irresistible. Give them a try—you’ll be surprised at just how easy and delicious homemade truffles can be!
Print
Easy Brownie Truffles Recipe
- Prep Time: 20 minutes (plus chilling time)
- Cook Time: 0 minutes (assuming brownies are pre-baked)
- Total Time: 50 minutes
- Yield: 24 truffles 1x
- Category: Dessert, Candy
- Method: No-Bake
- Cuisine: American
- Diet: Vegetarian
Description
These Easy Brownie Truffles are a decadent no-bake dessert made from crumbled brownies combined with cream cheese and coated in melted chocolate. Perfect for using leftover brownies, they are rich, fudgy, and customizable with your favorite decorations such as sprinkles or nuts. Quick to prepare and ideal for parties or a sweet treat anytime.
Ingredients
Brownie Mixture
- 1 batch baked brownies (from a box mix or homemade, fully cooled)
- 4 ounces cream cheese, softened
- 1/2 teaspoon vanilla extract (optional)
Coating and Decoration
- 10 ounces chocolate melting wafers or chocolate chips
- 2 tablespoons sprinkles, crushed nuts, or cocoa powder (optional, for decorating)
Instructions
- Bake and Cool Brownies: Bake the brownies according to package or recipe instructions and allow them to cool completely. This ensures the mixture will have the best texture and consistency for forming truffles.
- Prepare Brownie Mixture: Scoop the cooled brownies into a large bowl, removing any hard edges if desired. Crumble the soft center with a fork or your hands. Add the softened cream cheese and vanilla extract (if using), then mix until fully combined and smooth. The mixture should be soft but hold its shape.
- Form Truffle Balls: Use a small cookie scoop or spoon to portion and roll the mixture into 1-inch balls. Place them on a parchment-lined baking sheet and chill in the freezer for 20–30 minutes until firm.
- Melt Chocolate: While the truffles chill, melt the chocolate in a microwave-safe bowl in 30-second intervals, stirring in between, until smooth and glossy.
- Dip and Decorate: Dip each chilled truffle into the melted chocolate using a fork or dipping tool, allowing excess chocolate to drip off. Place the coated truffles back on the parchment-lined tray. Immediately decorate with sprinkles, crushed nuts, or a dusting of cocoa powder if desired.
- Set Chocolate Coating: Chill the truffles in the fridge for 15–20 minutes until the chocolate is set. Serve the truffles chilled or at room temperature for the best texture and flavor.
Notes
- Use fudgy brownies for the best texture in these truffles.
- These truffles can be made ahead and stored in the refrigerator for up to 5 days or frozen for up to 1 month.
- Try flavored brownies like salted caramel or peanut butter swirl for tasty variations.
Nutrition
- Serving Size: 1 truffle
- Calories: 140
- Sugar: 12g
- Sodium: 75mg
- Fat: 8g
- Saturated Fat: 4g
- Unsaturated Fat: 3g
- Trans Fat: 0g
- Carbohydrates: 16g
- Fiber: 1g
- Protein: 1g
- Cholesterol: 10mg