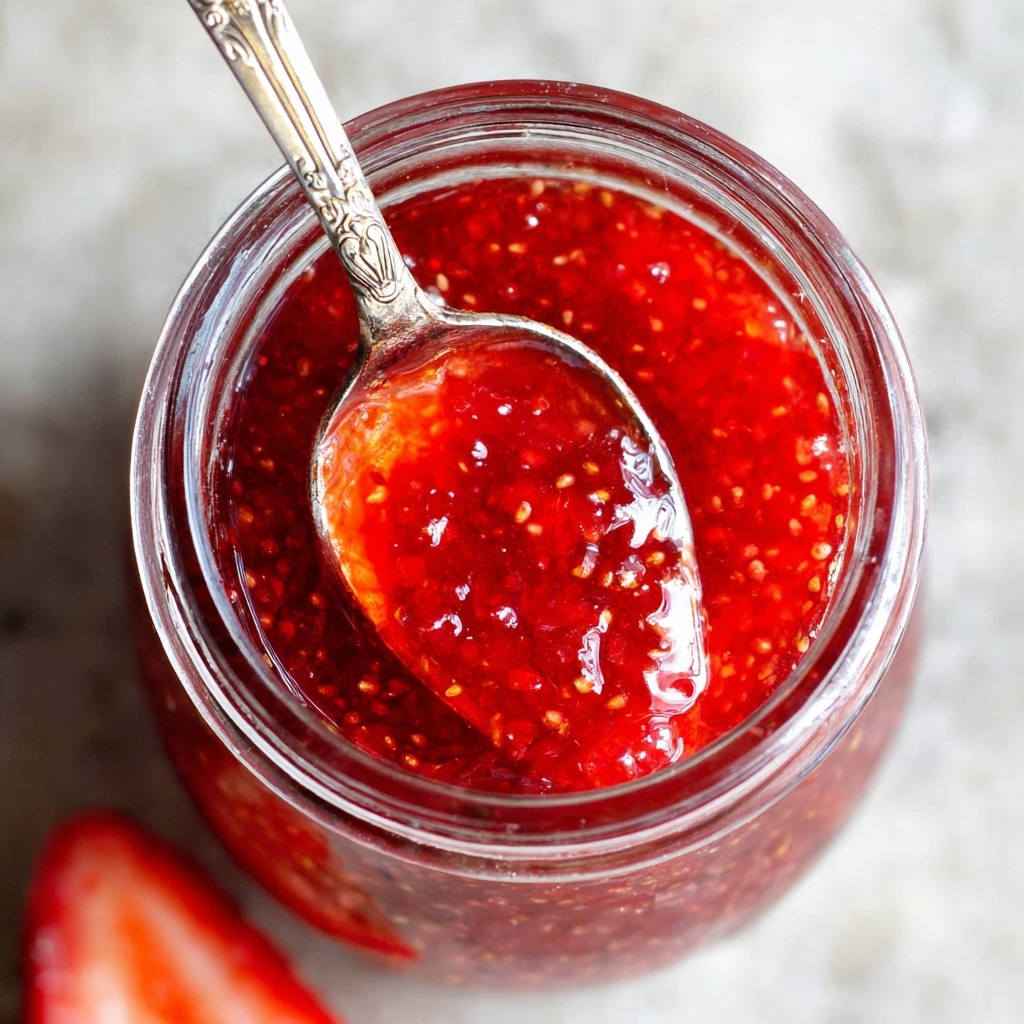
There is something truly magical about homemade preserves, and this Easy Strawberry Jam Recipe captures the perfect balance of sweet, tart, and fruity in a way that feels both nostalgic and refreshing. Made with just a handful of simple, fresh ingredients, this jam delivers vibrant color and luscious texture that’s perfect for spreading on toast, dolloping on yogurt, or even stirring into desserts. The best part is how effortlessly you can transform fresh strawberries into this delightful treat in just 20 minutes, making it an ideal kitchen project to brighten up your day or surprise your loved ones with a homemade gift.
Ingredients You’ll Need
Gathering your ingredients is where the fun begins. Each one plays a key role in the flavor, texture, and consistency of your jam. These simple, natural ingredients mean no preservatives, just pure strawberry goodness and a subtle zing of lemon to brighten things up.
- 5 cups strawberries (quartered, about 1 ½ lbs): Fresh and ripe strawberries give your jam a luscious sweetness and rich red color.
- 1 cup granulated sugar: This not only sweetens but helps the jam thicken as it cooks.
- 2 tablespoons lemon juice (about 1 lemon): Adds a bright acidity that balances the sugar and enhances the strawberry flavor.
- 1 lemon zested: The zest infuses your jam with a fragrant citrus aroma and a hint of complexity.
How to Make Easy Strawberry Jam Recipe
Step 1: Prep the Strawberries
Start by washing your strawberries thoroughly. Hull them by removing the green stems and cut the larger berries into quarters to ensure even cooking. This preparation sets the stage for a jam with plenty of fruity texture and sweetness.
Step 2: Combine Ingredients
In a medium pot or saucepan, combine the quartered strawberries, sugar, lemon juice, and lemon zest. Give it a gentle stir to mix everything together. Before turning on the heat, taste a bit of the mixture. Strawberries can vary in sweetness, so adjust the sugar or lemon juice now for your perfect balance.
Step 3: Cook Until Bubbly and Broken Down
Turn your stove to medium heat and bring the mixture to a boil. Keep an eye on it and stir occasionally to prevent scorching. Use a potato masher if you like a smoother texture or prefer smaller fruit pieces in your jam. As the strawberries cook down, they release their natural juices, creating that heavenly jam consistency.
Step 4: Optional Seedless Jam Step
If you prefer a smooth, seed-free jam, use an immersion blender right in the pot to break down the seeds and pulp. Afterwards, strain the mixture through a fine mesh sieve to remove the seeds. Return the silky smooth jam to the pot to continue cooking. Skim off any foam that forms on top for a clearer finish.
Step 5: Simmer and Thicken
Lower the heat and let your jam simmer gently. Stir frequently as it thickens. To check if it’s ready, place a small amount on a frozen plate—if it holds a gelled line briefly before dripping, your jam is perfectly set. Remember, this recipe doesn’t use added pectin, so it will have a soft, spreadable consistency.
Step 6: Cool and Store
Transfer the hot jam to a large bowl or baking dish. Cover with plastic wrap, poking a few holes to let steam escape, and allow it to cool completely at room temperature. Once cool, spoon your jam into clean mason jars or airtight containers and refrigerate. Your Easy Strawberry Jam Recipe is now ready to enjoy whenever you crave a burst of fresh strawberry flavor!
How to Serve Easy Strawberry Jam Recipe
Garnishes
Bring out the beauty of your homemade jam by adding fresh strawberry slices or a small sprig of mint when serving. A little lemon zest sprinkle on top can enhance that bright citrus note from the jam itself.
Side Dishes
This jam pairs wonderfully with toasted artisanal breads, buttery croissants, creamy ricotta, or even drizzled over vanilla ice cream. It’s also lovely as a topping on pancakes or stirred into your morning oatmeal for a fruity lift.
Creative Ways to Present
Try filling mini tart shells with your Easy Strawberry Jam Recipe and topping them with whipped cream for an elegant dessert. Layer it between cake layers or swirled into cheesecake batter for colorful, fruity surprises. It even makes a fantastic glaze for roasted meats if you’re feeling adventurous!
Make Ahead and Storage
Storing Leftovers
After opening, keep your jam refrigerated in an airtight container. It should stay fresh for up to three weeks, allowing you to savor it on toast or in recipes long after making it.
Freezing
If you want to keep your Easy Strawberry Jam Recipe for even longer, freezing is a fantastic option. Use freezer-safe containers, leaving some space at the top for expansion. Frozen jam can last up to six months without losing its delightful flavor.
Reheating
When you’re ready to use frozen jam, thaw it in the refrigerator overnight. If needed, warm gently in a saucepan over low heat, stirring occasionally to bring back that perfect spreading consistency.
FAQs
Can I use frozen strawberries for this recipe?
Absolutely! Frozen strawberries work well if fresh ones aren’t available. Just thaw and drain any excess liquid before cooking to prevent the jam from becoming too watery.
Do I need to add pectin to this jam?
No, this Easy Strawberry Jam Recipe relies on the natural pectin in the fruit and lemon juice, giving a softer set that spreads beautifully without any added thickeners.
How long does it take for the jam to set?
The simmering process usually takes about 10 to 15 minutes after the mixture comes to a boil. Testing on a frozen plate helps you find the perfect consistency.
Is this recipe suitable for canning?
This recipe is designed for refrigerator storage and isn’t optimized for traditional water bath canning due to its lower acidity and no added pectin. If you want to can it, follow safe canning guidelines and consider adding commercial pectin.
Can I customize the flavor of this jam?
Definitely! You can add a splash of vanilla extract, a pinch of cinnamon, or even a handful of chopped fresh basil for a unique twist. Just add these flavors towards the end of cooking to keep them vibrant.
Final Thoughts
This Easy Strawberry Jam Recipe is a delightful way to celebrate fresh strawberries any time of year. Its straightforward process and wholesome ingredients make it a joy to prepare, while its vibrant taste and texture ensure it will become a beloved staple in your kitchen. I encourage you to give it a try and experience the simple happiness that homemade jam brings to a morning table or cozy snack time.
Print
Easy Strawberry Jam Recipe
- Prep Time: 10 minutes
- Cook Time: 10 minutes
- Total Time: 20 minutes
- Yield: 10 servings 1x
- Category: Condiment
- Method: Stovetop
- Cuisine: American
- Diet: Vegetarian
Description
This Easy Strawberry Jam Recipe delivers a homemade, fresh fruit spread that’s perfect for toast, desserts, or as a sweet addition to many dishes. Using just fresh strawberries, sugar, and lemon, this recipe guides you through a simple stovetop method to create a naturally sweet and slightly tangy jam without added pectin.
Ingredients
Jam Ingredients
- 5 cups strawberries, quartered (approximately 1 ½ lbs)
- 1 cup granulated sugar
- 2 tablespoons lemon juice (about 1 lemon)
- 1 lemon, zested
Instructions
- Prepare Strawberries: Wash the strawberries thoroughly, hull them by removing the stems, and cut them into halves or quarters depending on size. Combine the prepared strawberries, sugar, lemon juice, and lemon zest in a medium pot or saucepan.
- Adjust Sweetness and Acidity: Taste the strawberry mixture at this stage and adjust the sweetness or tartness by adding more sugar or lemon juice as needed, since strawberry sweetness varies.
- Cook Strawberries: Place the pot on medium heat and bring the mixture to a boil. Cook until the strawberries break down and release their juices, stirring occasionally. Use a potato masher to help break up the fruit faster if desired.
- Optional Seed Removal: For a seedless jam, use an immersion blender to puree the hot jam and then strain it through a fine mesh sieve. Return the smooth jam mixture to the pot to continue cooking, skimming off foam as it forms.
- Simmer to Set: Lower the heat and simmer the jam gently, stirring frequently. Test the jam’s consistency by placing a small amount on a frozen plate; it should hold a line briefly before slowly dripping, indicating it’s ready despite not using pectin.
- Cool and Store: Pour the hot jam into a large bowl or baking dish and cover with plastic wrap with a few holes to allow steam to escape. Let it cool completely to room temperature, then transfer the jam into clean mason jars or airtight containers. Store refrigerated and enjoy within a few weeks.
Notes
- Use ripe, fresh strawberries for best flavor and natural sweetness.
- Adjust sugar and lemon juice based on the tartness and sweetness of your strawberries.
- Immersion blending and straining are optional steps only if you prefer seedless jam.
- This jam does not contain added pectin, so the texture will be softer and less firm than commercial jams.
- Store finished jam in the refrigerator and consume within 3-4 weeks for optimal freshness.