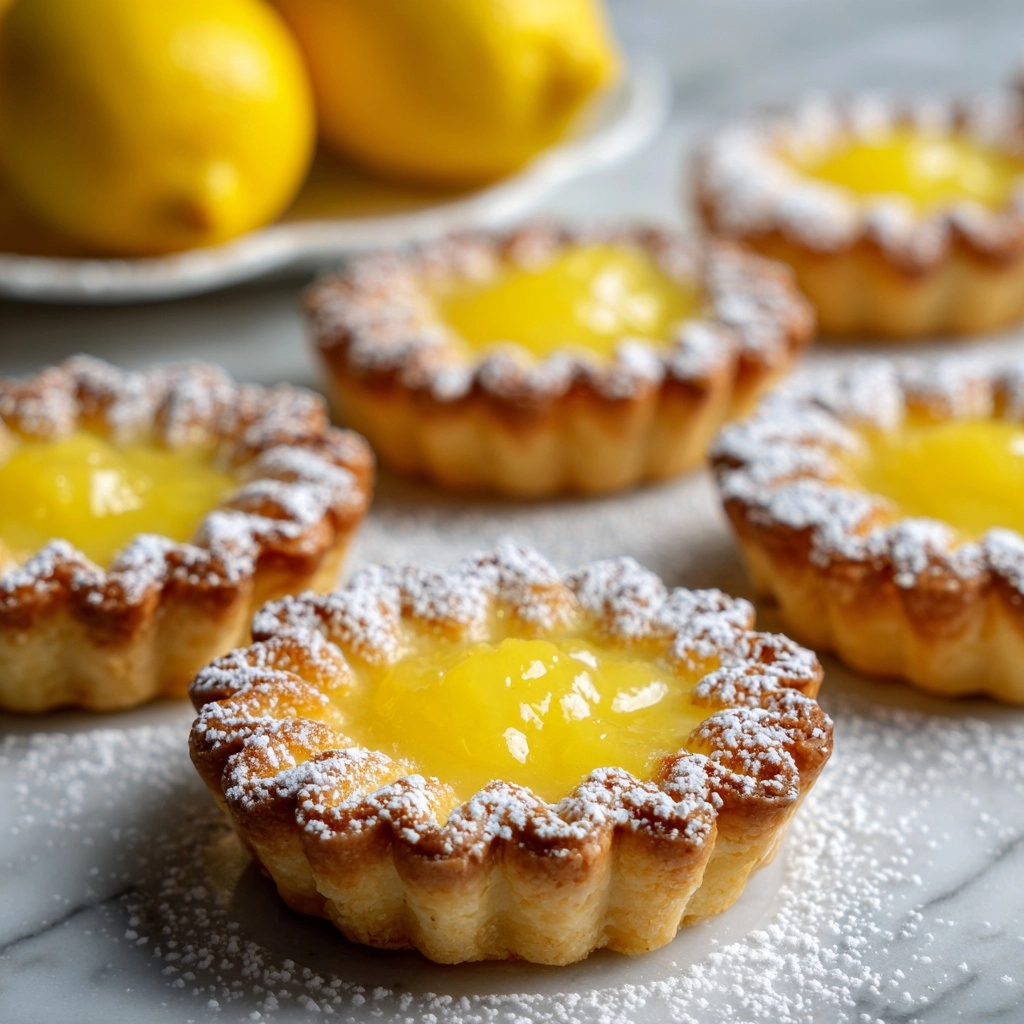
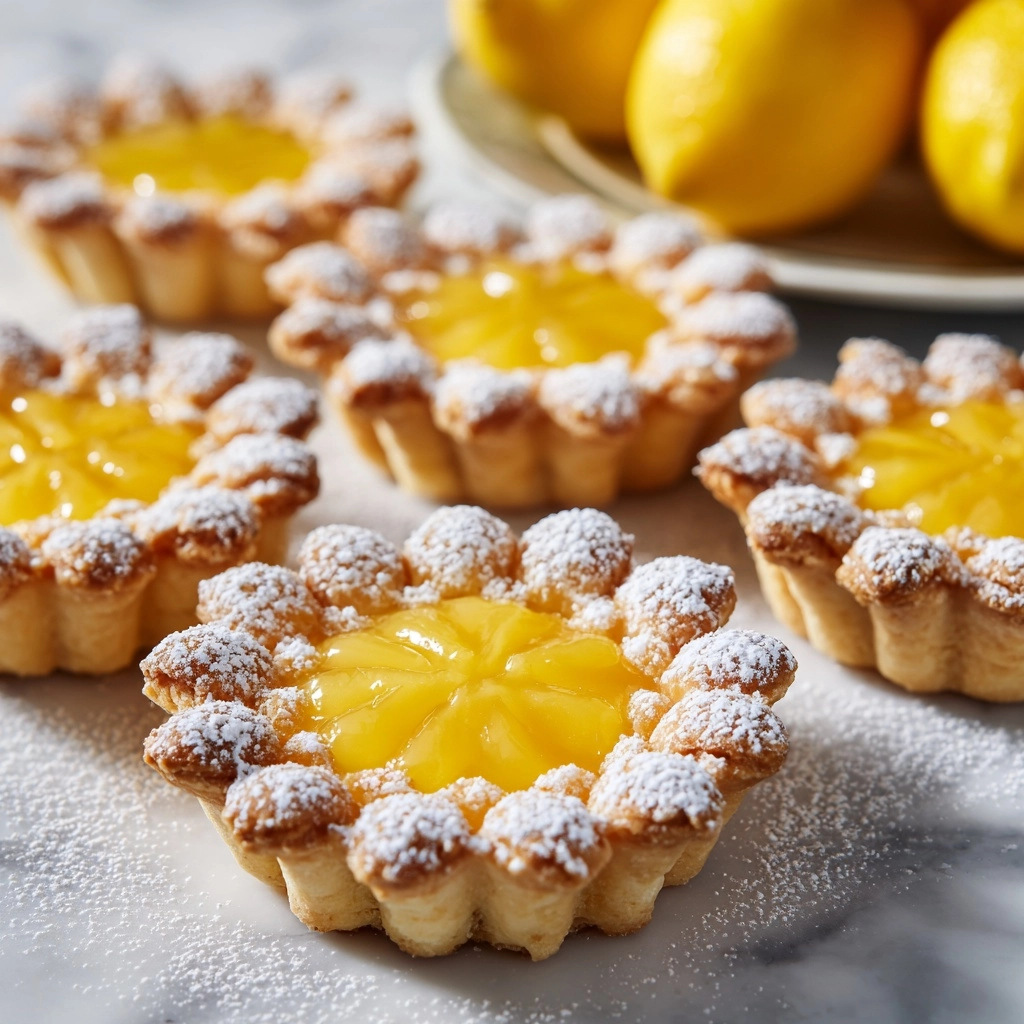
If there ever was a treat that instantly transports you to sunny days and leisurely brunches, Lemon Curd Tartlets do exactly that. With a buttery, crisp shell and bright, tangy filling, each tartlet is a tiny celebration—perfect for tea parties, dessert trays, and every sweet moment in between. Whether you’re craving a zing of citrus or just want an easy no-cook dessert, you’ll fall for the creamy whipped cream topping, vibrant lemon zest, and playful garnishes. Let’s make these Lemon Curd Tartlets together—you’ll be surprised by just how simple and satisfyingly elegant they are!
Ingredients You’ll Need
-
Lemon Curd:
- 1 cup lemon curd (store-bought or homemade)
Tartlet Shells:
- 12 mini tartlet shells (pre-baked)
Additional:
- 1 teaspoon lemon zest
- 1/2 cup heavy whipping cream
- 1 tablespoon powdered sugar
- Fresh berries or mint for garnish (optional)
How to Make Lemon Curd Tartlets
Step 1: Prepare Your Lemon Curd
If you’re whipping up homemade lemon curd, make sure it’s cooled and ready to use; this way your tartlets stay tidy and the curd sets up nicely inside the shells. Store-bought works beautifully too, especially when you’re short on time.
Step 2: Fill the Tartlet Shells
Spoon 1 to 2 tablespoons of lemon curd into each tartlet shell, smoothing the tops with a spoon for a polished look. The curd should fill the shell completely but not overflow, so every bite balances buttery crunch and vibrant citrus.
Step 3: Whip the Cream
In a separate mixing bowl, beat the heavy cream with powdered sugar until soft, billowy peaks form. This whipped cream will add an airy lightness to the bold flavor of the curd, making every tartlet shine.
Step 4: Decorate and Garnish
Spoon or pipe the freshly whipped cream over each tartlet. Sprinkle a little lemon zest on top and, if you’d like, tuck a berry or a mint leaf alongside for a pop of color that hints at the freshness inside.
Step 5: Chill and Serve
Pop your Lemon Curd Tartlets into the refrigerator until you’re ready to serve. This brief chill helps them set and makes the flavors mingle, resulting in the perfect cool, creamy, and tangy bite.
How to Serve Lemon Curd Tartlets

Garnishes
The finishing touches are where you can let your creativity shine! A bit of extra lemon zest gives a sunny look and an aromatic burst, while fresh berries, tiny sprigs of mint, or even edible flowers take your Lemon Curd Tartlets to next-level beautiful. For added texture, a sprinkle of crushed graham crackers or toasted coconut is always welcome.
Side Dishes
Pair these tartlets with a crisp glass of sparkling wine or a big pot of chamomile tea for a light, celebratory feel. On brunch tables, fresh fruit salads, berry compotes, or a plate of buttered shortbread cookies make lovely companions, enhancing the sweet-tart flavors and bringing more color to your spread.
Creative Ways to Present
Think beyond the ordinary by serving Lemon Curd Tartlets on a tiered cake stand, nestling each in a mini cupcake liner, or arranging them in a sunburst on a big platter. For parties, display a toppings “bar” with extra lemon zest, berries, and even flavored whipped creams so guests can build their own showpiece dessert!
Make Ahead and Storage
Storing Leftovers
If you have leftover Lemon Curd Tartlets, store them in a single layer in an airtight container in the fridge. They keep beautifully for up to two days—the shells stay crisp and the toppings remain fresh.
Freezing
While assembled tartlets don’t freeze well due to the cream, you can freeze the pre-baked tartlet shells separately for up to a month. Thaw the shells, then fill and finish the tartlets the day you plan to serve for best texture and flavor.
Reheating
Since these tartlets are a no-cook, chilled dessert, reheating isn’t necessary. If you find the tart shells have lost a bit of crispiness, a quick five-minute refresher in a 300°F (150°C) oven (shells only) will perk them right up before assembling with the filling.
FAQs
Can I use different citrus curds for the filling?
Absolutely! While classic Lemon Curd Tartlets are bursting with zesty lemon, you can experiment with lime, orange, or passionfruit curd for a fun twist. Just make sure the curd is thick and cool before filling the shells.
How can I make these tartlets gluten-free?
Look for gluten-free mini tart shells at the store, or bake your own with almond or oat flour. Everything else in the Lemon Curd Tartlets is naturally gluten-free, so it’s an easy swap!
Is it better to pipe or spoon on the whipped cream?
Either method works wonderfully—spooning gives a homey, rustic look while piping with a star tip creates a more polished, bakery-style finish. Choose whatever suits your style or occasion for serving Lemon Curd Tartlets!
Can I assemble them ahead for a party?
Yes, you can make Lemon Curd Tartlets a few hours in advance and refrigerate until serving. For extended prep, keep the whipped cream and filling separate until closer to party time to maintain maximum freshness and crispness.
What’s the best way to transport tartlets to an event?
Arrange the finished tartlets in a single layer in a sturdy, shallow container. If stacking is necessary, separate each layer with parchment paper. Add garnishes at your destination for the brightest, prettiest presentation.
Final Thoughts
No matter how you serve them or whom you share them with, Lemon Curd Tartlets are guaranteed to brighten any table. Just a handful of ingredients and a few quick steps bring this delightful treat to life—so go ahead and give them a try. The zesty flavor, creamy topping, and irresistible bite-sized charm might just make them your new go-to dessert!
Print
Lemon Curd Tartlets Recipe
- Prep Time: 15 minutes
- Cook Time: 0 minutes
- Total Time: 15 minutes
- Yield: 12 tartlets 1x
- Category: Dessert
- Method: No-Cook
- Cuisine: American, French
- Diet: Vegetarian
Description
These Lemon Curd Tartlets are the perfect bite-sized dessert for any occasion. With a buttery tartlet shell filled with tangy lemon curd and topped with whipped cream, they are a delightful treat.
Ingredients
Lemon Curd:
- 1 cup lemon curd (store-bought or homemade)
Tartlet Shells:
- 12 mini tartlet shells (pre-baked)
Additional:
- 1 teaspoon lemon zest
- 1/2 cup heavy whipping cream
- 1 tablespoon powdered sugar
- Fresh berries or mint for garnish (optional)
Instructions
- Prepare Lemon Curd: If using homemade lemon curd, prepare it ahead and let it cool completely.
- Fill Tartlet Shells: Fill each tartlet shell with about 1 to 2 tablespoons of lemon curd, smoothing the tops with a spoon.
- Whip Cream: In a separate bowl, whip the heavy cream with powdered sugar until soft peaks form.
- Assemble Tartlets: Spoon or pipe the whipped cream over each tartlet. Garnish with lemon zest and optional berries or mint leaves.
- Chill: Refrigerate until ready to serve.
Notes
- Tartlets can be assembled a few hours in advance and stored chilled.
- For extra texture, sprinkle crushed graham crackers or toasted coconut on top before serving.
Nutrition
- Serving Size: 1 tartlet
- Calories: 120
- Sugar: 9 g
- Sodium: 55 mg
- Fat: 7 g
- Saturated Fat: 4 g
- Unsaturated Fat: 2 g
- Trans Fat: 0 g
- Carbohydrates: 12 g
- Fiber: 0 g
- Protein: 1 g
- Cholesterol: 30 mg