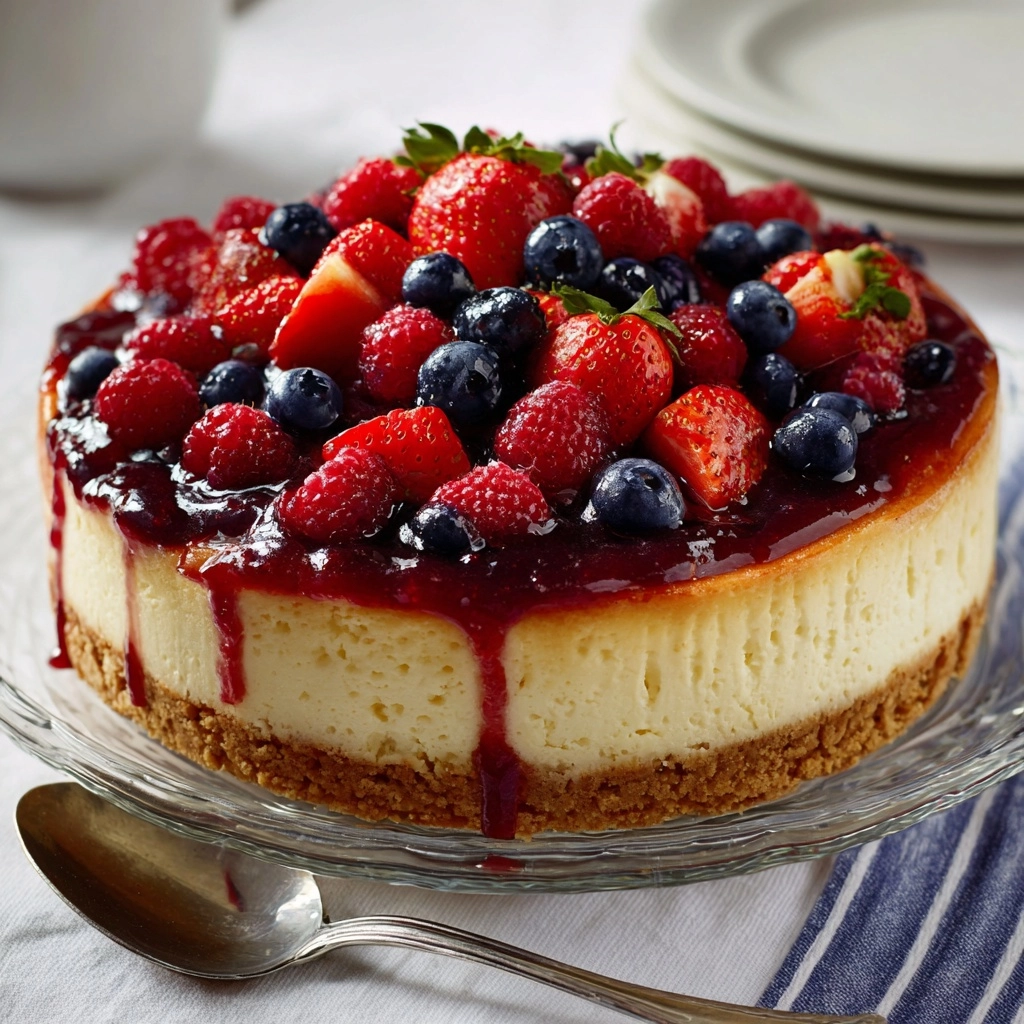
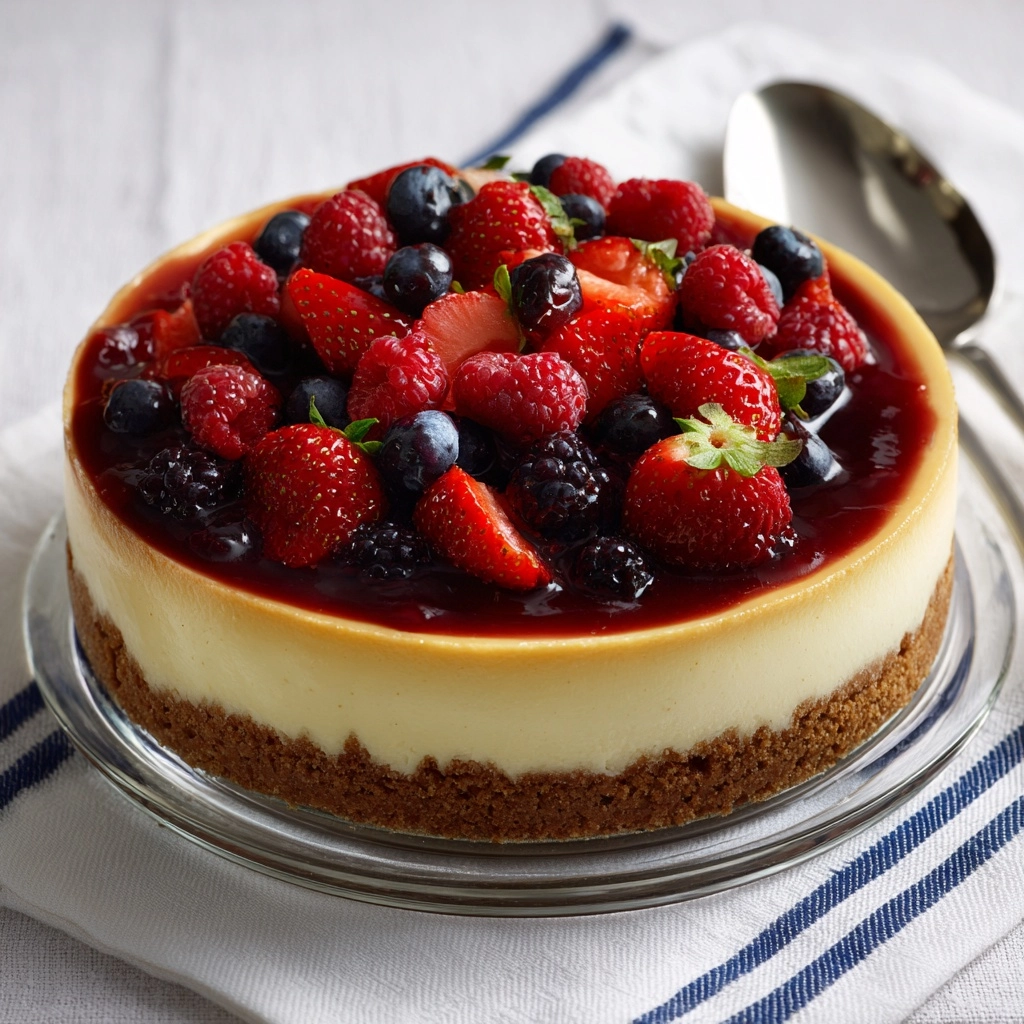
If you’ve ever wanted a showstopping dessert that’s as simple to make as it is spectacular to serve, the No-Bake Cheesecake Flag Cake is your new best friend. This crowd-pleasing, summery treat layers a buttery graham cracker crust, luscious cheesecake filling, and fresh berries in the design of the American flag—no oven required! Whether you’re celebrating the 4th of July, Memorial Day, or just want to make any gathering a little more special, this easy, patriotic dessert is guaranteed to draw “oohs” and “aahs” (and second helpings) from everyone at the table.
Ingredients You’ll Need
Ingredients You’ll Need
Let’s talk about how just a handful of kitchen staples and fresh berries come together to create pure magic! Each ingredient in this No-Bake Cheesecake Flag Cake has a purpose—be it adding rich creaminess, irresistible crunch, or the vibrant red and blue hues that bring the flag to life.
- Graham cracker crumbs: This classic no-bake base gives the cake its signature, buttery crunch.
- Unsalted butter, melted: The secret to holding the crust together and infusing it with delicious richness.
- Granulated sugar: Adds a touch of sweetness to the foundation of your cake.
- Cream cheese, softened: The creamy core that makes every bite tangy and smooth.
- Powdered sugar: Combines seamlessly with the cream cheese for that iconic cheesecake sweetness.
- Vanilla extract: A splash of this adds warmth and depth to your cheesecake filling.
- Heavy whipping cream: When whipped, it becomes airy and light, making the cheesecake filling fluffy but rich.
- Fresh blueberries: These become the starry blue corner of your flag, adding juicy bursts of flavor.
- Fresh strawberries, hulled and sliced: Their bright red color and sweet-tart flavor are perfect for “stripes” that pop.
How to Make No-Bake Cheesecake Flag Cake
Step 1: Make the Graham Cracker Crust
Start by grabbing a medium mixing bowl and tossing those graham cracker crumbs in with your melted butter and a little granulated sugar. Mix everything together until the crumbs are evenly coated and resemble damp sand. Once ready, press the mixture firmly and evenly into the bottom of a 9×13-inch baking dish. Use the back of a spoon (or your hands) to pack it down well, ensuring a solid crust that won’t crumble when you slice it later. Set this aside while you move on to the creamy goodness.
Step 2: Whip Up the Cheesecake Filling
In a large bowl, beat the softened cream cheese with powdered sugar and vanilla extract until completely smooth and creamy—don’t rush this step! Another bowl comes into play here: whip that heavy whipping cream to stiff peaks (a hand mixer makes this job easy), which guarantees your No-Bake Cheesecake Flag Cake filling will be fluffy and light. Gently fold the whipped cream into the cream cheese mixture, making sure to keep as much air in the batter as possible. This creates that dreamy, melt-in-your-mouth texture everyone loves.
Step 3: Layer the Filling Over the Crust
Spread the finished cheesecake filling over your crust, smoothing it into an even layer with an offset spatula or the back of a spoon. Take your time so the layer looks beautiful and uniform—this is your blank canvas!
Step 4: Decorate with Berries for the Flag Effect
Now comes the part that makes this the No-Bake Cheesecake Flag Cake everyone talks about! Arrange fresh blueberries in the top-left corner of the cake to create the “stars” portion of the flag. Use the strawberry slices to form red “stripes,” spacing them evenly across the cake for a red-white-red effect. Not only does this look stunning, but those fresh berries add a refreshing burst to each bite.
Step 5: Chill and Set
The hard part is waiting! Cover your cake and refrigerate for at least four hours, or until set. This chilling time helps all the layers meld together and makes it a breeze to slice. If you can prep it the day before, even better—No-Bake Cheesecake Flag Cake only gets more delicious overnight.
How to Serve No-Bake Cheesecake Flag Cake
Garnishes
A little extra whipped cream piped around the edges or a quick dusting of powdered sugar adds a bakery-style touch to your No-Bake Cheesecake Flag Cake. You can also sprinkle on a few extra blueberries and strawberries for an abundant, festive finish.
Side Dishes
Since this cake is such a showpiece, you’ll want to keep sides simple—a scoop of vanilla ice cream or a pitcher of fresh lemonade complements the creamy, fruity flavors without competing for attention. For a more decadent option, serve with a side of chocolate sauce for drizzling!
Creative Ways to Present
Try constructing individual mini flag cakes by layering the crust, filling, and fruit in mason jars or ramekins—perfect for parties or picnics! Feeling fancy? Use star-shaped cookie cutters to cut out serving pieces, or arrange the berries in a different flag pattern for other celebrations. However you serve it, the No-Bake Cheesecake Flag Cake always looks (and tastes) like a masterpiece.
Make Ahead and Storage
Storing Leftovers
If you find yourself with extra slices (lucky you!), cover the baking dish tightly with plastic wrap or transfer pieces to an airtight container. Store them in the refrigerator for up to 3 days. The crust may soften a bit over time, but the flavors only get better!
Freezing
You can absolutely freeze No-Bake Cheesecake Flag Cake if you want to get even further ahead. Slice the cake, place pieces on a baking sheet to firm up in the freezer, then wrap individually and store for up to 1 month. Thaw overnight in the fridge before enjoying—just know that the texture of the fruit may change slightly after freezing.
Reheating
There’s no reheating required for this cool, creamy dessert—just let fridge-chilled or thawed slices sit at room temperature for 10–15 minutes before serving, which softens the filling slightly and brings out the headiest flavor and texture.
FAQs
Can I use frozen berries instead of fresh?
Fresh berries make for the prettiest presentation and best texture, but you can use frozen if needed. Thaw and drain them very well to prevent extra moisture from seeping into your cake, and gently pat dry before arranging.
Can I make this No-Bake Cheesecake Flag Cake gluten-free?
Absolutely! Simply swap in your favorite gluten-free graham crackers for the crust. The filling and topping are naturally gluten-free, so you’re covered.
How far ahead can I assemble this cake?
For best flavor and firm slices, you can make No-Bake Cheesecake Flag Cake up to 24 hours in advance. Assemble and decorate, cover, and chill until you’re ready to serve for peak freshness.
What can I use instead of strawberries for the stripes?
Raspberries are a delicious alternative to strawberries for the “red” stripes, or you could try thin slices of cherries for a twist. Pick your favorite red fruit and have fun with it!
Can I reduce the sugar in this recipe?
You can scale back the granulated or powdered sugar to taste—just note that reducing it too much may affect the texture and stability of the cheesecake filling. Start with a slight reduction for a less-sweet version, and adjust as you go.
Final Thoughts
Few desserts are as festive, fuss-free, and tasty as the No-Bake Cheesecake Flag Cake. Whether you’re party-planning or just in the mood for a classic creamy treat, this recipe is always a hit. Gather your ingredients, invite your favorite people, and let this colorful cake be the star of your next celebration!
Print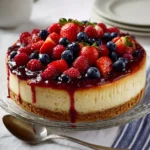
No-Bake Cheesecake Flag Cake Recipe
- Prep Time: 25 minutes
- Cook Time: 0 minutes
- Total Time: 4 hours 25 minutes
- Yield: 12 servings 1x
- Category: Dessert
- Method: No-Bake
- Cuisine: American
- Diet: Non-Vegetarian
Description
Celebrate any patriotic occasion with this stunning No-Bake Cheesecake Flag Cake. A creamy, luscious cheesecake filling atop a graham cracker crust, adorned with fresh blueberries and strawberries, creating a red, white, and blue masterpiece!
Ingredients
Graham Cracker Crust:
- 2 cups graham cracker crumbs
- 1/2 cup unsalted butter, melted
- 3 tablespoons granulated sugar
Cheesecake Filling:
- 16 ounces cream cheese, softened
- 1 cup powdered sugar
- 1 teaspoon vanilla extract
- 2 cups heavy whipping cream
Toppings:
- 1 cup fresh blueberries
- 1 1/2 cups fresh strawberries, hulled and sliced
Instructions
- Graham Cracker Crust: In a medium bowl, combine graham cracker crumbs, melted butter, and granulated sugar. Press mixture into the bottom of a 9×13-inch baking dish.
- Cheesecake Filling: Beat cream cheese, powdered sugar, and vanilla until smooth. Whip heavy cream to stiff peaks, then fold into cream cheese. Spread filling over crust.
- Decorate: Arrange blueberries in the top-left corner as stars and strawberries in rows for stripes.
- Chill: Refrigerate for at least 4 hours until set. Slice and serve chilled.
Notes
- Enhance with a tablespoon of lemon juice for extra flavor.
- Raspberries can be a tasty alternative to strawberries.
- Best prepared a day ahead for convenience.
Nutrition
- Serving Size: 1 piece
- Calories: 380
- Sugar: 22 g
- Sodium: 280 mg
- Fat: 27 g
- Saturated Fat: 16 g
- Unsaturated Fat: 10 g
- Trans Fat: 0 g
- Carbohydrates: 30 g
- Fiber: 2 g
- Protein: 5 g
- Cholesterol: 80 mg