If you’re hunting for a dessert that’s chocolatey, creamy, and impossibly easy to make, these No-Bake Chocolate Mousse Bars are about to become your new obsession. Imagine a velvety, airy mousse layered over a luscious cookie crust, all coming together in the fridge—no oven mitts required. Each bite is rich but light, delivering that perfect balance between decadence and simplicity. Whether you’re hosting friends, satisfying a weeknight sweet tooth, or looking for a make-ahead treat, this recipe hits all the sweet spots. Trust me, once you try these No-Bake Chocolate Mousse Bars, you’ll be dreaming up excuses to make them again and again.
Ingredients You’ll Need
Simplicity is the beauty of this recipe. Every ingredient here pulls its weight by adding flavor, texture, or stability—nothing extra, nothing missing. Gather these essentials, and you’re already halfway to dessert bliss.
- Chocolate sandwich cookies: Crushed cookies form a crunchy, chocolatey foundation that brings nostalgia and bold flavor to the base.
- Unsalted butter: Melted butter binds the cookie crumbs, ensuring the crust holds up when sliced.
- Semi-sweet chocolate chips: They melt down perfectly for a rich, not-too-sweet mousse; feel free to try milk or dark chocolate to suit your mood.
- Heavy whipping cream: Essential for both the ganache and that cloud-like mousse texture.
- Cream cheese: This adds a subtle tang and creamy body, which helps the mousse stay firm and sliceable.
- Powdered sugar: It blends easily for sweetness without any grainy texture.
- Vanilla extract: Just a touch enhances the chocolate and rounds out all the flavors.
- Whipped cream and chocolate shavings (optional): The finishing touches—these take your No-Bake Chocolate Mousse Bars from everyday treat to company-worthy dessert.
How to Make No-Bake Chocolate Mousse Bars
Step 1: Prepare the Cookie Crust
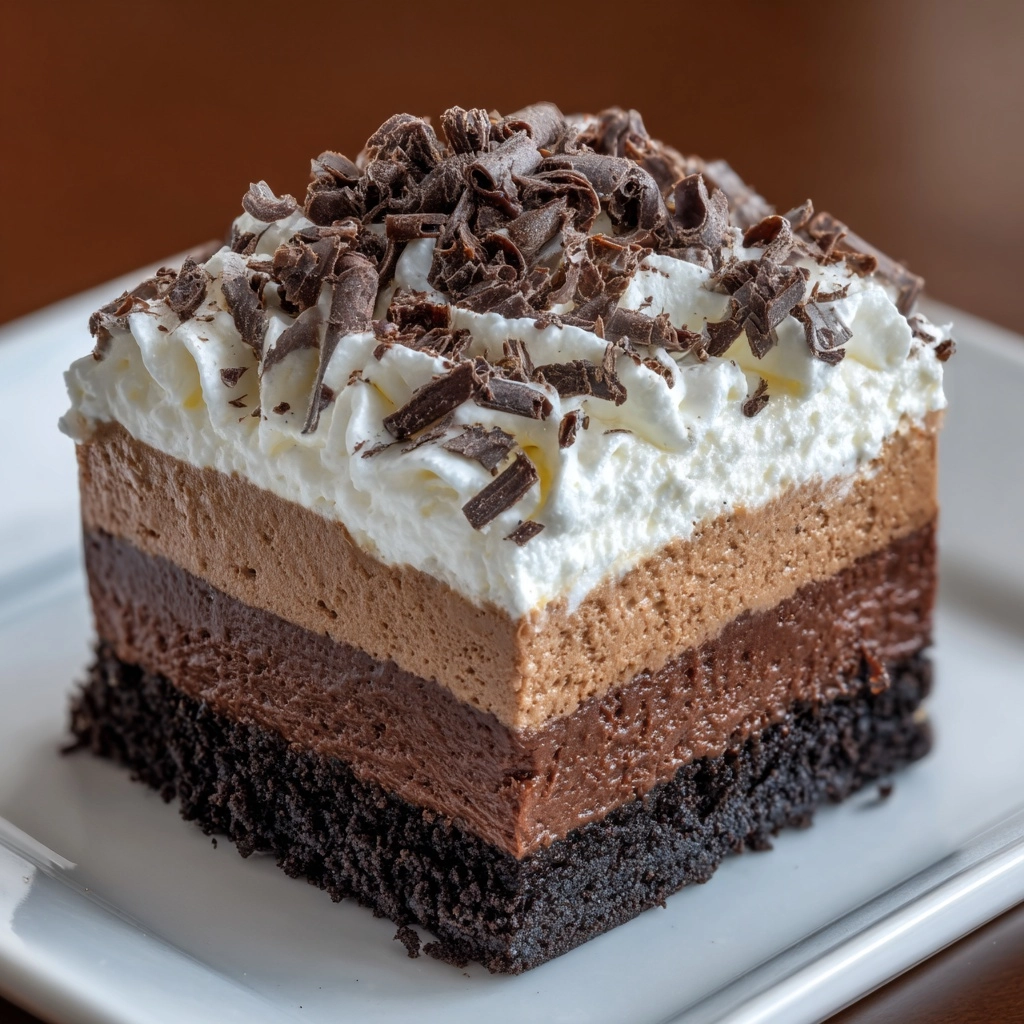
Start by pulsing the chocolate sandwich cookies in a food processor until they become fine crumbs. Mix them with the melted butter until the texture is like damp sand; this buttery combo helps everything hold together. Press the mixture firmly into a parchment-lined 8×8-inch pan, making sure to form an even crust—don’t be shy about applying some pressure. Pop the crust into the fridge to chill while you make the mousse. This cool base is the foundation for the creamy goodness to come.
Step 2: Make the Chocolate Ganache
In a microwave-safe bowl, heat 3/4 cup of heavy cream until hot (not boiling), then pour it over the semi-sweet chocolate chips. Let them sit undisturbed for two minutes. When you stir, you’ll see the chocolate melt into a glossy, rich ganache. Give it time to come down to room temperature before you mix it with the cream cheese—you want smooth and dreamy, not lumpy.
Step 3: Whip the Cream Cheese Mixture
Grab your hand mixer and whip the softened cream cheese, powdered sugar, and vanilla extract together until smooth and fluffy. Slowly blend in the cooled chocolate ganache, and watch as the mixture transforms into something utterly irresistible. This step is crucial—combining the ingredients gradually ensures a mousse that’s light, airy, and uniform in texture.
Step 4: Whip and Fold in Cream
In a clean bowl, whip the remaining 1/2 cup of heavy cream to stiff peaks. With a gentle hand, fold this whipped cream into the chocolate mixture. This technique keeps the mousse light and pillowy—the very essence of what makes No-Bake Chocolate Mousse Bars so irresistible. Take care not to overmix; you want every bite to melt on your tongue.
Step 5: Assemble and Chill
Spread the mousse evenly atop the chilled cookie crust, smoothing it out with an offset spatula for a polished look. Refrigerate for at least 4 hours, allowing the mousse to set and the flavors to meld. Patience pays off here—the texture only gets better as it chills.
Step 6: Slice and Garnish
Once the mousse is firm, lift out the entire slab using the parchment, then slice into neat bars. If you wish, dollop with whipped cream and scatter chocolate shavings on top. That final flourish adds elegance and makes every bar feel extra special.
How to Serve No-Bake Chocolate Mousse Bars

Garnishes
Top your No-Bake Chocolate Mousse Bars with a swirl of whipped cream and a sprinkle of chocolate shavings for that bakery-style allure. For a playful twist, you could sprinkle crushed cookies, a drizzle of caramel, or even a few raspberries—each brings out the chocolate in its own way.
Side Dishes
These bars are rich, so pair them with something light and refreshing—a bowl of fresh berries, a citrusy fruit salad, or even a small scoop of vanilla ice cream. For coffee lovers, a hot espresso makes the perfect counterpoint to the cool, chocolaty mousse.
Creative Ways to Present
If you’re serving for a crowd, cut the bars into bite-sized squares and serve on a tiered dessert tray for a party-ready presentation. For a special occasion, layer cubes of mousse bar with berries and whipped cream in parfait glasses for a stunning dessert. You can even gift them in a pretty box lined with parchment for a homemade, heartfelt treat.
Make Ahead and Storage
Storing Leftovers
Store any leftover No-Bake Chocolate Mousse Bars tightly covered in the refrigerator. They’ll stay luscious for up to 4 days, making them a wonderful make-ahead option for events—or late night cravings. Just keep them cold so the mousse stays set and the crust remains firm.
Freezing
Need to save some for later? No problem! Arrange the bars in a single layer on a tray and freeze until solid, then wrap individually in plastic wrap and store in an airtight container. They’ll keep beautifully for up to 2 months. Thaw in the refrigerator overnight for best results.
Reheating
No reheating required—one of the perks of a no-bake dessert! If the bars have been frozen, just allow them to thaw in the fridge. Enjoy them straight from the chill, when the mousse is at its most creamy and the flavors are at their fullest.
FAQs
Can I use a different type Dessert
Absolutely! While classic chocolate sandwich cookies make a delicious base, you can swap in graham crackers, digestive biscuits, or even chocolate chip cookies for a fun twist. Just make sure to adjust the butter if needed to achieve that wet sand texture.
What if I don’t have a food processor?
No food processor? No problem! Place the cookies in a zip-top bag and crush them with a rolling pin or heavy pan. It takes a bit more elbow grease, but the results are just as tasty and satisfying.
How can I make this recipe gluten-free?
To make gluten-free No-Bake Chocolate Mousse Bars, simply swap the sandwich cookies for your favorite gluten-free chocolate cookies. The rest of the ingredients are naturally gluten-free, so everyone can join in the chocolate celebration!
Can I use light cream cheese or a non-dairy alternative?
Feel free to use light cream cheese, though keep in mind the texture may be a bit softer. For a dairy-free version, use vegan cream cheese and coconut cream instead of whipping cream. The mousse will still be creamy and satisfying!
Do I have to chill the bars for the full 4 hours?
The chilling time ensures the mousse sets perfectly for clean slices and the best texture. If you’re short on time, try popping the bars in the freezer for 1-2 hours, but for the best results, the full chill time is worth it.
Final Thoughts
There’s something magical about a dessert that feels fancy but comes together with everyday ingredients and zero oven time. Whip up a batch of these No-Bake Chocolate Mousse Bars and watch them disappear—this is the kind of treat that wins hearts with every creamy, chocolate-laced bite. Don’t be surprised if they become the most-requested recipe in your kitchen!
Print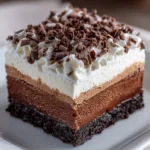
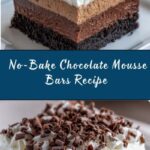
No-Bake Chocolate Mousse Bars Recipe
- Prep Time: 25 minutes
- Cook Time: 0 minutes
- Total Time: 4 hours 25 minutes (includes chilling)
- Yield: 9 bars 1x
- Category: Dessert
- Method: No-Bake
- Cuisine: American
- Diet: Vegetarian
Description
Indulge in the rich and creamy delight of these decadent No-Bake Chocolate Mousse Bars. A luscious chocolate mousse filling atop a crunchy cookie crust, topped with whipped cream and chocolate shavings – a perfect treat for any chocolate lover.
Ingredients
For the Crust:
- 24 chocolate sandwich cookies (like Oreos)
- 5 tablespoons unsalted butter, melted
For the Mousse:
- 1 1/2 cups semi-sweet chocolate chips
- 1 1/4 cups heavy whipping cream, divided
- 8 oz cream cheese, softened
- 1/2 cup powdered sugar
- 1 teaspoon vanilla extract
For Topping:
- Whipped cream and chocolate shavings (optional)
Instructions
- Prepare the Crust: In a food processor, pulse the chocolate sandwich cookies until finely crushed. Add melted butter and pulse until the mixture resembles wet sand. Press the cookie mixture firmly into the bottom of a parchment-lined 8×8-inch pan to form the crust. Chill in the refrigerator.
- Make the Mousse: Heat 3/4 cup heavy cream until hot but not boiling. Pour over chocolate chips, let sit, then stir until smooth. Let cool. Beat cream cheese with powdered sugar and vanilla until smooth. Mix in the cooled chocolate ganache. Whip remaining 1/2 cup heavy cream to stiff peaks. Fold into chocolate mixture.
- Assemble: Spread mousse over chilled crust. Refrigerate for at least 4 hours. Slice into bars, top with whipped cream and chocolate shavings.
Notes
- You can use milk chocolate or dark chocolate chips based on your preference.
- For a crunchier crust, add a pinch of salt or crushed nuts to the cookie base.
Nutrition
- Serving Size: 1 bar
- Calories: 360
- Sugar: 22g
- Sodium: 210mg
- Fat: 26g
- Saturated Fat: 14g
- Unsaturated Fat: 10g
- Trans Fat: 0g
- Carbohydrates: 30g
- Fiber: 2g
- Protein: 4g
- Cholesterol: 55mg