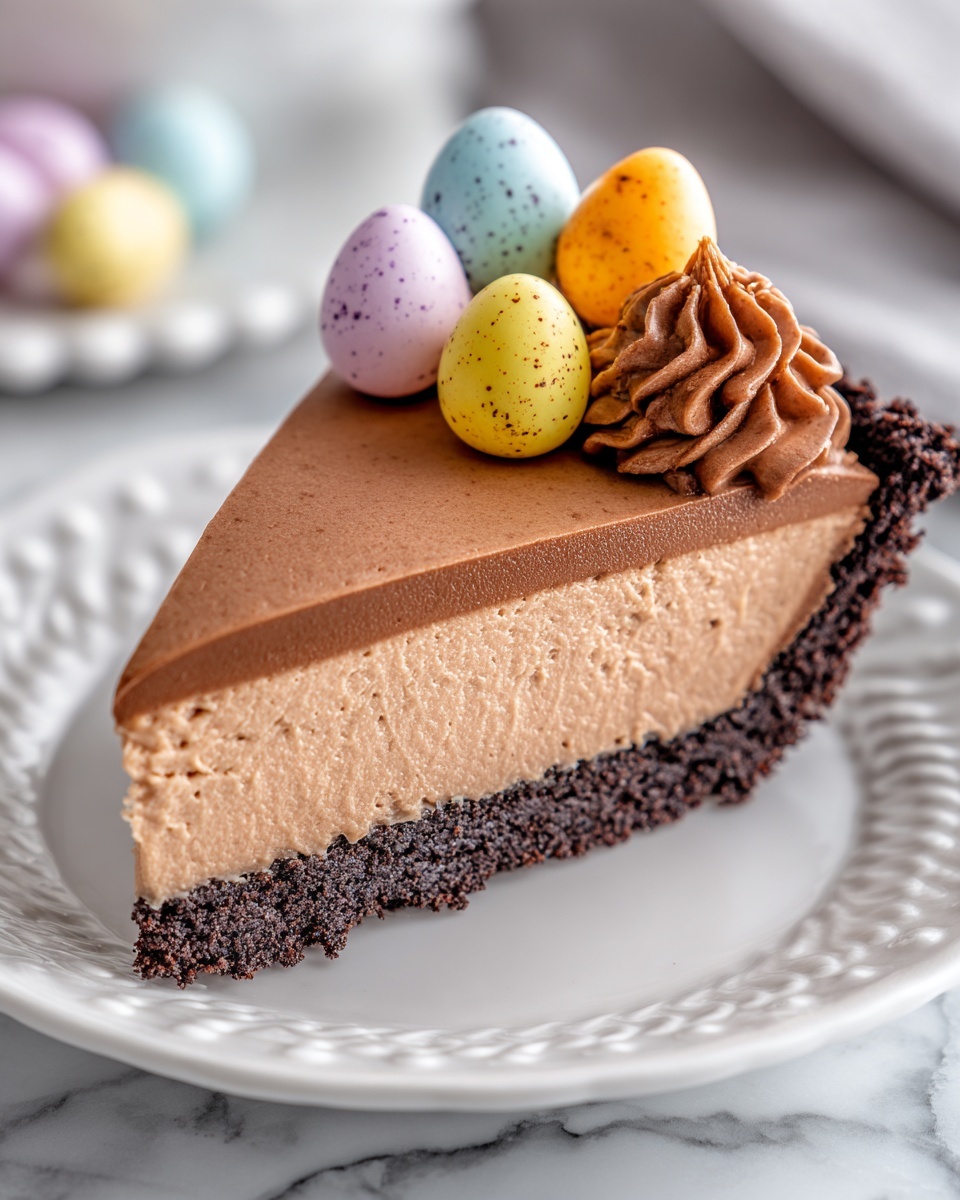
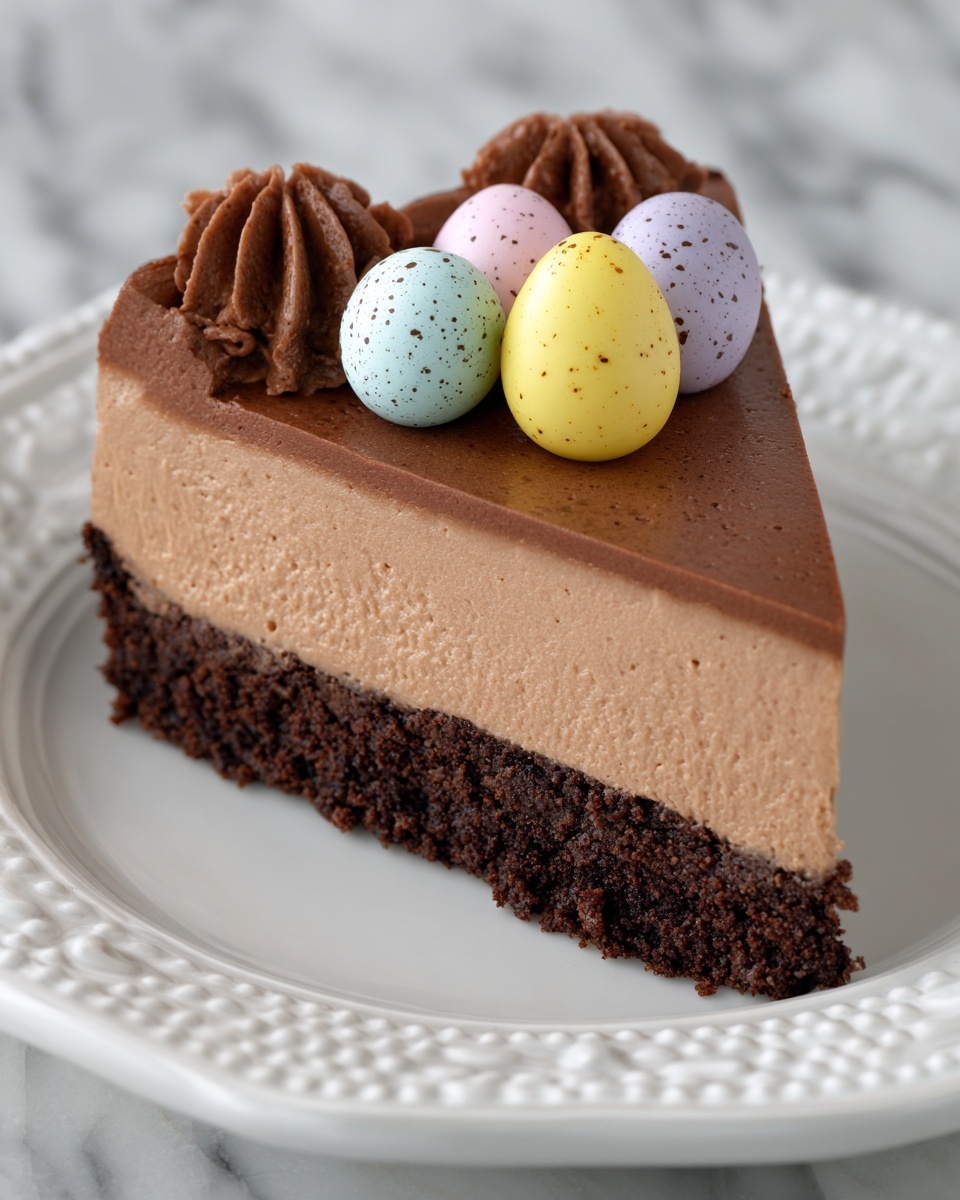
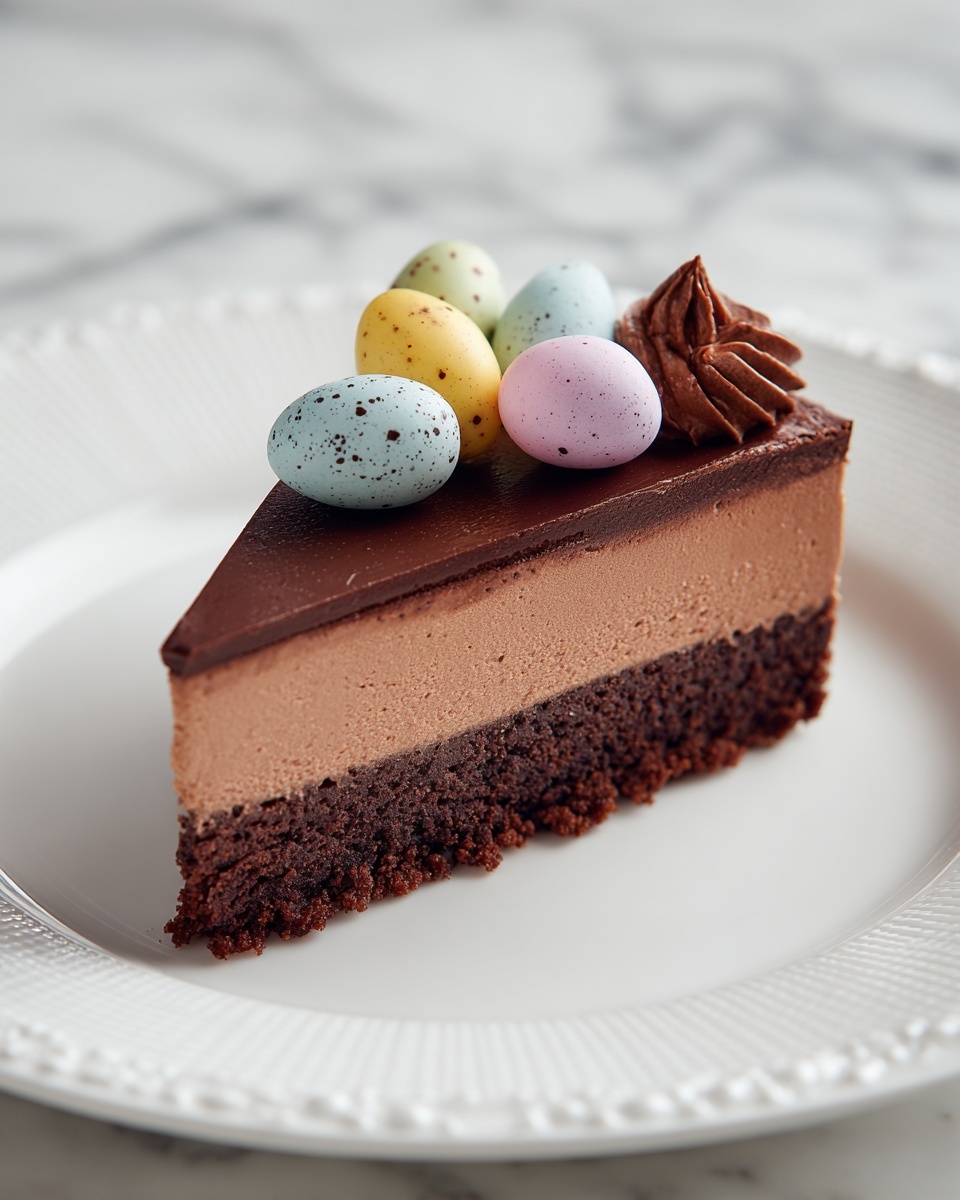
If you have a sweet tooth and love the creamy decadence of cheesecake without the fuss of baking, you are absolutely going to adore this No-Bake Mini Egg Chocolate Cheesecake Recipe. It brilliantly combines the rich depth of semi-sweet chocolate, the lightness of whipped cream, and the playful crunch of mini eggs all nestled in a crunchy Oreo cookie crust. This treat is as delightful to look at as it is to eat, making it perfect for celebrations or any time you want to impress without endless effort. Dive in and let this luscious, no-bake delight become your new favorite dessert!
Ingredients You’ll Need
This recipe truly shines because of its simplicity and carefully chosen ingredients that work harmoniously to give you that luscious, creamy texture and irresistible chocolate flavor. Each element plays a vital role, from the crunchy base to the velvety cheesecake filling studded with colorful mini eggs.
- Oreo cookies (35): Using both wafers and filling ensures the crust is flavorful and holds together perfectly.
- Unsalted butter (⅓ cup, melted): Adds richness to the crust and helps bind the crushed Oreos.
- Semi-sweet chocolate (8 ounces, finely chopped): Provides a deep, smooth chocolate flavor that balances sweetness.
- Heavy whipping cream (1 cup): Whipped to stiff peaks for a light, airy cheesecake texture.
- Cream cheese (20 ounces, softened): The creamy base essential for that classic cheesecake feel.
- Powdered sugar (¾ cup): Sweetens the filling smoothly without any graininess.
- Sour cream (¼ cup): Adds a subtle tang and keeps the filling luscious and creamy.
- Chopped mini eggs (1 ¼ cups): These bring delightful bursts of candy crunch throughout the cheesecake.
- Mini eggs for garnish (¼ cup): Bright and festive, these finish the cheesecake with charm.
How to Make No-Bake Mini Egg Chocolate Cheesecake Recipe
Step 1: Prepare the Oreo Crust
Start by pulsing the Oreo cookies in a food processor until they are finely crushed—this forms the flavorful base. Mix the crumbs thoroughly with melted butter so it holds together once pressed. Then, firmly press this mixture into the bottom and sides of your 9-inch springform pan, creating a sturdy crust that sets the foundation for your cheesecake.
Step 2: Chill the Crust
Pop the crust in the refrigerator to firm up while you prepare the decadent cheesecake filling. This chilling step ensures the crust won’t crumble when sliced and helps the cheesecake set properly later on.
Step 3: Melt the Chocolate
Gently melt your finely chopped semi-sweet chocolate in short bursts in the microwave, stirring in between to achieve a glossy, smooth finish without burning. This luscious chocolate will infuse the cheesecake with its rich flavor.
Step 4: Whip the Cream
In a large bowl, beat the heavy whipping cream until you reach stiff peaks. This step is crucial because it gives the cheesecake its light, airy texture that contrasts beautifully with the dense chocolate.
Step 5: Make the Cheesecake Filling
In a separate bowl, beat the softened cream cheese with the powdered sugar until smooth and creamy. Then mix in the melted chocolate and sour cream, combining everything into a rich, velvety blend. Be gentle yet thorough here to maintain the smoothness of the filling.
Step 6: Fold in Whipped Cream and Mini Eggs
Carefully fold the whipped cream into the chocolate cream cheese mixture to preserve the fluffy texture. Then, fold in the chopped mini eggs, adding delightful pops of color and crunch that make every bite joyful and fun.
Step 7: Assemble and Chill
Spoon the cheesecake filling over your chilled Oreo crust, smoothing the top with a spatula. Refrigerate the cheesecake for at least 4 hours, or until it is fully set. This patience pays off with the perfect slice every time.
Step 8: Garnish and Serve
Before serving, scatter the remaining mini eggs over the top for a festive, eye-catching presentation. Run a thin knife around the edges of the pan to loosen the cheesecake, then carefully unlatch the springform pan. Use a sharp knife to slice, and get ready to delight your guests.
How to Serve No-Bake Mini Egg Chocolate Cheesecake Recipe
Garnishes
Aside from the crushed and whole mini eggs, consider adding a drizzle of melted chocolate or a dusting of cocoa powder to enhance the visual appeal and flavor complexity. A few fresh berries on the side can also add a subtle tart contrast that brightens the dessert.
Side Dishes
This cheesecake pairs beautifully with a cup of rich coffee or a mug of warm milk—perfect for an indulgent afternoon treat or a celebratory dessert. For lighter pairing, fresh fruit salad works well to balance the richness of the chocolate cheesecake.
Creative Ways to Present
Try serving each slice on a decorative dessert plate with a sprig of mint or edible flowers for an elegant touch. You can also make individual portions in clear cups or jars layered with extra crushed Oreos and mini eggs for a playful spin that’s great for parties.
Make Ahead and Storage
Storing Leftovers
Keep any leftover No-Bake Mini Egg Chocolate Cheesecake Recipe covered tightly with plastic wrap or stored in an airtight container in the refrigerator. It will stay fresh and creamy for up to 4 days, making it a convenient treat to enjoy over several occasions.
Freezing
If you want to save for longer, you can freeze this cheesecake. Wrap it well with plastic wrap and foil to prevent freezer burn, and store it for up to 2 months. Thaw overnight in the refrigerator before serving to restore its perfect texture.
Reheating
Since this is a no-bake cheesecake, reheating is unnecessary and not recommended. Serving it chilled keeps the texture and flavor exactly as intended, creamy and cool with that satisfying chocolate crunch.
FAQs
Can I use a different type of cookie for the crust?
Absolutely! While Oreo cookies give this cheesecake a wonderful flavor and texture, you can substitute with chocolate graham crackers or digestive biscuits for a different twist. Just be sure they’re finely crushed and mixed well with butter to hold the crust together.
Do I have to use sour cream in the filling?
Sour cream adds a subtle tanginess that balances the sweetness and contributes to a smooth texture. If you don’t have it, you can try substituting with Greek yogurt or omit it altogether, though the flavor profile may be slightly less rich.
How long should I chill the cheesecake before serving?
Chilling the cheesecake for at least 4 hours is crucial for it to set properly. If you have more time, overnight chilling will only improve the texture and help all the flavors meld beautifully.
Can this recipe be made dairy-free?
It would require some substitutions like dairy-free cream cheese, non-dairy whipped cream, and vegan butter. The texture and flavor might differ, but with the right ingredients, it’s definitely possible to enjoy a dairy-free version!
What’s the best way to cut the cheesecake for neat slices?
Use a thin, sharp knife and run it under hot water between slices, wiping it dry each time. This technique helps you achieve clean cuts without dragging or crumbling the filling or crust.
Final Thoughts
There you have it—your new go-to crowd-pleaser, the No-Bake Mini Egg Chocolate Cheesecake Recipe. It’s effortless to make, rich in flavor, and stunning on any dessert table. Whether you’re celebrating a special occasion or simply craving a chocolatey treat, this cheesecake will not disappoint. Grab your ingredients, invite some friends, and share the joy of this wonderful dessert today!
Print
No-Bake Mini Egg Chocolate Cheesecake Recipe
- Prep Time: 30 minutes
- Cook Time: 0 minutes
- Total Time: 4 hours 30 minutes
- Yield: 14 servings 1x
- Category: Dessert
- Method: No-Cook
- Cuisine: American
Description
This No-Bake Mini Egg Chocolate Cheesecake is a delightfully creamy and chocolatey dessert perfect for any celebration or indulgent treat. Featuring a crunchy Oreo cookie crust, rich semi-sweet chocolate, and creamy cheesecake filling studded with chopped mini eggs, this cheesecake requires no baking and only refrigeration. It’s a simple yet impressive recipe that yields 14 servings and is perfect for chocolate and candy lovers alike.
Ingredients
Crust
- 35 Oreo cookies (wafers and filling)
- ⅓ cup unsalted butter, melted
Cheesecake Filling
- 8 ounces semi-sweet chocolate, finely chopped
- 1 cup heavy whipping cream (about 35% fat)
- 20 ounces cream cheese, softened
- ¾ cup powdered sugar
- ¼ cup sour cream
- 1 ¼ cups chopped mini eggs
- ¼ cup mini eggs, for garnish
Instructions
- Crush Oreos: In a food processor, pulse Oreo cookies until finely crushed to create a uniform crumb texture for the crust.
- Combine Crust Ingredients: Mix the Oreo crumbs with the melted butter until well combined, ensuring the butter coats all crumbs for a firm crust.
- Form Crust: Press the crumb mixture firmly into the bottom and sides of a 9-inch springform pan, creating an even base and edges for the cheesecake.
- Chill Crust: Refrigerate the crust while preparing the cheesecake filling to help it set and become firm.
- Melt Chocolate: Place the chopped semi-sweet chocolate in a microwave-safe bowl and melt in short bursts, stirring often until smooth and fully melted.
- Whip Cream: In a large bowl, beat the heavy whipping cream until stiff peaks form; set aside for folding into the cheesecake mixture.
- Mix Cream Cheese and Sugar: In another large bowl, beat the softened cream cheese with the powdered sugar until smooth and creamy with no lumps.
- Add Chocolate and Sour Cream: Beat the melted chocolate and sour cream into the cream cheese mixture until fully incorporated for a rich flavor.
- Fold in Whipped Cream and Mini Eggs: Gently fold the whipped cream and chopped mini eggs into the chocolate mixture to maintain the airy texture and distribute the candy pieces evenly.
- Assemble Cheesecake: Spoon the prepared filling over the chilled Oreo crust, smoothing the top evenly with a spatula.
- Refrigerate to Set: Refrigerate the cheesecake for at least 4 hours, or until fully set and firm enough to slice.
- Garnish: Before serving, sprinkle the top with the remaining mini eggs for a festive and colorful garnish.
- Release Pan and Slice: Run a thin knife around the edge of the crust to loosen it from the pan, then unclamp the springform and remove the cheesecake.
- Serve: Slice with a thin, sharp knife and serve chilled for the best texture and flavor.
Notes
- Ensure the cream cheese is softened to room temperature for a smooth filling.
- Do not over-melt the chocolate; stir well to avoid burning.
- Use a sharp knife warmed with hot water for cleaner slices.
- Refrigerate leftovers tightly covered; best consumed within 3 days.
- This recipe is best prepared a day in advance to allow proper setting.