If you have ever found yourself craving those warm, soft, and buttery delights from your favorite Italian restaurant, you are going to love mastering this Olive Garden Breadsticks Recipe right in your own kitchen. These golden, garlicky sticks of heaven bring together a perfect blend of softness, slight chewiness, and a flavorful buttery garlic topping that will have everyone reaching for another. Whether you’re pairing them with a hearty pasta or serving them as an irresistible snack, this recipe turns simple pantry ingredients into an iconic and utterly comforting breadstick experience.
Ingredients You’ll Need
The magic of this Olive Garden Breadsticks Recipe lies in its simple and trusty ingredients. Each component plays a crucial role: the yeast creates that lovely rise and airy texture, butter adds richness, and the garlic powder gives the classic flavor we all adore. Having these essentials on hand means you’re just moments away from fresh-baked goodness.
- 1 cup warm water (about 110°F): Provides the perfect temperature to activate the yeast without killing it.
- 1 packet (2¼ tsp) active dry yeast: The key to that soft, fluffy dough with a beautiful rise.
- 2 tablespoons granulated sugar: Feeds the yeast for proper fermentation and adds a touch of sweetness.
- 3 cups all-purpose flour: Forms the structure of the breadsticks, balancing chewiness and softness.
- 1½ teaspoons salt: Enhances flavor while controlling yeast activity for a perfect rise.
- 2 tablespoons unsalted butter (softened): Infuses richness into the dough for a tender crumb.
- For the Topping: 3 tablespoons unsalted butter (melted): Coats the breadsticks with that irresistible buttery shine.
- ½ teaspoon garlic powder: Brings that signature Olive Garden garlicky goodness.
- ½ teaspoon salt: Finishes the topping with a balanced savory touch.
How to Make Olive Garden Breadsticks Recipe
Step 1: Activate the Yeast and Mix the Dough
Begin by combining warm water, yeast, and sugar in a large bowl or your stand mixer. You’ll want to set this aside for 5 to 10 minutes until it’s foamy and alive with bubbles, signaling the yeast is happy and ready to work. Then, add the flour, salt, and softened butter to build your dough. Mix everything until it just comes together, then knead it for about 7 to 8 minutes by hand or 5 minutes with a dough hook. This kneading step is crucial to develop that smooth, elastic texture that forms the base of your perfect breadsticks.
Step 2: First Rise
Once your dough is kneaded, place it in a greased bowl and cover it with a towel or plastic wrap. Set it in a warm spot to rise for about an hour or until it doubles in size. This patient rise is what gives the dough its airy, fluffy texture inside, a hallmark of the Olive Garden breadsticks you love.
Step 3: Shape the Breadsticks
After the dough has risen, gently punch it down to release any trapped air. Divide the dough into 12 equal pieces and roll each piece into a rope about 6 to 7 inches long. Place each rope on a parchment-lined baking sheet, spacing them an inch apart to allow room for puffing during the second rise.
Step 4: Second Rise
Cover your shaped breadsticks loosely and let them rest for another 30 to 45 minutes. During this time, they’ll puff up nicely, preparing you for that perfect bake with a soft, fluffy interior.
Step 5: Bake and Butter
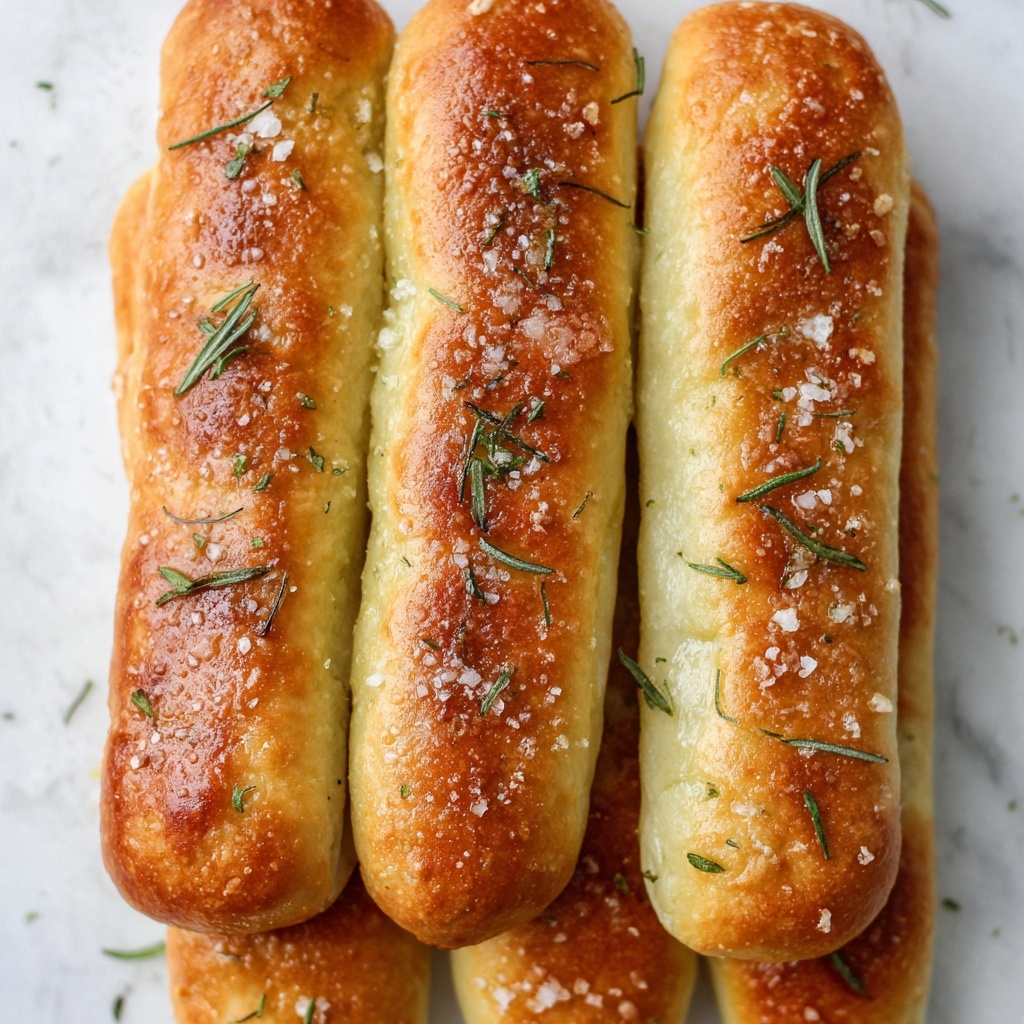
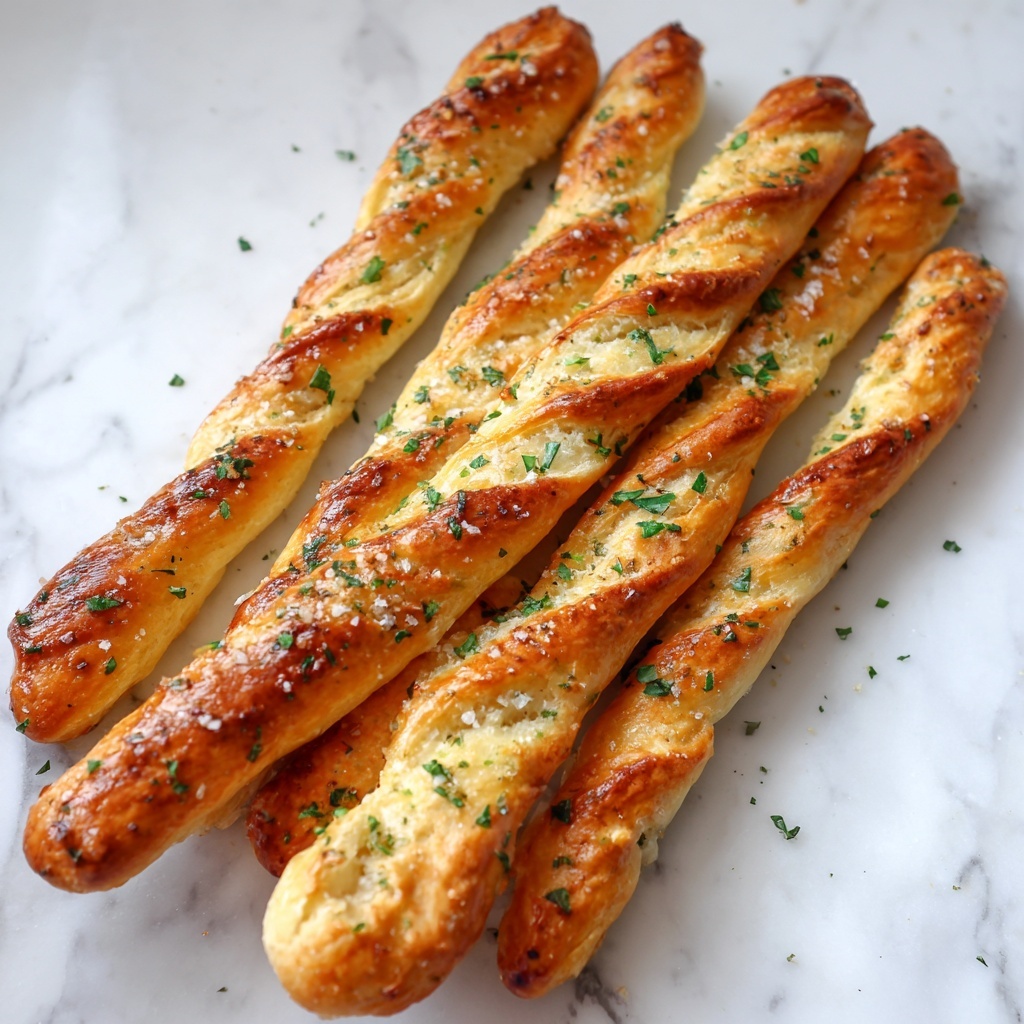
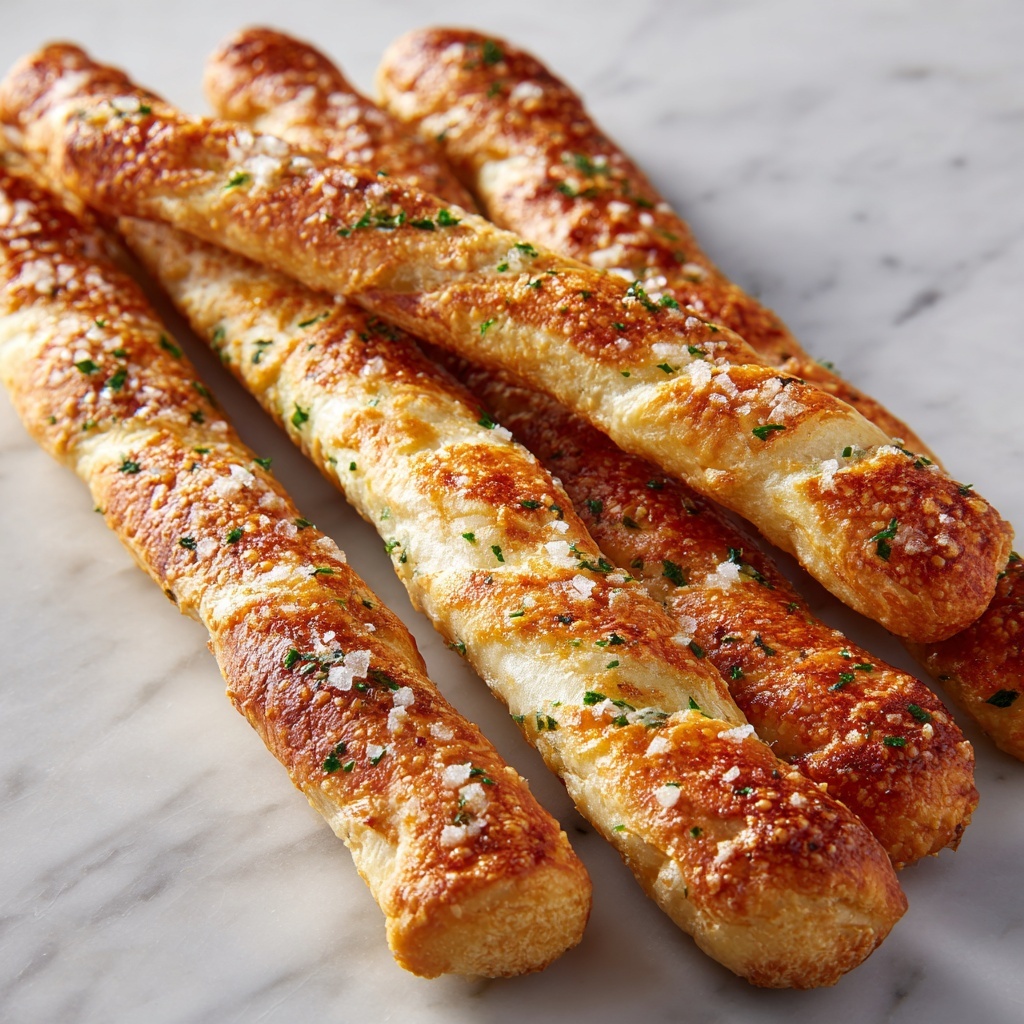
Preheat your oven to 400°F. When ready, bake the breadsticks for 12 to 14 minutes, or until they turn a beautiful golden brown. While they’re still hot, brush them generously with melted butter mixed with garlic powder and salt—the finishing touch that delivers that signature Olive Garden flavor and melt-in-your-mouth texture. Serve warm and watch these breadsticks disappear in no time.
How to Serve Olive Garden Breadsticks Recipe
Garnishes
The classic garlic and butter coating is always a winner, but to elevate your Olive Garden Breadsticks Recipe even more, try sprinkling freshly grated Parmesan cheese or a pinch of dried Italian herbs right after brushing with butter. A dusting of finely chopped fresh parsley adds a splash of color and fresh flavor that wakes up each bite beautifully.
Side Dishes
This breadstick recipe pairs wonderfully with just about any Italian-inspired meal. Imagine serving them alongside a hearty marinara or Alfredo pasta, a rich lasagna, or even a colorful caprese salad. They’re also fantastic dunked in warm soups like tomato basil or minestrone, making every meal feel extra comforting and special.
Creative Ways to Present
For a fun twist, arrange the breadsticks in a circular pattern on a platter around a small bowl of marinara or garlic butter dip. You could also make mini sandwiches by slicing the breadsticks horizontally and filling them with mozzarella and roasted vegetables or Italian cold cuts for a crowd-pleasing appetizer. This recipe’s versatility lets your creativity shine in presentation and flavor enhancement.
Make Ahead and Storage
Storing Leftovers
If you find yourself with leftover breadsticks, store them in an airtight container at room temperature for up to two days. This keeps the bread soft and prevents the garlic butter from drying out, so your next snack is just as delicious as the first.
Freezing
To enjoy these breadsticks later, freeze them before baking by shaping the dough and placing the raw sticks on a baking sheet lined with parchment paper. Freeze until firm, then transfer to a freezer-safe bag or container. When you’re ready, thaw and bake as usual for freshly baked flavor whenever the craving hits.
Reheating
Reheat leftover or thawed breadsticks in the oven at 350°F for about 5 to 7 minutes, or pop them into an air fryer for 2 to 3 minutes. This helps refresh their buttery exterior and soft interior, almost like they just came out of the oven.
FAQs
Can I use instant yeast instead of active dry yeast?
Yes, you can swap active dry yeast for instant yeast by adding it directly to the dry ingredients. Just reduce the initial warm water activation step since instant yeast doesn’t require proofing. This can slightly speed up your prep time without compromising the breadsticks’ texture.
What can I do if my breadsticks turn out dense?
Dense breadsticks might be a sign of under-kneading or not letting the dough rise enough. Make sure to knead until the dough is smooth and elastic, and allow adequate time for both rising periods. Also, check that your yeast is active and fresh, as old yeast can impact the rise.
Are these breadsticks gluten-free?
This Olive Garden Breadsticks Recipe calls for all-purpose flour, so it is not gluten-free as written. However, you can experiment with gluten-free all-purpose flour blends, but results may vary in texture and rise.
Can I add fresh garlic instead of garlic powder?
Yes, fresh garlic can give a more pungent flavor. Mince it finely and mix it with the melted butter for brushing after baking, but use sparingly to avoid overpowering the breadsticks or causing garlic bits to burn in the oven.
How long do the breadsticks keep fresh?
Freshly baked Olive Garden breadsticks are best enjoyed the same day. Stored properly in an airtight container, they stay good for up to two days at room temperature. Beyond that, freezing is your best option to maintain quality.
Final Thoughts
There is something incredibly satisfying about pulling warm, buttery breadsticks fresh from the oven, especially when you know you made them yourself. This Olive Garden Breadsticks Recipe strikes the perfect balance between simple ingredients and outstanding flavor that’s sure to become a household favorite. So go ahead, gather your ingredients, roll up your sleeves, and get ready to enjoy a restaurant-quality treat right at home. Your taste buds will thank you!
Print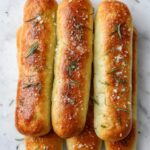
Olive Garden Breadsticks Recipe
- Prep Time: 20 minutes
- Cook Time: 14 minutes
- Total Time: 1 hour 45 minutes
- Yield: 12 breadsticks 1x
- Category: Side Dish, Bread
- Method: Baking
- Cuisine: Italian-American
- Diet: Vegetarian
Description
Recreate the beloved Olive Garden Breadsticks at home with this easy recipe featuring soft, garlicky, buttery breadsticks that are perfect as a side or snack.
Ingredients
Dough
- 1 cup warm water (about 110°F)
- 1 packet (2¼ tsp) active dry yeast
- 2 tablespoons granulated sugar
- 3 cups all-purpose flour
- 1½ teaspoons salt
- 2 tablespoons unsalted butter, softened
Topping
- 3 tablespoons unsalted butter, melted
- ½ teaspoon garlic powder
- ½ teaspoon salt
Instructions
- Activate the yeast: In a large bowl or stand mixer, combine the warm water, active dry yeast, and sugar. Let the mixture sit for 5 to 10 minutes until it becomes foamy, signaling that the yeast is active and ready.
- Make the dough: Add the all-purpose flour, salt, and softened butter to the yeast mixture. Mix until a soft dough forms. Knead the dough by hand for 7 to 8 minutes or use a dough hook attachment for about 5 minutes until it becomes smooth and elastic.
- First rise: Place the kneaded dough in a greased bowl. Cover it with a towel or plastic wrap and let it rise in a warm, draft-free place for about 1 hour or until it doubles in size.
- Shape the breadsticks: Punch down the dough and divide it into 12 equal pieces. Roll each piece into a rope about 6 to 7 inches long. Place the ropes on a parchment-lined baking sheet, spacing them approximately 1 inch apart. Cover loosely and let them rise again for 30 to 45 minutes until puffy.
- Bake the breadsticks: Preheat your oven to 400°F (200°C). Bake the breadsticks for 12 to 14 minutes or until they turn a golden brown color.
- Add the topping and serve: While the breadsticks are still hot, brush them generously with the melted butter mixed with garlic powder and salt. Serve the breadsticks warm for the best flavor and texture.
Notes
- For extra soft breadsticks, place a shallow pan of hot water in the oven while baking to create steam.
- Store leftovers in an airtight container for up to 2 days.
- Reheat leftover breadsticks in the oven or air fryer to restore freshness.