If you’re looking to add a festive and delicious treat to your St. Patrick’s Day celebration, this St. Patrick’s Day Green and White Fudge Recipe is an absolute must-try. It blends the creamy goodness of white chocolate with a vibrant pop of green that instantly brings the spirit of the holiday to your table. Beyond just its cheerful colors, this fudge delivers a smooth, luscious texture with a subtle vanilla flavor that makes every bite feel like a little celebration. Whether you’re sharing it with family, gifting neighbors, or simply indulging yourself, this fudge is a crowd-pleaser that’s as fun to make as it is to eat.
Ingredients You’ll Need
Creating this St. Patrick’s Day Green and White Fudge Recipe is surprisingly straightforward because it relies on simple, pantry-friendly ingredients that work together perfectly. Each ingredient plays a vital role in achieving the right creamy texture, sweet flavor, and festive color to make your fudge truly special.
- White Chocolate Chips: The base for both fudge layers; choose good-quality chips for the creamiest result.
- Sweetened Condensed Milk: Adds sweetness and helps give the fudge that silky, rich consistency.
- Butter: Brings an indulgent creaminess and smooth mouthfeel to the fudge.
- Vanilla Extract: Enhances the overall flavor with a warm, comforting note that complements the white chocolate.
- Green Food Coloring: The secret to that iconic St. Patrick’s Day green hue; add a little at a time to get the perfect shade.
- Green Sprinkles or Nonpareils: For a delightful texture contrast and festive decoration on top.
- Gold Edible Glitter (optional): Adds a magical touch and extra sparkle, perfect for celebrating the holiday with a bit of pizzazz.
How to Make St. Patrick’s Day Green and White Fudge Recipe
Step 1: Prepare the Pan
First things first, line an 8-inch square baking dish with parchment paper or lightly grease it to ensure your fudge will come out cleanly and in perfect squares later. This step might seem small, but it makes a huge difference when it’s time to serve.
Step 2: Make the Green Fudge Layer
In a microwave-safe bowl, combine 2 cups of white chocolate chips, 1/2 cup of sweetened condensed milk, and 1/4 cup of butter. Microwave in 30-second bursts, stirring in between, until everything is melted together smoothly. This gentle melting process avoids any graininess, giving your fudge that signature creamy texture.
Step 3: Add Vanilla and Green Food Coloring
Once melted, stir in 1 teaspoon of vanilla extract and about 1/2 teaspoon of green food coloring. If you want a deeper green, feel free to add more food coloring a little at a time until it reaches your desired festive shade. This vibrant green layer will give your fudge that unmistakable St. Patrick’s Day vibe.
Step 4: Pour and Chill the Green Layer
Pour the green fudge mixture into your prepared dish and spread it evenly with a spatula. Pop it into the refrigerator for about 15 minutes so the layer firms up a bit, which will help keep the white layer distinct and neat when you add it.
Step 5: Make the White Fudge Layer
Repeat the melting process with the second batch of 2 cups white chocolate chips, 1/2 cup sweetened condensed milk, and 1/4 cup butter. Once melted, gently stir in 1 teaspoon of vanilla extract. This layer will contrast beautifully with the green and keep that classic fudge cream flavor shining through.
Step 6: Add the White Layer and Chill
When the green layer has set slightly but is still a bit tacky, pour the white chocolate mixture evenly over it. Smooth the top with your spatula and then refrigerate the entire fudge until completely set—about 2 hours or overnight for best results.
Step 7: Cut and Garnish
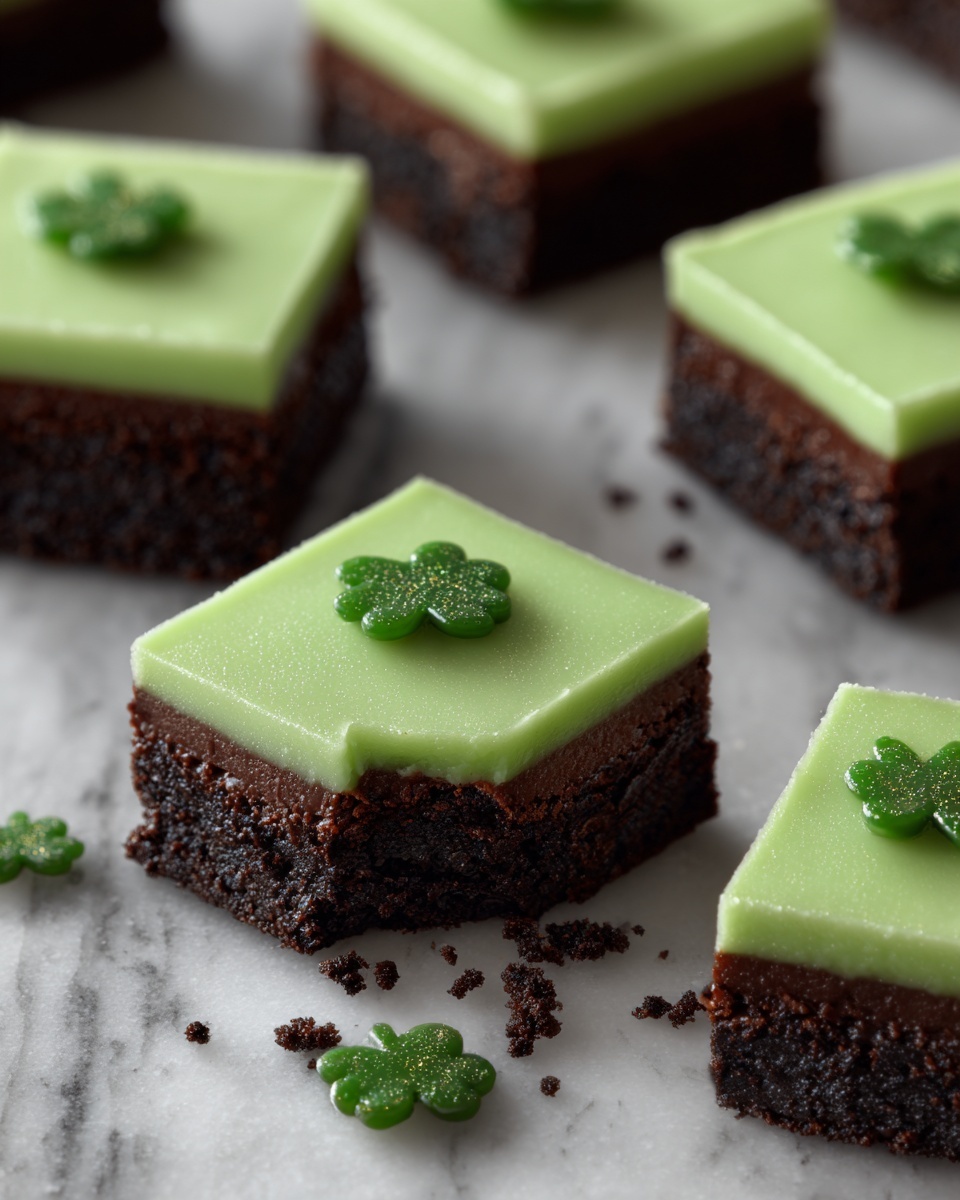
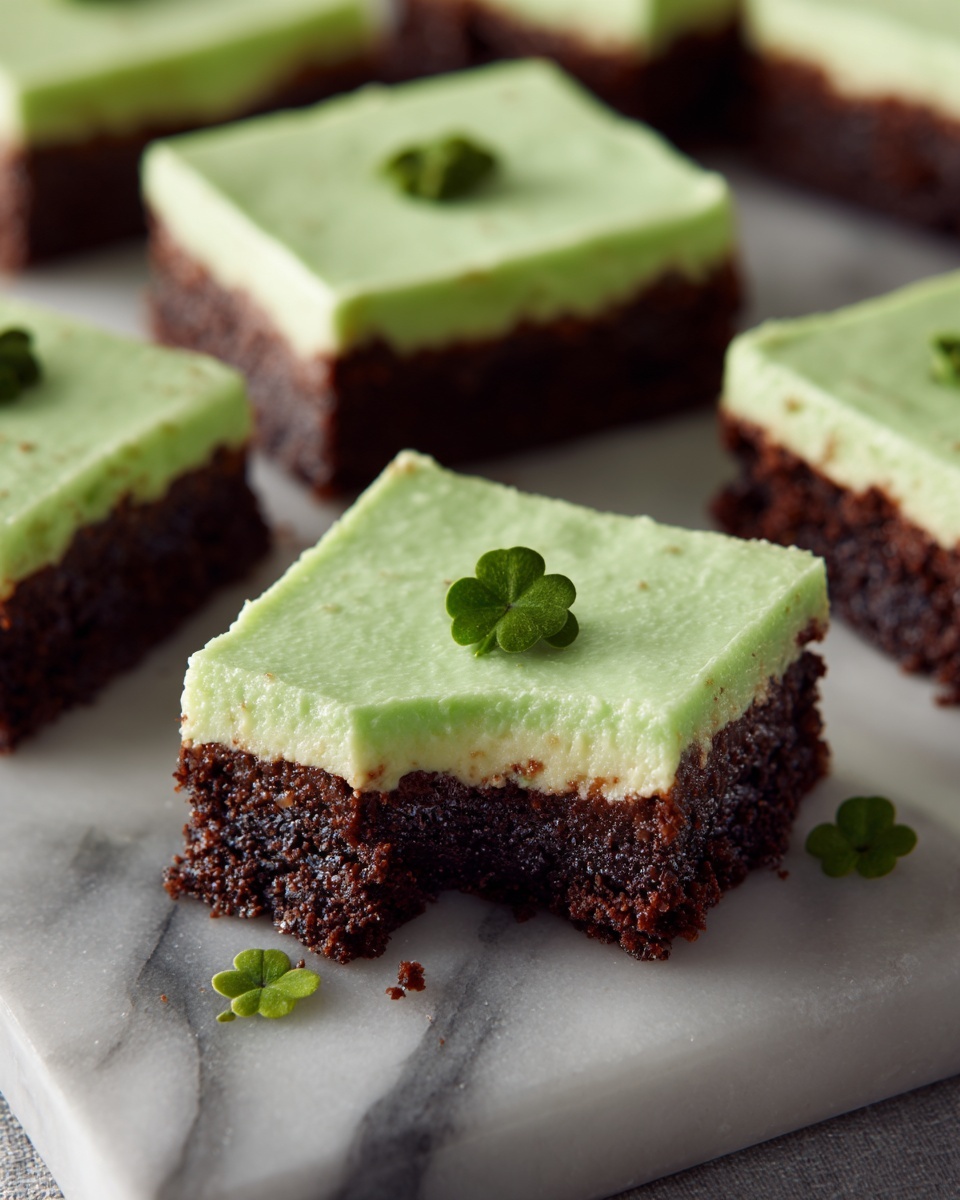
Once your fudge is chilled and firm, lift it out of the pan using the parchment paper and transfer it to a cutting board. Cut into small squares and if you want to elevate the festive feel, sprinkle the tops with green sprinkles or a hint of shimmering gold edible glitter. These finishing touches make your fudge look utterly irresistible and perfect for St. Patrick’s Day celebrations.
How to Serve St. Patrick’s Day Green and White Fudge Recipe
Garnishes
Adding garnishes like green sprinkles or a dusting of gold edible glitter provides not only visual appeal but also a fun texture contrast. These extra details make each piece feel special and festive, perfect for gifting or displaying at a party.
Side Dishes
This fudge pairs wonderfully with a warm cup of Irish coffee or a creamy chai latte, balancing the sweet richness of the fudge with a cozy, spiced drink. It also complements other St. Patrick’s Day treats like shamrock sugar cookies or buttery soda bread for a deliciously themed spread.
Creative Ways to Present
For a fun twist, arrange your fudge pieces on a platter lined with green and gold paper or serve in clear cellophane bags tied with ribbon as adorable party favors. You can also layer the fudge in a decorative jar, alternating the green and white squares, creating a tempting and visually stunning gift.
Make Ahead and Storage
Storing Leftovers
Your St. Patrick’s Day Green and White Fudge Recipe keeps beautifully in an airtight container in the refrigerator for up to two weeks. Make sure to separate layers with parchment paper to prevent sticking and preserve those perfect clean layers.
Freezing
If you want to prepare ahead of time or save some for later, fudge freezes exceptionally well. Wrap each piece individually in plastic wrap and layer them in a freezer-safe container. When sealed properly, fudge can last up to three months in the freezer without losing its delightful texture.
Reheating
Fudge is best enjoyed chilled or at room temperature. If you prefer it softer, let the pieces sit at room temperature for about 15 to 20 minutes before serving. Avoid heating fudge in the microwave as it can alter the texture and affect its creamy consistency.
FAQs
Can I use regular chocolate instead of white chocolate for this recipe?
While this particular St. Patrick’s Day Green and White Fudge Recipe is designed around white chocolate to showcase the green and white contrast, you can experiment with milk or dark chocolate for different flavors. Keep in mind the color might not be as vibrant with darker chocolates.
Is there a way to make this fudge vegan or dairy-free?
Yes, you can substitute vegan white chocolate chips and use coconut condensed milk alternatives to make this fudge vegan. Make sure to check that all other ingredients, like sprinkles and food coloring, are also vegan-friendly to keep it perfect for any dietary needs.
How do I get a smooth, creamy texture without graininess?
The key is to melt your chocolate and butter gently and to stir constantly during melting so the mixture doesn’t overheat or seize. Using sweetened condensed milk also helps keep the fudge extra smooth and luscious in texture.
Can I add flavors besides vanilla?
Absolutely! While vanilla is classic and subtle, you can incorporate peppermint extract for a minty twist or even a hint of Irish cream flavoring to make the fudge even more festive and unique.
What’s the best way to cut fudge into neat squares?
Use a sharp knife and warm it up by dipping it in hot water before slicing. Wipe the blade clean between cuts to keep the edges precise and avoid crumbly or uneven fudge squares.
Final Thoughts
This St. Patrick’s Day Green and White Fudge Recipe is one of those simple yet stunning treats that brings joy with every bite. Its creamy texture, festive colors, and easy preparation make it a go-to for celebrating in style. I encourage you to try this recipe and watch how it brightens up your holiday gatherings and puts a big smile on everyone’s faces.
Print
St. Patrick’s Day Green and White Fudge Recipe
- Prep Time: 10 minutes
- Cook Time: 10 minutes
- Total Time: 20 minutes
- Yield: 24 servings 1x
- Category: Dessert
- Method: Stovetop
- Cuisine: American
Description
Celebrate St. Patrick’s Day with this festive two-layer white chocolate fudge featuring a vibrant green bottom layer and a classic white top layer. Easy to make with simple ingredients, this creamy and rich fudge is perfect for holiday parties and gifting.
Ingredients
Green Fudge Layer
- 2 cups White Chocolate Chips
- 1/2 cup Sweetened Condensed Milk
- 1/4 cup Butter
- 1 tsp Vanilla Extract
- 1/2 tsp Green Food Coloring (or as desired)
White Fudge Layer
- 2 cups White Chocolate Chips
- 1/2 cup Sweetened Condensed Milk
- 1/4 cup Butter
- 1 tsp Vanilla Extract
Garnish (Optional)
- Green Sprinkles or Nonpareils
- Gold Edible Glitter
Instructions
- Prepare the Pan: Line or grease a baking dish to prevent the fudge from sticking, ensuring easy removal once set.
- Make the Green Fudge Layer: In a saucepan, melt 2 cups white chocolate chips with 1/2 cup sweetened condensed milk and 1/4 cup butter over low heat, stirring continuously until smooth.
- Add Flavor and Color: Remove the melted mixture from heat and stir in 1 teaspoon vanilla extract and 1/2 teaspoon green food coloring. Adjust the color for your preferred festive green shade.
- Set the Green Layer: Pour the green fudge mixture evenly into the prepared baking dish and refrigerate for about 15 minutes until it is slightly set.
- Make the White Fudge Layer: Repeat the melting process with another 2 cups white chocolate chips, 1/2 cup sweetened condensed milk, and 1/4 cup butter over low heat until smooth, then remove from heat and stir in 1 teaspoon vanilla extract.
- Layer the White Fudge: Once the green layer has set, pour the white fudge mixture over it, spreading evenly to cover the surface completely.
- Chill the Fudge: Refrigerate the layered fudge until fully set, approximately 1 to 2 hours.
- Cut and Garnish: Once firm, cut the fudge into 24 pieces. Optionally, sprinkle green sprinkles or gold edible glitter over the top for extra festive flair.
- Serve and Enjoy: Serve your beautiful St. Patrick’s Day fudge at your celebration or package it as a delightful seasonal gift.
Notes
- Use a low heat setting while melting chocolate to prevent burning.
- Adjust green food coloring gradually to avoid an overly intense color.
- Ensure each layer is sufficiently set before adding the next to avoid mixing.
- Store fudge in an airtight container in the refrigerator for up to one week.
- Allow fudge to come to room temperature briefly before serving for a softer texture.